How to Choose a Birdhouse (August 2026)
When I put up my first birdhouse fifteen years ago, it was a flimsy pine box from a garden center…

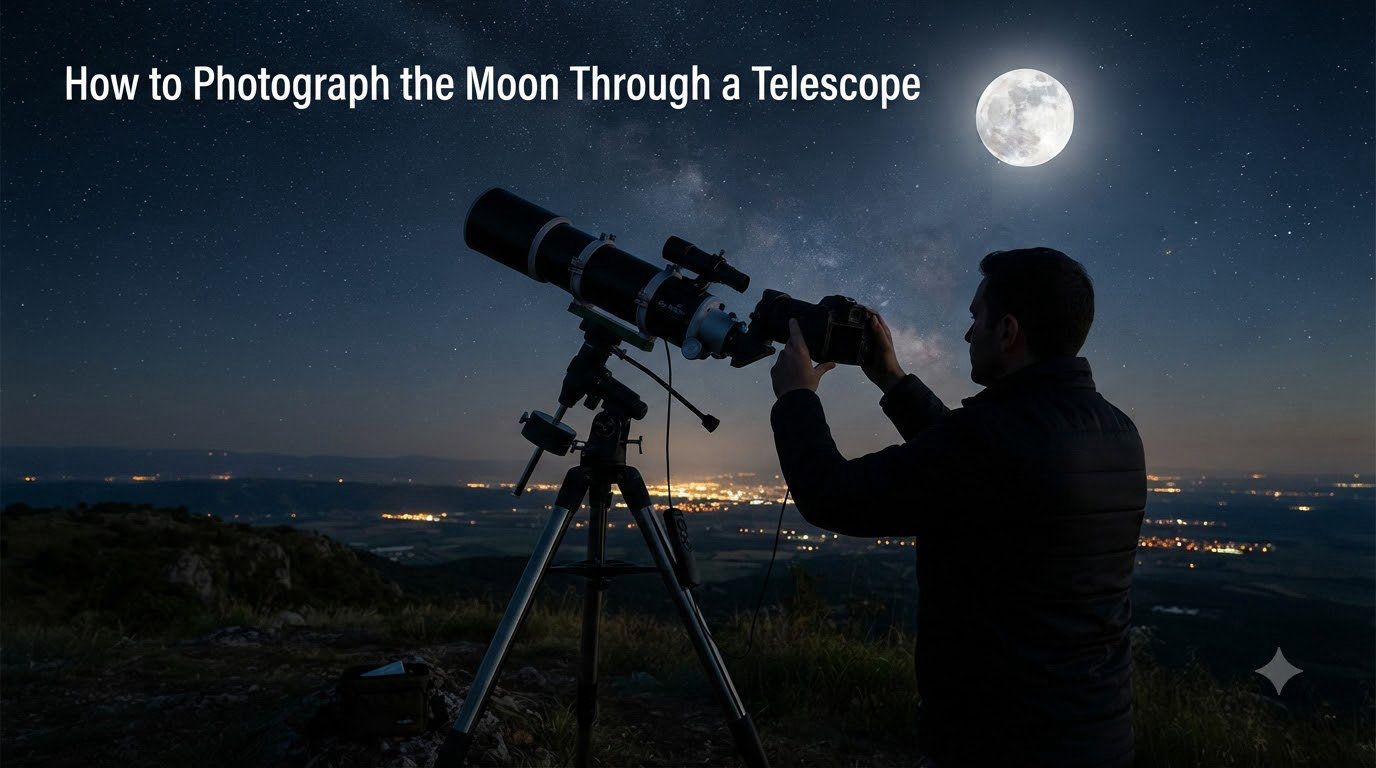
The first time I tried to photograph the moon through a telescope, I ended up with a glowing white blob on a black background. No craters, no shadows, no texture. Just a blob. I had assumed my telescope and my DSLR would do the work. They did not. It took me about three months of failed shoots, dozens of over-exposed images, and one very patient night with a fellow astrophotographer before I finally captured a sharp image of the terminator line and the craters along it. This guide is everything I wish I had known on night one.
If you want to learn how to photograph the moon through a telescope, the good news is that the Moon is the most forgiving celestial object you will ever shoot. It is bright, large in angular size, and forgiving of mistakes that would ruin a deep-sky image. The bad news is that most beginners run into the same handful of issues: overexposure, soft focus, vibration blur, and choosing the wrong method for their camera. I will walk you through every step so you can skip that frustrating phase.
This guide covers the three main methods astrophotographers use, the camera settings that actually work, how to focus through a telescope (the hardest part, honestly), which moon phases give the best images, and a complete post-processing workflow using AutoStakkert and RegiStax. Whether you are shooting with a smartphone, a DSLR, or a dedicated planetary camera, the principles are the same.
Before you start, you need a basic equipment chain. The Moon is bright enough that you do not need a tracking mount or a dark sky site. You do, however, need a few specific pieces of gear.
Telescope: Any telescope with a focal length of at least 500mm will work. A short-tube 80mm refractor is my favorite starter option because it is lightweight, has minimal chromatic aberration, and produces bright, contrasty lunar images. Reflectors and Schmidt-Cassegrains work too, but you will want to collimate them before each session for sharp results. If you are still choosing a telescope, our telescope for astronomy guide compares the most common options.
Camera: Three categories work well. A DSLR or mirrorless camera with a T-ring adapter gives you the most flexibility. A smartphone with a universal telescope adapter is the cheapest entry point. A dedicated planetary CMOS camera (like a ZWO ASI224MC) is what serious lunar imagers eventually move to because it shoots high-frame-rate video, which is essential for stacking.
Adapters: For DSLR and mirrorless cameras, you need a brand-specific T-ring (Canon EF, Sony E, Nikon F, etc.) that threads onto a 1.25-inch or 2-inch prime focus adapter. For smartphones, you need a universal smartphone clamp that holds your phone centered over the eyepiece. Expect to spend between 20 and 80 dollars on these.
Mount: A sturdy alt-azimuth mount is fine for short exposures of the Moon because it moves slowly enough that you can track it manually. An equatorial mount with a motor drive is better because it eliminates drift in longer exposures, but it is not required for lunar work.
Optional but useful: A Barlow lens (1.5x or 2x) increases focal length for higher magnification. A moon filter reduces glare. A remote shutter release or 2-second timer prevents vibration. If you are shooting with a dedicated planetary camera, a laptop running capture software like FireCapture or SharpCap. If you are already learning other astrophotography techniques, much of this gear will overlap.
There are three ways to photograph the Moon through a telescope. Each method suits a different camera type and produces a different result. Most beginners start with the afocal method because it is the simplest, then graduate to prime focus as their skills grow.
Prime focus photography removes the eyepiece entirely and uses the telescope itself as a giant camera lens. Your camera body attaches directly to the telescope tube via a T-ring and a prime focus adapter. The result is a wide, bright image of the Moon with sharp detail across the full disk.
This is my preferred method when I shoot with a DSLR. Setup takes about two minutes once you have the right adapters. Here is the process: remove the camera lens and the telescope eyepiece. Attach the brand-specific T-ring to your camera body. Thread the T-ring onto the prime focus adapter. Slide the adapter into the telescope focuser just like you would slide in an eyepiece. Lock the focuser thumbscrew. That is the entire physical setup.
Prime focus works best with focal lengths between 500mm and 2000mm. Below 500mm and the Moon will be small in the frame. Above 2000mm and atmospheric turbulence will start to soften fine detail unless you are stacking hundreds of frames.
Eyepiece projection adds an eyepiece between the telescope and the camera. The eyepiece magnifies the image again before it reaches the sensor, giving you much higher magnification than prime focus alone. This is the method to use when you want to photograph individual craters or capture a tight shot of a single mountain range.
The setup is similar to prime focus, but you keep an eyepiece in the focuser and attach your camera to the eyepiece using a special projection adapter that holds the camera lens (or, with a DSLR, the camera body without a lens) above the eyepiece. The distance between the eyepiece and the camera sensor determines the effective magnification. The further away the camera is, the higher the magnification.
This method has tradeoffs. The extra glass in the eyepiece reduces contrast slightly. Vignetting can be a problem at high magnifications. And because you are working at higher magnification, atmospheric seeing becomes critical. On a steady night with good seeing, eyepiece projection produces stunning crater close-ups. On a turbulent night, the results look like the Moon is sitting under running water.
The afocal method is what you use when you point a smartphone camera into a telescope eyepiece and snap a photo. The telescope eyepiece is doing the magnification, the smartphone lens is just capturing what comes out the other end. This is the simplest method and the one almost everyone tries first.
To do it well, you need three things: a stable smartphone adapter that holds your phone perfectly centered over the eyepiece, a telescope with a manageable focal length (under 1500mm works best), and steady hands or, ideally, a remote shutter or timer.
My workflow for the afocal method: First, I attach my phone to the adapter and roughly center it over the eyepiece. Then I use the telescope’s finder scope to get the Moon centered in the eyepiece at low magnification. Once it is in view, I switch to a higher-power eyepiece (around 10mm to 15mm). Then I fine-tune the phone position until the Moon fills the screen and tap to focus. Use a 3-second timer or Bluetooth remote to trigger the shutter and prevent vibration. That is it.
The biggest advantage of the afocal method is that almost everyone already owns a smartphone. The disadvantage is that image quality depends heavily on how well you can align the phone lens with the eyepiece, and even slight misalignment causes vignetting and edge blur. A dedicated smartphone adapter solves both problems.
The Moon is deceptively tricky to expose because it is much brighter than people expect. The camera’s automatic exposure will consistently overexpose it, turning the surface into a white circle with no detail. To get sharp, contrasty moon photos, you need to shoot in full manual mode and use a specific exposure rule designed for the Moon.
The Looney 11 rule: This is the most important rule for lunar photography. The rule states that for a properly exposed photograph of the Moon, set your aperture to f/11, set your shutter speed to 1/ISO, and use ISO 100 to ISO 400 depending on the Moon’s phase. Full moon uses ISO 100. Quarter moon uses ISO 200. Crescent moon uses ISO 400. This rule works because the Moon is a sunlit object and its surface brightness is roughly constant, which means exposure scales predictably with phase and ISO.
For a full moon at ISO 100, that gives you f/11 at 1/100s. For a quarter moon at ISO 200, you get f/11 at 1/200s. For a crescent at ISO 400, you get f/11 at 1/400s. These are starting points. You will likely need to adjust based on atmospheric conditions and the specific telescope you are using.
If your telescope does not have an adjustable aperture: Most telescopes have a fixed aperture, so the f/11 rule needs to be adapted. The principle is the same, but you will adjust shutter speed and ISO to match your telescope’s focal ratio. A telescope with an f/6 focal ratio is about one stop faster than f/11, so start at ISO 100 with a shutter speed of 1/200s and adjust from there.
Why ISO matters: Higher ISO amplifies the signal but also amplifies noise. For single exposures, ISO 100 to ISO 400 gives the cleanest results. For video capture (which is what you do with planetary cameras), you actually want a higher ISO because you are stacking hundreds of frames later, and the stacking process averages out the noise. Planetary cameras typically shoot at gain 50 to gain 300 depending on the camera model.
The histogram tells the truth: I always check the histogram after a test shot. For a properly exposed Moon, the histogram should peak somewhere around the middle and have data extending into both the shadows and highlights. If the histogram is bunched up against the right edge, you are overexposing. If it is bunched against the left edge, you are underexposing. Aim for about 70% brightness on the histogram, never 100%. This matches what experienced astrophotographers on Reddit consistently recommend.
If you find that the Moon is washing out even at f/11 and 1/100s, try adding a moon filter to reduce glare by about half a stop. Neutral density filters work too, and they will not change the color balance.
Focusing is the single most common reason moon photos come out soft. Slight defocus turns crisp craters into mush, and the problem gets worse at higher magnifications. Here is how to get it right.
Use live view at maximum magnification: Switch your camera to live view mode, then zoom in digitally to 10x or whatever your camera offers. Aim at the terminator line (the boundary between light and dark on the Moon) because that is where contrast is highest. Now slowly adjust the focuser until the craters snap into sharp focus. Your camera’s autofocus will not work on the Moon through a telescope because the camera is looking at an image, not at the Moon directly. You must focus manually.
Use a Bahtinov mask for precise focus: A Bahtinov mask is a simple plastic diffraction aid that creates three spikes around a bright star. When the center spike is perfectly centered between the other two, the telescope is in exact focus. Bahtinov masks are normally used on stars, but you can use one on a bright portion of the Moon near the terminator with great results. They cost about 15 dollars and are worth every penny.
Mask drift and thermal currents: On long exposures, you will notice the focus slowly drifting. This happens because the telescope tube changes temperature as it equilibrates with the outside air, and the metal contracts or expands slightly. Let the telescope sit outside for at least 30 minutes before you start shooting so it reaches thermal equilibrium. This single step will dramatically improve your focus consistency.
For planetary cameras shooting video: Focus the same way, using live view on your laptop, but expect to refocus more often because the higher frame rates amplify any drift. Many planetary capture programs like FireCapture have a focus assistant that shows a numeric focus quality score. Use it. Re-focus every few minutes during a session.
Most beginners instinctively try to shoot the full moon because it looks the most impressive to the naked eye. This is the single biggest mistake you can make in lunar photography. The full moon is the worst phase to photograph because the Sun is shining straight down on the lunar surface, which means there are no shadows. Without shadows, craters have no definition. The full moon through a telescope is just a bright white disk with gray maria.
The best moon phases for photography are the gibbous phases, particularly the 3 to 5 days on either side of full. During these phases, the Sun is hitting the Moon at an angle, which creates long shadows along crater rims and mountain ranges. That is where the drama lives. The terminator line – the boundary between light and dark – is where you will find the most dramatic detail.
Crater photography is best done within about 48 hours of the terminator crossing your target crater. Each crater has its own geometry, and the lighting angle has to be right to see its structure. The crater Copernicus, for example, looks spectacular at first or third quarter but is just a bright spot at full moon.
If you want to photograph the entire lunar disk, the waxing or waning gibbous phases give you the best balance of full-disk visibility and some terminator detail. For pure dramatic close-ups, choose a target crater and shoot it when the terminator is near. Lunar atlases and apps like the Photographer’s Ephemeris or PhotoPills will tell you exactly when the terminator crosses any feature you want to capture.
Even with perfect settings and focus, a single lunar exposure will look soft compared to what is possible. The secret that experienced lunar imagers use is stacking: combining dozens or hundreds of individual frames to average out atmospheric turbulence and sensor noise.
The basic stacking workflow uses two free programs: AutoStakkert and RegiStax. Both have been the standard for planetary and lunar imaging for over a decade.
Step 1: Capture video, not stills. If you are using a planetary CMOS camera, capture a video file (typically AVI or SER format) of at least 60 seconds at the highest frame rate your camera supports. Aim for a few hundred to a few thousand individual frames. If you are using a DSLR, take a burst of at least 20 RAW files instead. Videos and bursts give you more options during stacking than single frames.
Step 2: Run AutoStakkert. Open your video in AutoStakkert. Choose the image stabilization area (usually near the terminator or your target crater) and let the software analyze each frame. It will rank every frame by quality. Select the top 10% to 50% of frames. Higher quality percentage means sharper results but fewer frames to stack. Click “Stack” and let it produce a single combined image.
Step 3: Run RegiStax wavelet sharpening. Open the stacked image in RegiStax and use the wavelet sharpening controls. This is where lunar images go from soft to crisp. Start with the default wavelet settings and adjust each layer to bring out detail without introducing artifacts. The trick is to sharpen the high-frequency layers lightly and the low-frequency layers more aggressively. Pull up a tutorial on YouTube for the exact slider values, but expect to spend 10 to 20 minutes tweaking before you get a feel for it.
Step 4: Final touches in Lightroom or GIMP. After stacking and wavelet sharpening, do your final adjustments in Lightroom, Photoshop, or the free GIMP. Adjust contrast, highlights, and shadows. Pull the white balance slightly toward blue to compensate for any atmospheric tint. Sharpen the final image one last time with an unsharp mask. Export at full resolution.
The difference between a single frame and a properly stacked image is dramatic. A single frame might show crater detail that is 60% sharp. A stacked image can push that to 90% or better. This is why serious lunar imagers always stack.
The f/11 rule (also called the Looney 11 rule) states that to photograph the Moon you should set your aperture to f/11 and your shutter speed to 1/ISO. For a full moon at ISO 100, that gives f/11 at 1/100s. For a quarter moon at ISO 200, use f/11 at 1/200s. For a crescent moon at ISO 400, use f/11 at 1/400s. The rule works because the Moon is a sunlit object with roughly constant surface brightness, so exposure scales predictably with phase.
To take a good moon picture with your phone through a telescope, use a universal smartphone adapter that clamps your phone over the eyepiece. Center the Moon in a low-power eyepiece first, then switch to higher magnification (10-15mm eyepiece). Lock focus on the Moon through your phone screen, set exposure manually if possible, and use a 3-second timer or Bluetooth remote to avoid vibration. Tap to focus on the terminator line for sharpest results.
No. The Apollo flags are about 1.5 meters wide and sit on the lunar surface roughly 384,000 km away. Even the largest Earth-based telescopes resolve detail only down to about 1 km across under ideal conditions, which is roughly 1,000 times too coarse to see the flags. The Lunar Reconnaissance Orbiter has photographed the landing sites from orbit, but those images were taken from about 50 km altitude. From Earth, no telescope will ever show the flags.
For single exposures with a DSLR or mirrorless camera, ISO 100 to ISO 400 gives the cleanest results. Use ISO 100 for a full moon, ISO 200 for a quarter moon, and ISO 400 for a crescent. For dedicated planetary cameras shooting video, higher ISO (or gain) values between 50 and 300 work better because the stacking process averages out the noise across hundreds of frames.
Your moon photo looks white because it is overexposed. The Moon is much brighter than most beginners expect. Switch to full manual mode, use the Looney 11 rule (f/11, 1/ISO shutter speed), and check the histogram. Aim for the histogram peak to sit around 70% brightness, not 100%. If your telescope has a fixed focal ratio, shorten the shutter speed or use a lower ISO until the lunar surface shows texture and crater detail instead of pure white.
Photographing the moon through a telescope is one of the most rewarding things you can do as a beginner astrophotographer. The Moon is bright, easy to find, and patient with mistakes. The three methods – prime focus for DSLR users, eyepiece projection for high magnification, and afocal for smartphone shooters – cover nearly every camera setup out there. The f/11 rule, careful focusing, and the right moon phase will get you 90% of the way to a great image. The last 10% comes from stacking video frames in AutoStakkert and sharpening with wavelet filters in RegiStax.
Do not be discouraged by early failures. My first dozen attempts produced nothing useful, and many of the images on r/astrophotography from experienced imagers show that even pros throw away hundreds of frames per session to get one keeper. The difference is that they have a process. Now you do too.
Get out on the next clear night, point your telescope at the terminator, and try the Looney 11 rule. When you finally see crater shadows pop into focus on your screen, you will understand why so many people get hooked on this hobby. Clear skies, and enjoy August 2026.