8 Best Leica Alternatives for Street Photography (October 2026)
I have shot with a Leica M6 for the better part of a decade, and I still reach for it…


Photographing stars opens up a completely new world of creative possibilities. The night sky has always captivated me, and learning to capture it through a lens changed how I see photography entirely.
Photographing stars requires using long exposures (15-30 seconds) with high ISO settings and wide apertures to capture faint starlight. You need manual focus to prevent blur, a sturdy tripod to eliminate camera shake, and dark skies away from light pollution for the best results.
After spending three years experimenting with astrophotography, I’ve learned that anyone can capture beautiful star photos with the right approach. My first attempts were disappointing blurry messes, but understanding a few key techniques transformed my results. I’ve shot stars from dark sky parks in Utah to my own suburban backyard, and the principles remain the same.
This guide covers everything you need to photograph stars: equipment essentials, camera settings, finding dark locations, step-by-step shooting process, smartphone options, and common mistakes to avoid. Let’s get started.
Photographing stars requires some specific gear, but you don’t need to spend a fortune. The right equipment makes the difference between frustrating blurry shots and sharp star-filled images.
You need three essential items: a camera with manual controls, a wide-angle lens, and a sturdy tripod. Everything else is optional but can improve your results.
Any DSLR or mirrorless camera can photograph stars. Full-frame cameras perform better in low light, but crop sensors work perfectly fine too. I started with a basic crop-sensor DSLR and captured excellent star photos before upgrading.
Modern smartphones can also capture stars using night mode. While results won’t match a dedicated camera, phone astrophotography has improved dramatically in recent years.
A wide-angle lens is ideal for star photography. Lenses between 14mm and 24mm capture expansive skies and include foreground elements for composition. The wider your lens, the longer you can expose before stars begin to trail.
Fast apertures (f/2.8 or wider) gather more light, but an f/4 kit lens can still work with higher ISO settings. I’ve used everything from f/1.4 primes to f/4 zoom lenses, and each has its place.
You absolutely need a sturdy tripod for star photography. Long exposures of 15-30 seconds require complete stability. Any movement during exposure creates blur that ruins the shot.
Cheap, flimsy tripods vibrate in the slightest breeze. I learned this the hard way when several early attempts were ruined by an unstable setup. A quality tripod makes a significant difference in sharpness.

Height: 20.4-64.1 inches
Weight: 2.53 lbs
Load: 17.6 lbs
Ball head: 360-degree
The K&F CONCEPT 64-inch tripod offers excellent stability for star photography at an affordable price point. With a 17.6-pound load capacity, it securely supports heavy camera setups even when fully extended to 64 inches.
The 360-degree ball head allows precise composition adjustments, which is essential when framing star scenes. Quick flip leg locks make setup fast and easy in the dark—a feature I appreciate when trying to capture brief clearing conditions.
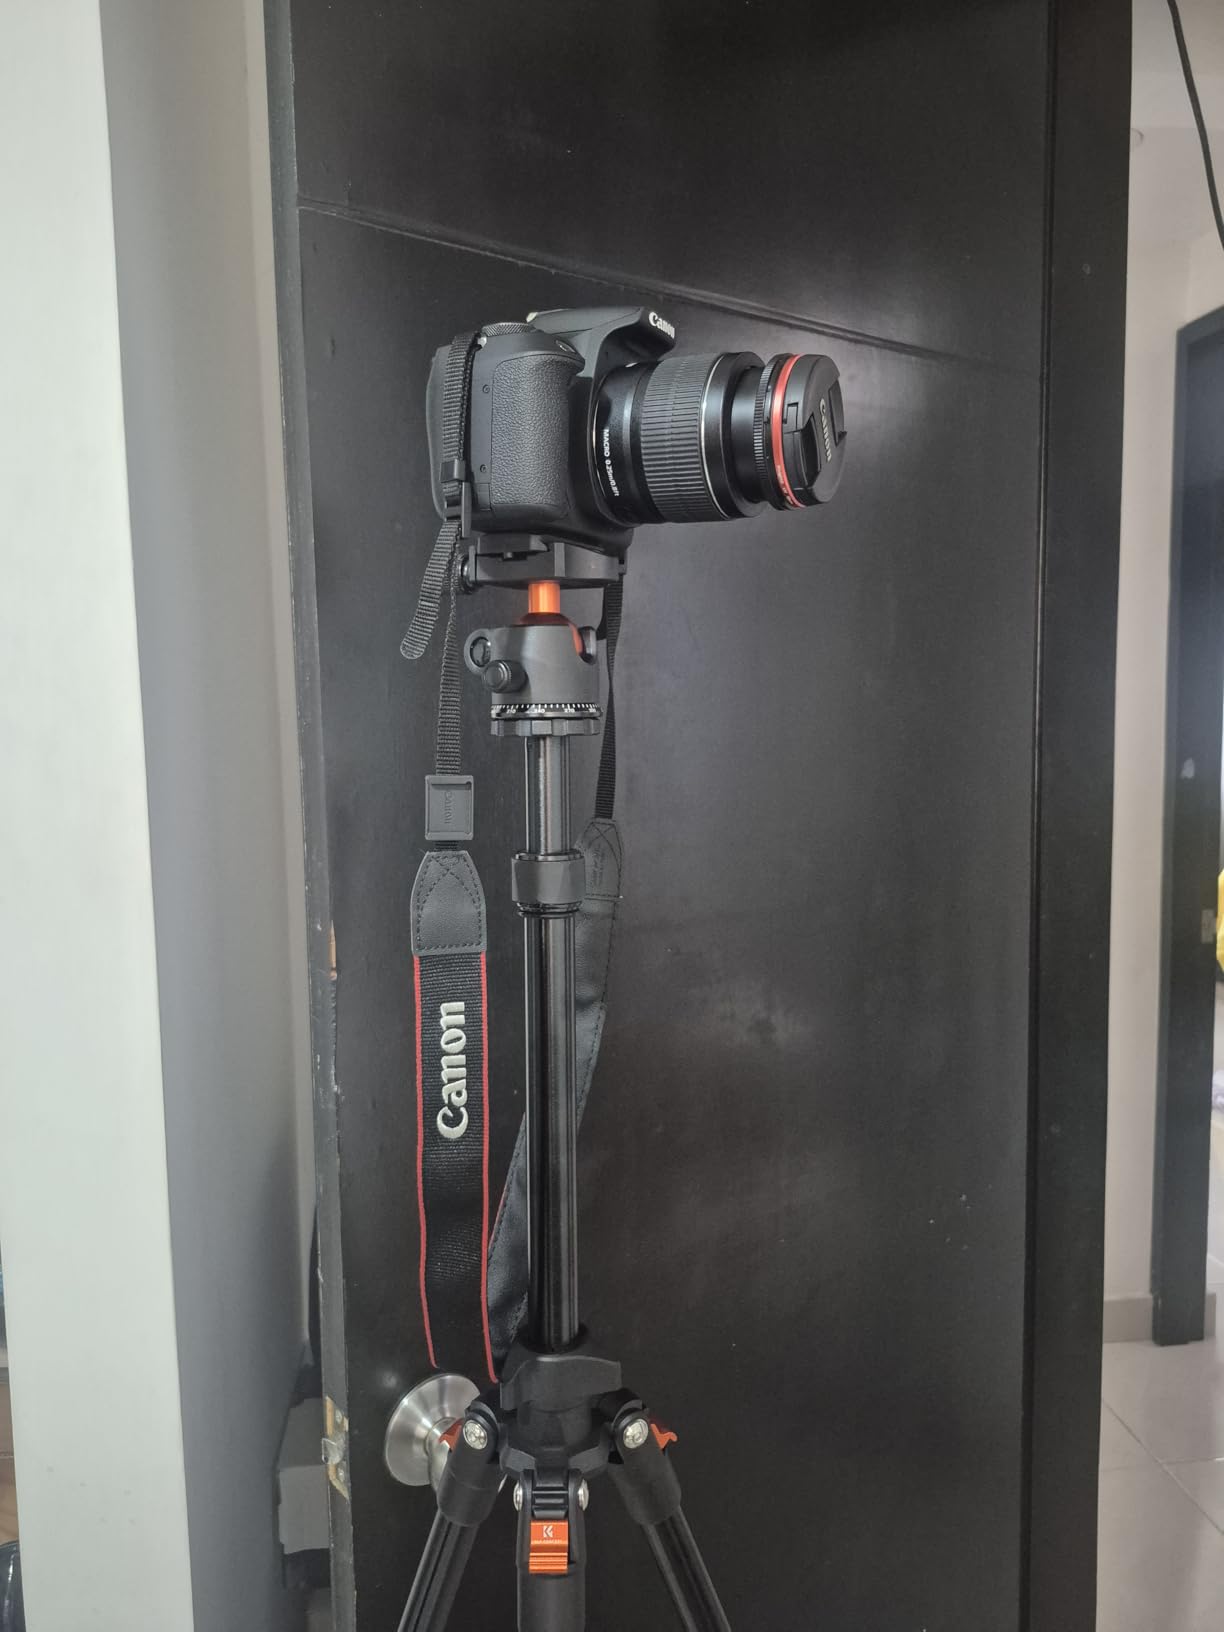
Customer photos confirm the tripod’s stability even at maximum extension. Real-world images show the tripod supporting full-frame camera bodies with telephoto lenses without vibration issues.
At only 2.53 pounds, this tripod won’t weigh down your gear bag during hikes to dark sky locations. The included carrying bag provides protection during transport.
The main compromise is the large collapsed diameter. When folded, this tripod is bulkier than some travel-specific options. Users report it may not fit in backpack side pockets easily.
For star photography specifically, the center column can be inverted for low-angle shots. This feature lets you capture unique compositions with foreground elements close to the ground.
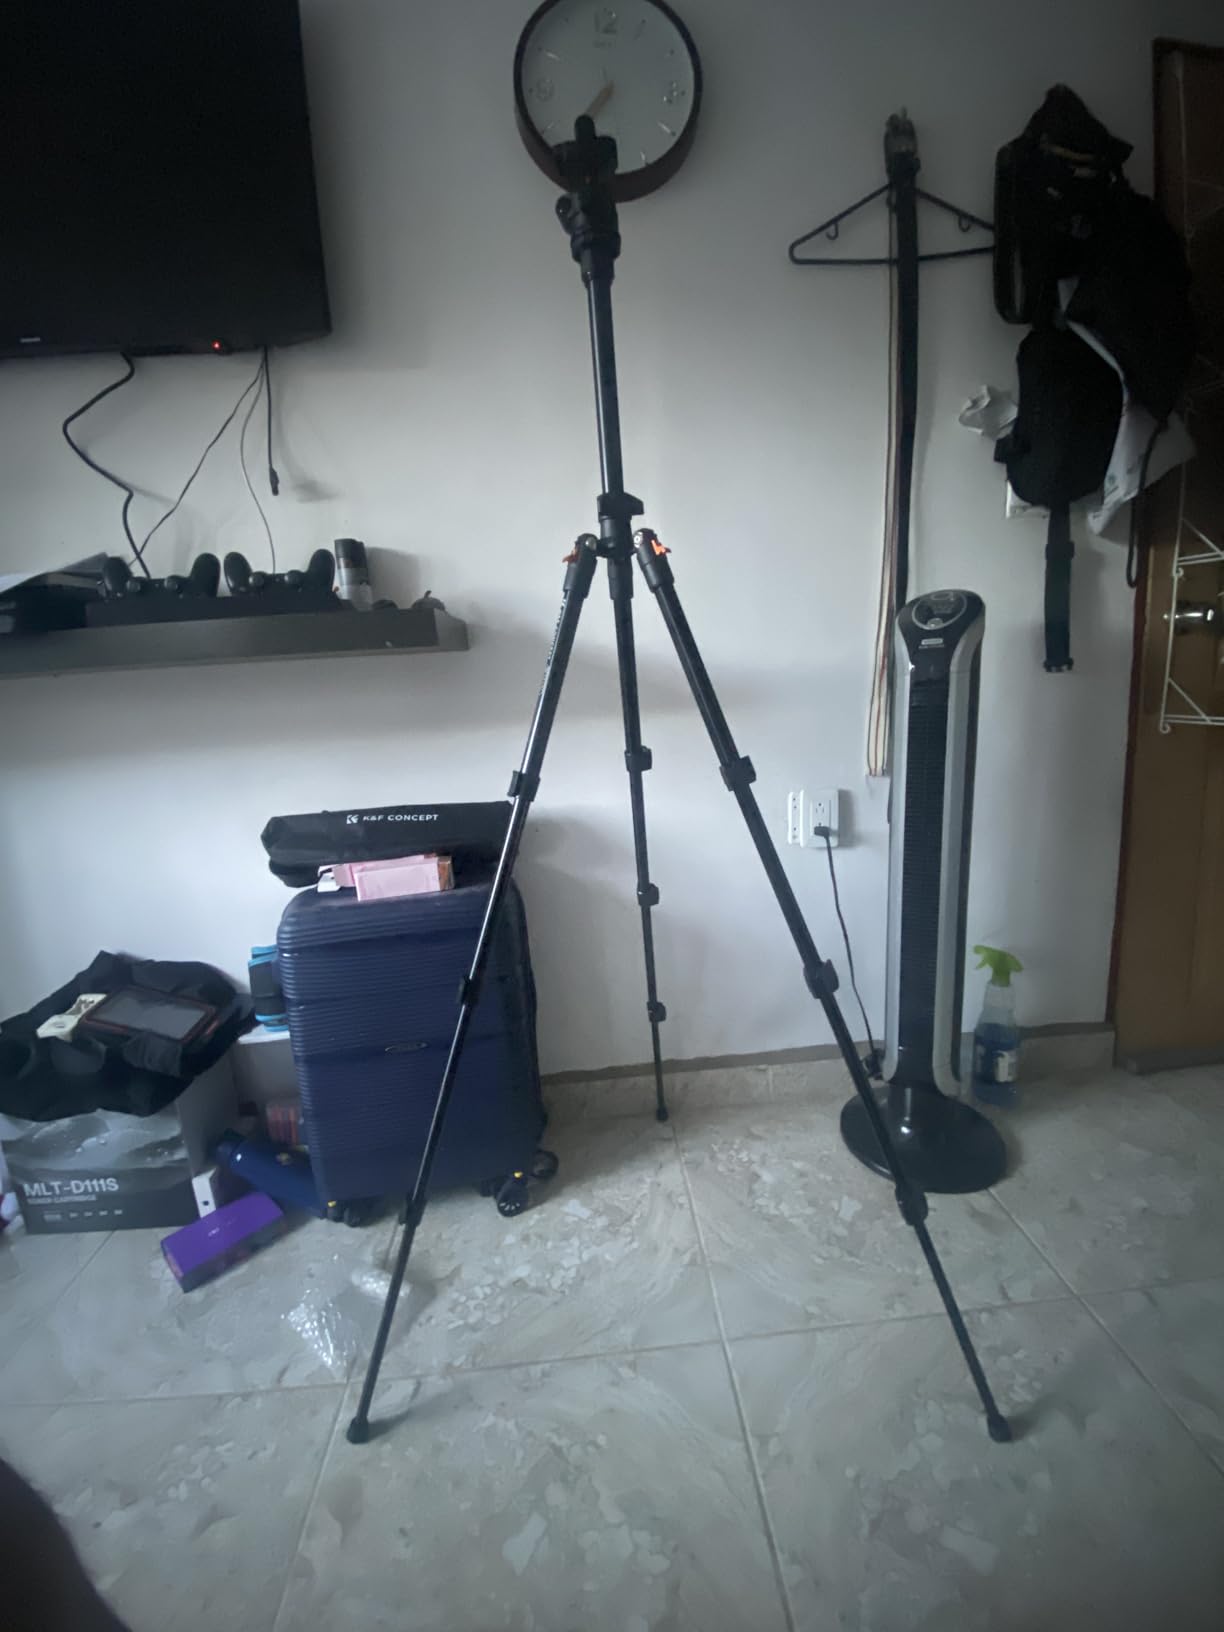
Customer images demonstrate the tripod’s versatility. User-submitted photos show the setup working on various surfaces from rocky terrain to sandy beaches, with non-slip rubber feet providing grip.
The standard 1/4-inch thread mounts any camera or smartphone adapter. An included cellphone clip adds versatility if you want to try smartphone astrophotography alongside traditional camera work.
A remote shutter release or intervalometer prevents camera shake during exposure. Using a 2-second timer works as a free alternative if you don’t have a remote.
A headlamp with red light mode preserves your night vision while adjusting settings. White light destroys your night adaptation, making it harder to compose and focus.
Extra batteries are essential. Cold night drains batteries faster than normal conditions. I always carry at least two spares for winter shoots.
Proper camera settings are critical for successful star photography. The right combination of ISO, aperture, and shutter speed captures sharp stars without trailing.
Photographing stars requires manual mode with these settings: ISO 1600-3200, aperture f/2.8 (or wide open), shutter speed 15-25 seconds, manual focus set to infinity, and RAW format capture.
Quick Summary: Start with ISO 1600, f/2.8 aperture, 20-second exposure. Adjust based on results—increase ISO if too dark, decrease shutter if stars trail.
ISO controls your camera’s sensitivity to light. Higher ISO values capture brighter images but introduce more noise or grain.
For star photography, ISO 1600-3200 works well for most cameras. Full-frame cameras can often use ISO 3200-6400 with acceptable noise levels. Crop sensors generally perform best at ISO 800-1600.
I recommend starting at ISO 1600 and reviewing your results. If images are too dark, increase ISO incrementally. If noise becomes problematic, decrease ISO and extend shutter speed slightly.
Aperture determines how much light enters your lens. Lower f-numbers indicate wider openings that gather more light.
For star photography, shoot at your lens’s widest aperture. If you have an f/2.8 lens, use f/2.8. If your widest is f/4, use f/4. Every f-stop you lose requires doubling ISO to compensate.
Some photographers stop down slightly to f/3.5 or f/4 for improved sharpness. This is a valid approach if your lens performs poorly wide open, but you’ll need higher ISO settings.
Shutter speed determines how long your camera collects light. Longer exposures capture more stars but risk star trailing—the appearance of streaks instead of points.
The Rule of 600 calculates your maximum shutter speed before stars begin to trail. Divide 600 by your lens’s focal length (in full-frame equivalent).
Rule of 600: A formula to calculate maximum shutter speed before stars trail. Divide 600 by your lens focal length to get your maximum exposure time in seconds.
| Focal Length | Max Shutter Speed |
|---|---|
| 14mm | 43 seconds |
| 20mm | 30 seconds |
| 24mm | 25 seconds |
| 35mm | 17 seconds |
| 50mm | 12 seconds |
For crop sensor cameras, use the Rule of 400 instead to account for the crop factor. This prevents star trails that become more apparent at longer focal lengths.
| Condition | ISO | Aperture | Shutter Speed |
|---|---|---|---|
| Dark sky, new moon | 1600-3200 | f/2.8 | 20-30 sec |
| Some light pollution | 3200-6400 | f/2.8 | 15-20 sec |
| Moonlit night | 800-1600 | f/4 | 10-15 sec |

Focal length: 14mm
Aperture: f/2.8
Angle of view: 116.6 degrees
Weight: 1.1 lbs
The Rokinon AF 14mm f/2.8 delivers an ultra-wide 116.6-degree angle of view perfect for capturing expansive starfields. This wide perspective lets you include foreground elements while still showing plenty of sky.
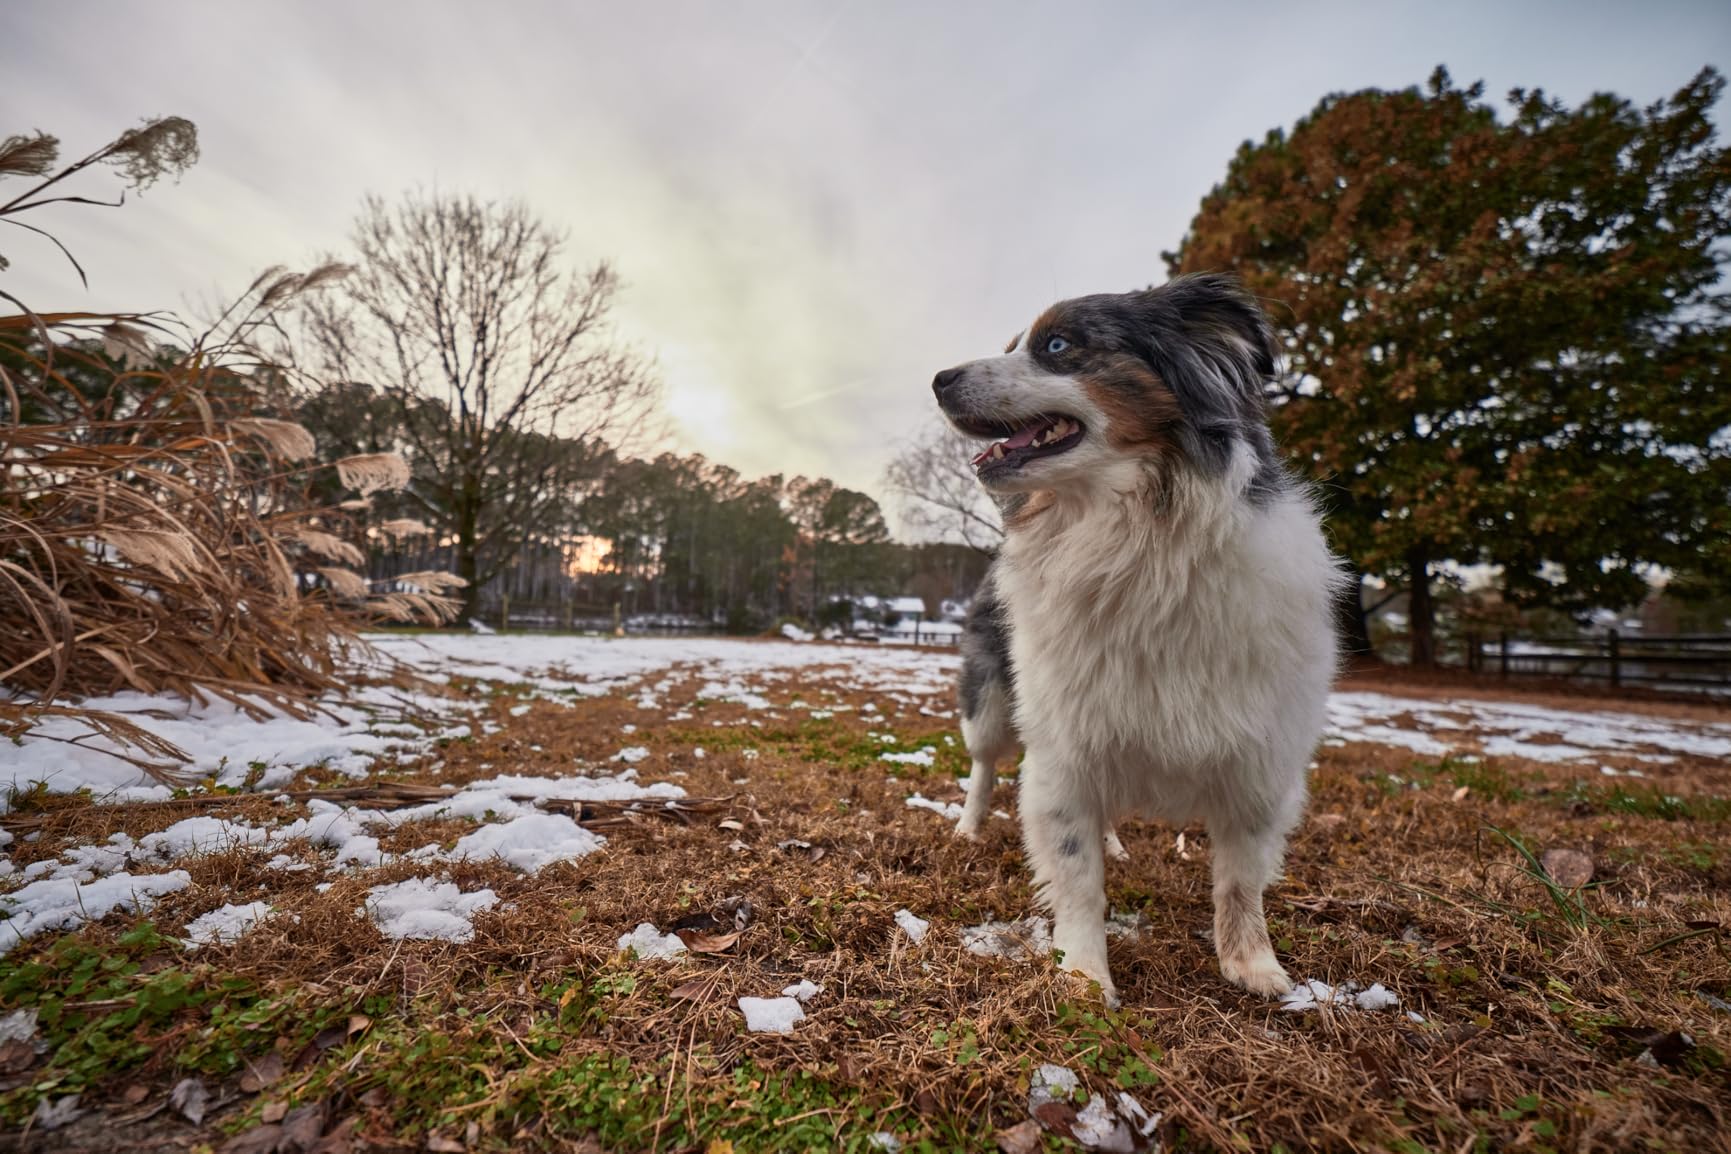
Customer photos demonstrate the lens’s expansive coverage. Real buyers have shared images showing vast Milky Way scenes with landscapes stretching from edge to edge of the frame.
The fast f/2.8 aperture gathers ample light for star photography. At this focal length, you can use shutter speeds up to 42 seconds before stars begin trailing based on the Rule of 600.
This lens uses 15 elements in 10 groups including ED, aspherical, and high-refractive glass. The optical design controls aberrations reasonably well for the price point, though some chromatic aberration appears at bright edges.
Weather sealing provides reliability for night photography sessions. Dew and humidity are common challenges when shooting stars, and the sealed aluminum body offers protection against the elements.
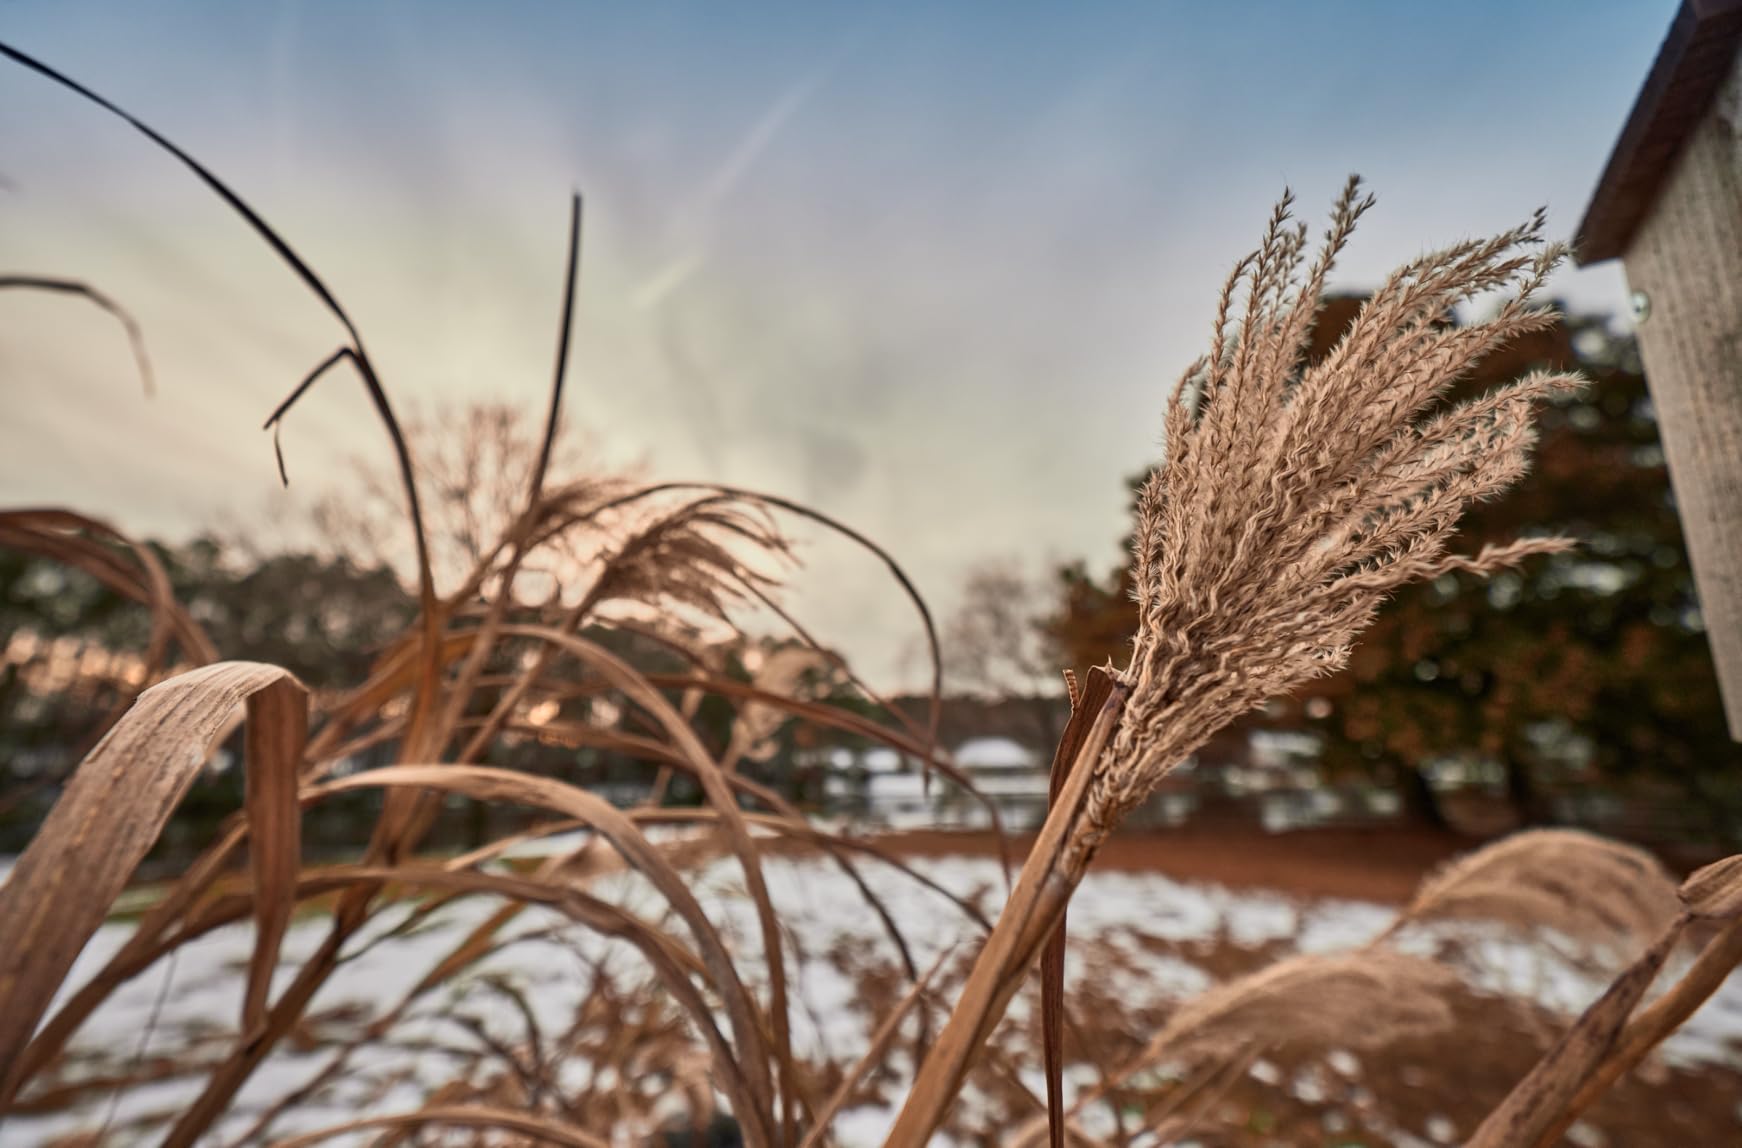
User-submitted photos validate the lens’s low-light performance. Multiple customer images show sharp star fields with good center sharpness, though corner performance varies slightly as expected with ultra-wide designs.
At only 485 grams, this lens won’t burden your setup during long hikes to dark locations. The compact design balances well on most camera bodies, reducing strain on your tripod mount.
Dark skies away from light pollution dramatically improve your star photos. Even a short drive from city lights reveals exponentially more stars.
Light Pollution: Excessive or misdirected artificial light that brightens the night sky and reduces visibility of stars. City lights create an orange glow that hides fainter stars and the Milky Way.
To photograph stars effectively, you need skies classified as Bortle Class 3 or darker on the light pollution scale. Bortle Class 1-2 represents truly dark skies, while Class 9 is the center of a major city.
Light pollution maps show dark sky locations using color coding. Purple and gray areas represent the darkest skies, while white, red, and orange indicate heavy light pollution.
Websites like DarkSiteFinder.com and LightPollutionMap.info provide interactive maps showing light pollution levels worldwide. I use these tools to plan shoots within driving distance of my location.
Generally, you’ll need to drive 30-60 miles from major cities to find adequately dark skies. Rural areas away from population centers offer the best star visibility.
International Dark Sky Parks offer protected night sky environments with minimal light pollution. These designated sites maintain strict lighting controls that preserve dark sky viewing.
There are over 130 International Dark Sky Places worldwide. These range from urban parks to remote wilderness areas. Many offer camping facilities perfect for all-night photography sessions.
I’ve visited several Dark Sky Parks and the difference is remarkable. On clear nights, the Milky Way casts a visible shadow and thousands more stars become visible compared to suburban locations.
The moon dramatically affects star visibility. A bright moon acts like giant light pollution, washing out fainter stars and the Milky Way’s structure.
Plan your star photography during the new moon phase (within 3-4 days of new moon) for darkest skies. During this period, the moon isn’t visible or appears as a thin crescent that sets early.
Full moon periods make star photography nearly impossible. The bright moonlight overwhelms starlight, resulting in washed-out skies with few visible stars.
Clear skies are essential for star photography. Even thin clouds can obscure stars and ruin your shot. Check weather forecasts specifically for cloud cover percentages.
I aim for nights with less than 20% cloud cover. Partly cloudy conditions can create interesting images with stars between clouds, but fully overcast nights aren’t worth the effort.
Dew is another consideration. Cold nights can cause condensation on your lens, blurring images over time. A lens warmer or periodic checking helps manage this issue.
Follow this step-by-step process to photograph stars successfully. I’ve refined this workflow through hundreds of nights under the stars.
Photographing stars requires setting up your tripod, configuring camera settings, manually focusing on a bright star, taking test shots, and adjusting based on results. The entire process takes about 15-20 minutes from arrival to first successful shot.
Check weather, moon phase, and light pollution maps before heading out. Arrive at your location before sunset to scout compositions while you can still see.
I give myself at least 30 minutes of daylight to find interesting foreground elements and set up my composition. This saves frustration when working in complete darkness later.
Safety is important when shooting at night. Tell someone where you’re going, bring a friend if possible, and carry a flashlight or headlamp for navigating to and from your location.
Position your tripod on solid ground. Avoid unstable surfaces like loose gravel or wet ground that might shift during long exposures.
Extend the legs fully if needed, but keep the center column down for maximum stability. Weight your tripod by hanging your bag from the hook underneath if available.
Level your tripod to ensure straight horizons. Some tripods have built-in bubble levels, or you can use the electronic level in your camera.
Include interesting foreground elements in your composition. Trees, mountains, buildings, or silhouettes add depth and scale to star photos.
Use the rule of thirds when positioning your horizon. A low horizon (bottom third) emphasizes the sky, while a higher horizon includes more foreground detail.
If using a wide-angle lens, consider how foreground and background elements relate. Leading lines like fences or paths can draw the viewer into the scene.
Focusing at night is challenging and the most common point of failure for beginners. Autofocus cannot see in the dark, so manual focusing is essential.
Photographing stars requires manual focus because autofocus systems cannot detect enough contrast in darkness to lock onto stars. You must set focus manually using infinity markings or live view zoom.
Focusing is the technique that caused me the most frustration when starting. I spent multiple nights with slightly out-of-focus images before mastering this process. The key is using live view zoom on the brightest star you can find.
Take several test shots and review them at 100% zoom. Check for sharpness, exposure, and star trailing.
If stars are trailing, reduce shutter speed based on the Rule of 600. If the image is too dark, increase ISO. If too bright, decrease ISO or shutter speed.
I typically take 5-10 test shots before achieving optimal results. Don’t get frustrated—this fine-tuning is normal and part of the process.
Once settings are dialed in, capture multiple shots. Take at least 10-20 identical exposures to increase your chances of a perfect result.
Shooting in burst mode can help. You can then select the sharpest image from the sequence or stack multiple images for improved quality.
Consider using an intervalometer for automated capture. This accessory triggers your camera at set intervals, allowing you to relax or set up a second camera.
Great star photos combine technical skill with artistic vision. Thoughtful composition elevates your images from snapshots to compelling photographs.
Photographing stars works best when you include foreground elements that provide context and scale. Lone trees, mountains, silhouettes, or structures create visual interest and help viewers connect with the scene.
Include compelling foreground elements in your star photos. A lone tree, mountain peak, building, or reflective lake adds visual anchoring to the vast sky.
Scout your location during daylight to identify strong foreground options. Consider how these elements will appear as silhouettes against the night sky.
I look for subjects with interesting shapes that create recognizable silhouettes. Dead trees, arches, and rock formations work particularly well for star photography.
Apply the rule of thirds when positioning your horizon. Place the horizon on the bottom third line to emphasize the sky, or on the top third to highlight foreground elements.
For Milky Way photography, position the galactic core along one of the vertical third lines. This creates a more dynamic composition than centering the core.
Get low to the ground for unique perspectives. A low angle makes foreground elements appear more prominent against the sky.
Use inverted center column on your tripod or place camera directly on ground with a small bean bag for support. This technique works especially well for foreground subjects like flowers or rocks.
Star panoramas capture sweeping views of the night sky. Shoot multiple overlapping images and stitch them together in post-processing.
For panoramas, overlap each frame by at least 30%. Keep exposure settings consistent across all shots and use manual focus to maintain sharpness throughout.
Smart telescopes have revolutionized beginner astrophotography. These all-in-one devices handle the technical challenges, letting you focus on composition and enjoying the night sky.

Aperture: 50mm
Resolution: 1080x1920
Weight: 5.5 lbs
Mount: Alt-az
The ZWO Seestar S50 represents a new category of smart telescopes designed for accessibility. This all-in-one device integrates a 50mm apochromatic refractor, camera, mount, and battery into a compact unit.
The built-in app automatically finds and tracks celestial objects. Simply select your target from the app interface, and the telescope slews to position and begins capturing automatically.
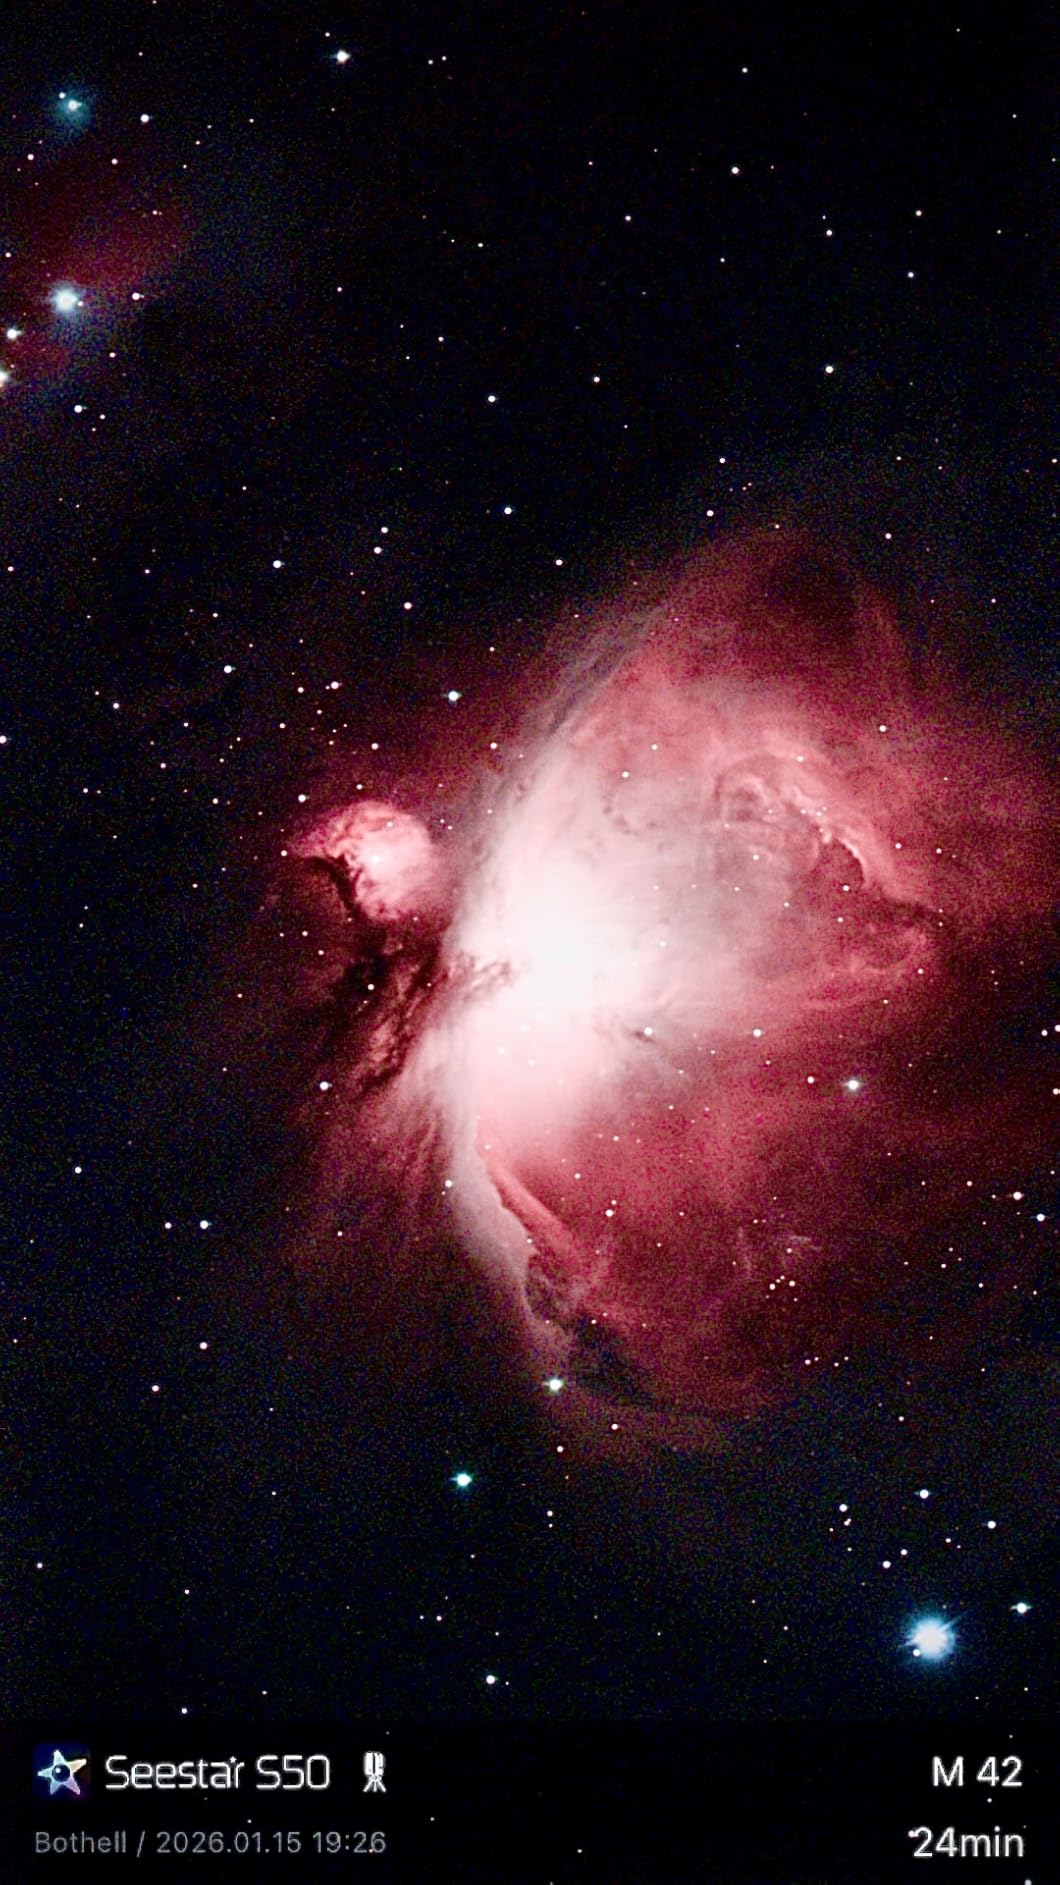
Customer photos show impressive results for such a compact device. Real buyers have shared images of the Moon, planets, and deep sky objects captured with minimal technical knowledge required.
The 50mm apochromatic lens provides crisp images with excellent chromatic aberration control. This triplet optical design delivers quality that rivals traditional telescopes twice the size.
Built-in EQ Mode, Plan Mode, and Mosaic Mode expand your creative options. Mosaic mode automatically stitches multiple frames for wider field-of-view images of larger objects.
The built-in dew heater prevents lens fogging in humid conditions—a thoughtful feature that shows ZWO understands real-world astrophotography challenges.
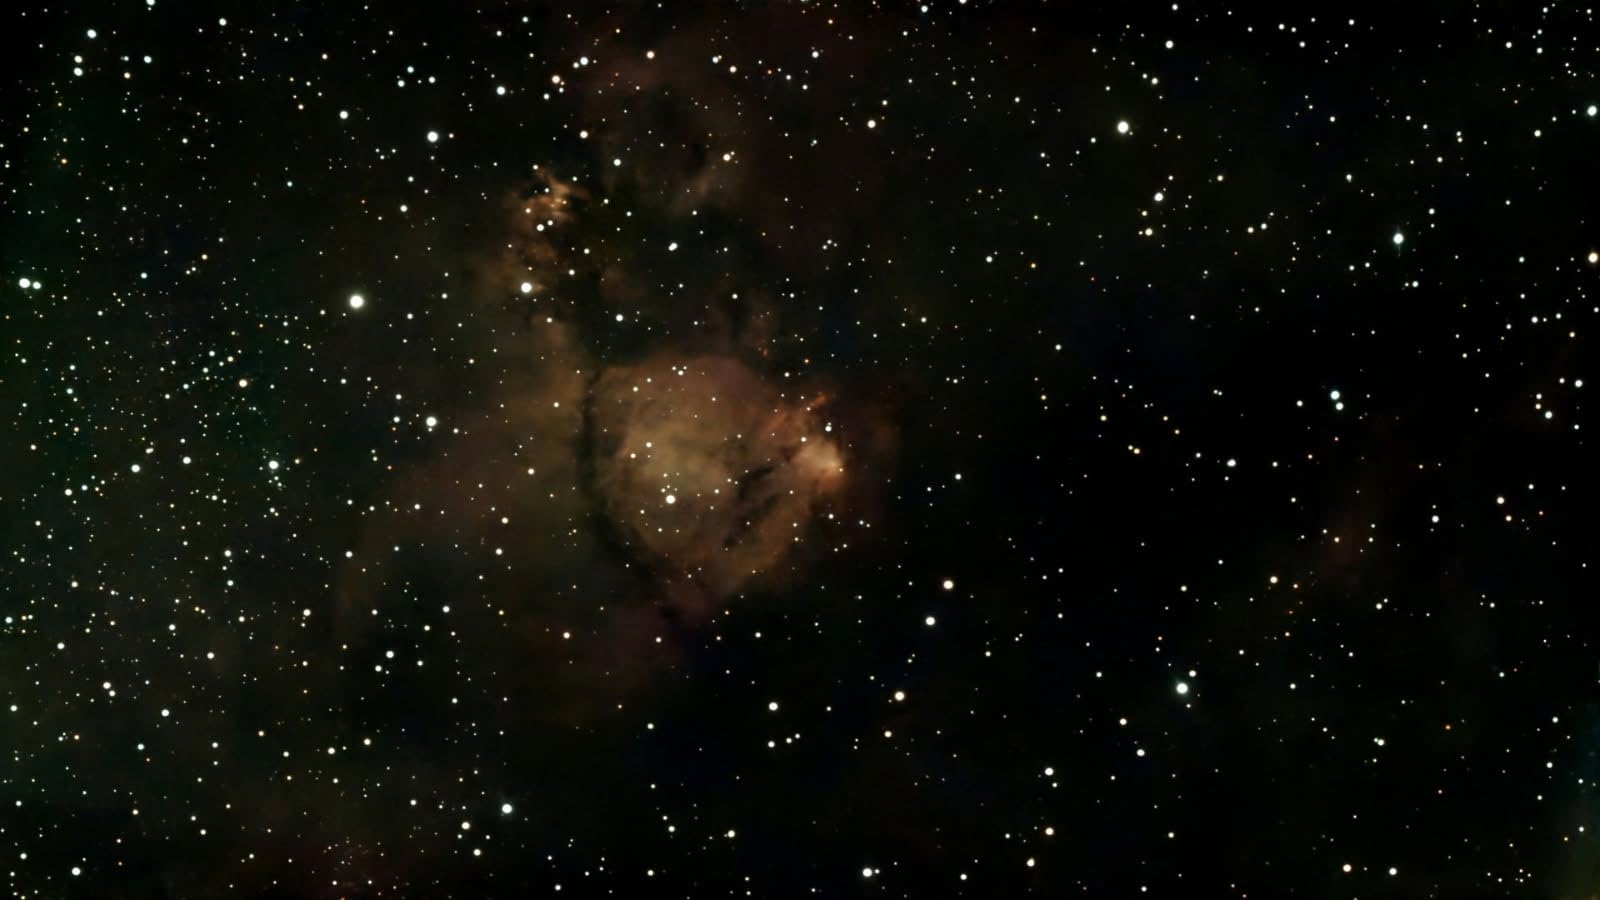
User-submitted photos validate the auto-centering feature. Customer images demonstrate how the telescope keeps targets centered during extended capture sessions without user intervention.
At 5.5 pounds, the Seestar S50 is highly portable. The included compact tripod sets up in seconds, though many users upgrade to more substantial mounts for stability.
The integrated battery provides hours of operation from a single charge. When the battery runs low, you can power the unit continuously via USB connection to a power bank.
Modern smartphones can capture stars using built-in night modes. While results won’t match dedicated cameras, phone astrophotography offers an accessible entry point.
Photographing stars with a smartphone requires using night mode, stabilizing the device completely, and finding the darkest skies possible. Modern phones use computational photography to combine multiple exposures for brighter, cleaner images.
Most modern smartphones include a night mode feature. This mode automatically uses longer exposures and combines multiple frames to reduce noise.
For iPhone users, Night mode activates automatically in low light. Android users should look for Night Sight or similar modes depending on their device.
Some smartphones offer manual camera controls through Pro mode or third-party apps. Manual control lets you adjust ISO, shutter speed, and focus for better results.
You must stabilize your smartphone completely for star photography. Any movement during exposure results in blur.
A small tripod or phone mount is essential. Prop your phone against rocks or use a bean bag if you don’t have a tripod. The 2-second timer prevents shake from tapping the shutter.
Small sensors limit smartphone star photography. You’ll capture the brightest stars but miss fainter details that cameras capture easily.
The Milky Way’s core is possible with premium phones in very dark skies, but results require ideal conditions and some luck. Consider smartphone astrophotography as a stepping stone to dedicated camera work.
Learning from mistakes accelerates your progress in star photography. I made all these errors myself, and understanding them will save you frustration.
Photographing stars fails most often due to improper focus, camera shake during exposure, incorrect exposure settings, and shooting in locations with too much light pollution. Address these four issues and your success rate will dramatically improve.
The most common mistake is out-of-focus stars. Autofocus cannot work in darkness, so you must use manual focus with live view zoom.
Never rely on the infinity mark on your lens. Many lenses focus slightly past infinity, making the mark inaccurate. Always use live view zoom on a bright star for precise focus.
Even slight movement ruins long exposures. Camera shake creates blurry stars instead of sharp points.
Use a remote shutter release or the camera’s 2-second timer. Disable image stabilization when using a tripod, as the stabilization system can actually cause blur when the camera is perfectly still.
Exposures that are too long create star trails instead of sharp points. This happens when Earth’s rotation moves stars during your exposure.
Use the Rule of 600 to calculate your maximum shutter speed. If you see trailing in your test shots, reduce shutter speed accordingly.
City lights wash out stars and create an orange glow in your images. Even 30 miles from a major city, light pollution affects visibility.
Use light pollution maps to find truly dark locations. The difference between a suburban sky and a dark sky site is remarkable.
Cold temperatures drain batteries quickly. Night temperatures can reduce battery capacity by 50% or more.
Always carry spare batteries and keep them warm in an interior pocket. Rotate batteries if they get too cold, and consider using a battery grip for extended capacity.
The best ISO for star photography is 1600-3200 for most cameras. Full-frame cameras can often use ISO 3200-6400 with acceptable noise, while crop sensors perform best at ISO 800-1600. Start at ISO 1600 and increase if images are too dark or decrease if noise becomes problematic.
Focus on stars at night by switching to manual focus, setting focus to infinity, enabling live view, and zooming in 10x on a bright star. Adjust the focus ring until the star appears as the smallest possible point of light. Take a test shot and zoom in to confirm sharpness, then tape the focus ring to prevent accidental movement.
Use shutter speeds between 15-25 seconds for most star photography with wide-angle lenses. Calculate your maximum exposure using the Rule of 600: divide 600 by your lens focal length. For example, a 24mm lens can use 25-second exposures (600 divided by 24 equals 25) before stars begin to trail.
Yes, you can photograph stars with modern smartphones using night mode features. Stabilize your phone completely with a small tripod or prop it against solid objects. Use the 2-second timer to prevent shake. Results will show the brightest stars but won’t match dedicated cameras for capturing faint details or the Milky Way.
The best lenses for astrophotography are wide-angle lenses between 14-24mm with fast apertures of f/2.8 or wider. Wider lenses allow longer exposures before star trailing, while fast apertures gather more light. Look for sharp corner performance and minimal coma, which can distort stars toward frame edges.
The Rule of 600 is a formula for calculating maximum shutter speed before stars begin to trail. Divide 600 by your lens focal length to get your maximum exposure time. For crop sensor cameras, use 400 instead of 600. For example, a 20mm lens on a full-frame camera can use 30-second exposures (600 divided by 20 equals 30).