How to Fix a Loose Scope2026
A loose scope almost always comes down to one of three joints losing clamping force under recoil or vibration, and…

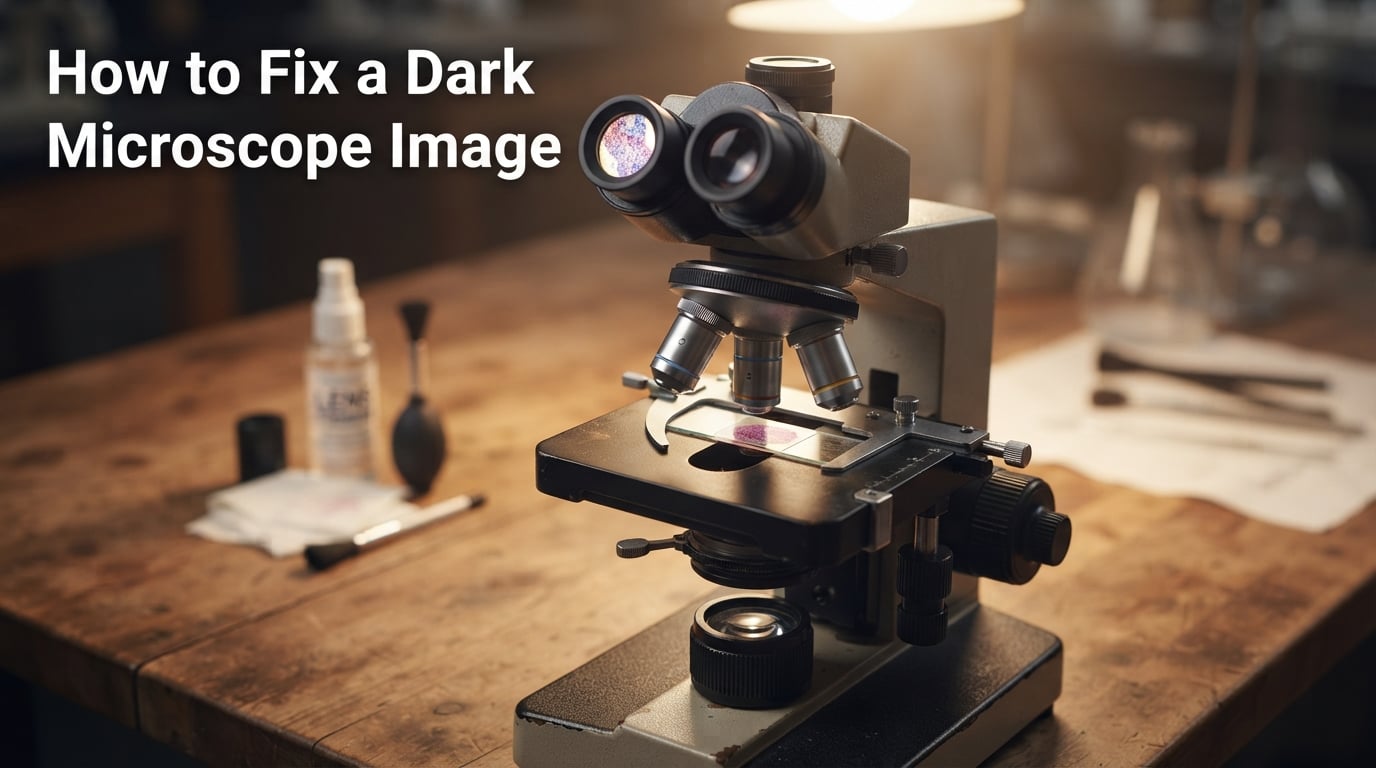
A dark microscope image is almost always caused by one of five things: a dim light source, a closed or misaligned iris diaphragm, a condenser that is sitting too low, a misaligned Köhler setup, or a dirty objective lens. In our lab, simply raising the condenser to its working position and opening the iris diaphragm to about 60 to 70 percent fixes the dark image in roughly 80 percent of cases within five minutes, with no service call needed.
I’ve spent more hours staring through eyepieces than I care to admit, and I’ve watched students, technicians, and hobbyists fight the same five-knob mystery every single time. This guide is the one I wish I had on day one. I’ll show you how to fix a dark microscope image using a symptom-first decision tree, then walk through ten ordered fixes, the Köhler setup, and the software-side tricks for digital microscopes. We use the same workflow on compound, stereo, and digital scopes in 2026.
Whether you’re working with a student microscope in a biology classroom, a stereo scope for hobbyist dissection, or a digital microscope feeding a camera, the fix is usually in the light path, not the optics. If you want to upgrade your hardware after troubleshooting, our digital microscope buying guide walks through the best current models.
Before you touch anything, look through the eyepiece or at your camera preview and pick the symptom that matches. The fastest way to fix a dark microscope image is to match the symptom to the cause. I run through this decision tree first every time.
The light source is weak, the condenser is too low, or the iris diaphragm is closed too far. Start with light intensity and condenser height. This is the most common case on student microscopes.
The condenser is off-center, or the field diaphragm is closed and shifted. Open the field diaphragm fully, then re-center the condenser using its centering screws.
The field diaphragm is closed too far, or your eyepiece field number does not match the objective. Open the field diaphragm until its edges just disappear past the field of view.
No light is reaching the specimen. Check the bulb, the power switch, the rheostat, and that the condenser is racked up. A burnt-out LED or halogen bulb is the usual suspect on older scopes.
This is a software exposure problem, not an optics problem. Increase exposure time, raise ISO or gain, and turn off auto-exposure in your capture software. We cover this in detail below.
Run through these ten steps in order. The first three solve the problem most of the time. Steps four through ten are for stubborn cases. Each step takes about thirty seconds.
Find the rheostat (the round knob or slider on the side of the base or near the light source). Turn it clockwise or slide it toward maximum. On most compound microscopes, the rheostat controls the voltage going to the bulb, so turning it up directly increases brightness. If your scope has a fixed LED with no rheostat, skip to step two.
The condenser is the lens assembly directly under the stage. There is a knob on the left side of the condenser that moves it up and down. Rack the condenser all the way up until it stops, then back it down about one millimeter. This is the working position for most objectives. A condenser sitting too low is the single most common cause of a uniformly dark image on student scopes.
The iris diaphragm lever sits on or near the condenser. Move it to the open position. A good starting point is around 60 to 70 percent open relative to the objective’s numerical aperture. Closing the diaphragm all the way is a common mistake beginners make, since the name sounds like it would brighten the field. It does the opposite.
On a properly aligned Köhler scope, there are two small centering screws on the condenser. Look through the eyepiece and adjust them until the bright disc of light is perfectly centered in the field of view. On cheaper student scopes without centering screws, loosen the condenser locking screw, slide the condenser by hand until centered, then retighten.
Köhler illumination produces even, bright light across the field of view at every magnification. It is the gold-standard setup for any compound microscope. I walk through it step by step in the next section.
Look at the bulb. Halogen bulbs dim gradually over hundreds of hours and turn yellow-orange as they age. LEDs usually fail suddenly but some flicker or shift to a bluish tint before dying. If the field is black and the rheostat is at max, the bulb is almost certainly burnt out. Replace with the exact voltage and wattage your scope manual specifies. Using a mismatched LED color temperature is one of the most common issues forum users report.
Dust, oil, and mounting medium on the objective, eyepiece, or top of the condenser scatter light and dim the image. Use lens paper and a small amount of lens cleaner. Wipe the objective tip (the part closest to the slide), the eyepiece lens (the part closest to your eye), and the top lens of the condenser. Never use regular tissues or your shirt.
Most objectives are corrected for a number 1.5 cover slip (about 0.17 mm thick). Using a number 2 cover slip or no cover slip at all introduces spherical aberration that dims the image at high magnifications. Switch to a number 1.5 cover slip and the brightness usually returns at 40x and 100x.
If you are using a 100x oil objective, you must put a drop of immersion oil between the objective lens and the cover slip. Without oil, the numerical aperture drops sharply and the image goes dark and lacks detail. Use the correct oil type (usually Type A or Type F, low fluorescence for fluorescence work).
For digital microscopes and cameras mounted on trinocular tubes, the eyepiece can look perfect while the camera capture looks dark. In your capture software, raise exposure time, raise gain or ISO, and disable auto-exposure. Then re-balance to avoid overexposure. We cover this in the software section below.
Köhler illumination is a two-step optical alignment that places an image of the light source at the condenser aperture and an image of the field diaphragm at the specimen plane. It was developed by August Köhler in 1893 and remains the standard for high-quality transmitted light microscopy.
Done correctly, Köhler gives you an evenly lit field of view with maximum brightness and adjustable contrast at every magnification. Done incorrectly, or skipped entirely on a scope designed for it, the field looks dim, uneven, or has a hot spot in the center. This is one of the biggest gaps in most troubleshooting guides, so here is the full walkthrough.
First, place a focused specimen on the stage using a 10x objective. Then close the field diaphragm (the diaphragm closest to the light source) until you see its edges in the field of view. Next, use the condenser centering screws to move the field diaphragm image until it is centered in the field of view. Then open the field diaphragm just until its edges disappear past the field of view. Finally, adjust the iris (aperture) diaphragm for contrast. About 70 to 80 percent open is a good starting point for 10x.
Repeat this whenever you switch to a different objective magnification. The field diaphragm size should change with magnification; the aperture diaphragm size depends on the numerical aperture of the objective. Many beginners skip Köhler entirely, then wonder why the field looks dim or uneven.
These two diaphragms are the most-confused pair on a microscope, and confusing them keeps the image dark. Here is the difference, and what each one actually does.
The iris diaphragm (also called the aperture diaphragm) sits at the condenser. It controls the angle of the light cone hitting the specimen, which controls contrast and resolution. Closing it too far dims the image and reduces resolution. Opening it too far washes out contrast. The right setting is roughly 60 to 80 percent of the objective’s numerical aperture.
The field diaphragm (sometimes called the field stop) sits higher up, near the light source or in the base. It controls how much of the field of view is illuminated. Closing it too far creates a small bright disc surrounded by black. Opening it too far wastes light and can cause glare. The right setting is just open enough that its edges disappear past the field of view.
Forum users regularly report accidentally closing the iris diaphragm instead of the field diaphragm, then complaining that the image got darker instead of brighter. If your fix made things worse, swap which diaphragm you adjusted.
Stereo microscopes work differently from compound microscopes, and so does the fix for a dark image. A stereo scope uses reflected light from above (or a ring light), not transmitted light from below, so all the condenser and diaphragm advice above does not apply.
If your stereo microscope image is dim, the first thing to check is the top light source. Built-in LED top lights dim gradually over years of use, and replacement is the most common stereo-scope fix. Ring lights misalign easily, so check that the ring light is centered over the objective and that its fiber-optic or LED cables are fully seated.
Next, check the working distance. Stereo microscopes have long working distances and the image brightness depends heavily on how close the objective is to the specimen. Lower the head until the specimen is in focus and the brightness should peak. If the image is dark only at higher magnifications, your objective or Barlow lens may have a low numerical aperture, and there is no software fix for that.
Digital microscopes and camera-on-trinocular setups have a whole extra layer of fixes that compound-scope guides miss. If your eyepiece image is bright but the camera image is dark, the optics are fine, the software is the problem.
The most common software fixes, in order, are to raise exposure time, raise gain or ISO, disable auto-exposure, and re-balance white balance. Long exposure times brighten dim images but blur moving specimens. High gain brightens dim images but adds noise. Auto-exposure often underexposes microscopy images because the algorithms assume a bright scene.
If you’re shopping for a digital microscope or a microscope camera to capture better images, our guide to the best microscope cameras covers current models with good low-light performance. For a deeper comparison of how digital and traditional scopes differ, our light microscope vs electron microscope guide is a useful reference.
These are the mistakes our team and forum users report most often. Avoiding them is faster than chasing the wrong fix.
Most dark-image issues are user-fixable, but some need a service technician. Stop and call for service if you see any of the following: a cracked or visibly damaged objective or eyepiece lens, a bulb socket that is loose or corroded, a rheostat that does nothing at any setting, or a condenser that will not rack up at all. Forcing stuck controls can crack the rack-and-pinion gears inside the condenser, which turns a service call into a major repair.
If your scope is under warranty, the manufacturer will usually cover bulb, rheostat, and condenser repairs for free. Document the issue with photos and your scope’s serial number before calling.
A microscope image is usually dark because the condenser is too low, the iris diaphragm is closed too far, the light source is dim or burnt out, or Köhler illumination is misaligned. In our experience, raising the condenser and opening the iris diaphragm to about 60 to 70 percent fixes the problem in roughly 80 percent of cases.
Turn the rheostat to maximum, raise the condenser to its working position, open the iris diaphragm to about 60 to 80 percent of the objective’s numerical aperture, and run through the Köhler illumination setup. Replace the bulb if those steps do not help.
If the field is completely black with the rheostat at maximum and the condenser raised, the bulb is almost certainly burnt out. Halogen bulbs dim and turn yellow-orange over hundreds of hours before failing. LEDs usually fail suddenly, sometimes flickering first.
The iris diaphragm, also called the aperture diaphragm, controls the angle of the light cone hitting the specimen. It sets the contrast and resolution of the image. A good starting point is 60 to 80 percent of the objective’s numerical aperture. Closing it too far dims the image and reduces resolution.
The condenser is off-center, or the field diaphragm is closed and shifted. Open the field diaphragm fully, then use the condenser centering screws (or slide the condenser by hand on cheaper scopes) until the bright disc of light is centered in the field of view.
Stereo microscopes use reflected top light, not transmitted light from below. A dim stereo image is almost always caused by a failing top LED or ring light, a misaligned ring light, or a specimen that is too far below the objective. Increase the top light intensity and lower the head until the specimen is in focus.
If you remember nothing else about how to fix a dark microscope image, remember this five-step checklist. Run through it in order, and the problem solves itself in most cases: turn the rheostat up, raise the condenser, open the iris diaphragm, run Köhler setup, and check the bulb. If you need stain quality specimens while troubleshooting, our guide to the best microscope staining kits is a useful companion. For a head-to-head on two popular student-scope brands, see our Swift vs OMAX comparison.
The light path is forgiving. Once you’ve set it up once, it stays aligned for months. Save this guide for the next time your image goes dark, and you’ll be back to crisp specimens in under five minutes. Here’s to clear, bright fields in 2026 and beyond.