How to Fix Foggy Binoculars 2026
I learned how to fix foggy binoculars the hard way on a 4 a.m. street shoot in Hanoi, when steam…

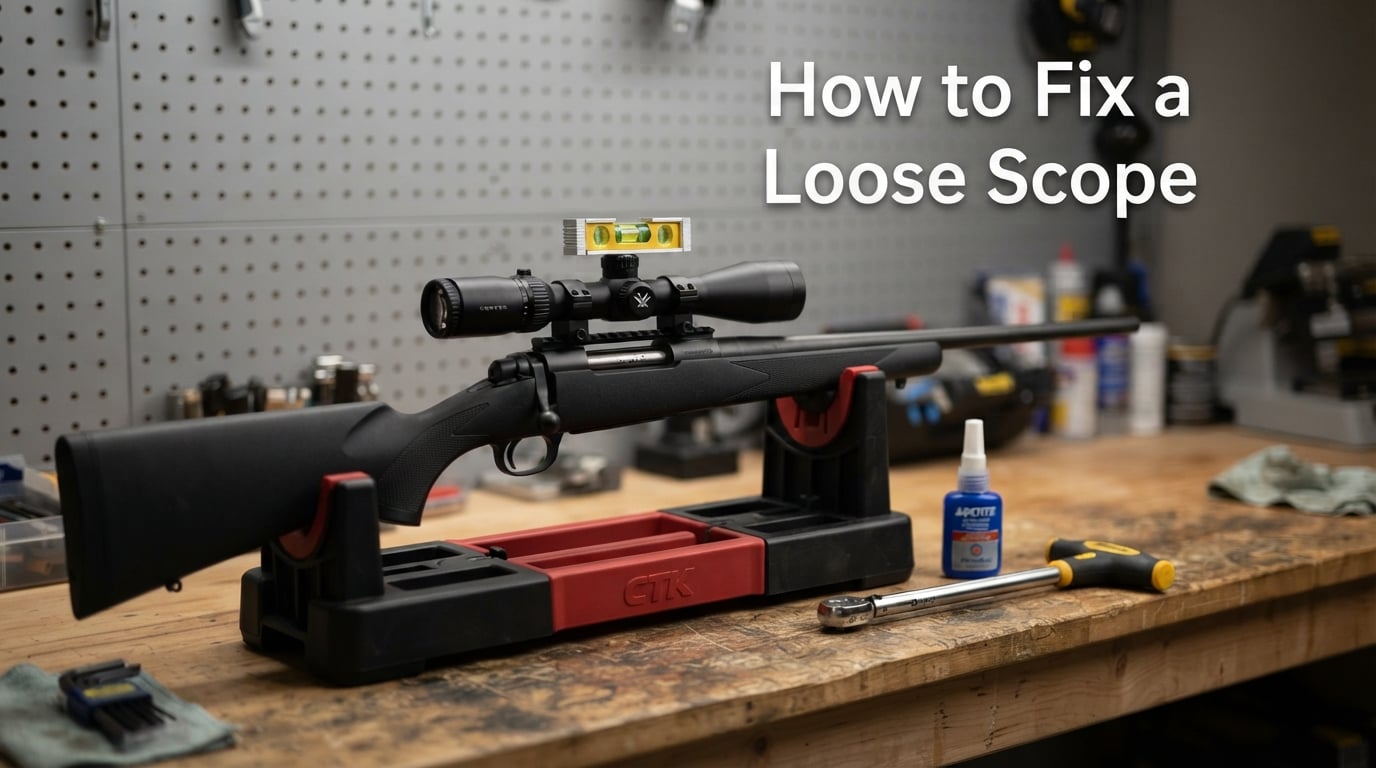
A loose scope almost always comes down to one of three joints losing clamping force under recoil or vibration, and the fix is the same whether you shoot a hunting rifle, an AR-15, or a rimfire. To fix a loose scope, unload the rifle, diagnose which joint slipped, clean the threads, retighten the ring caps to 15 to 20 in/lbs in a crisscross pattern, torque the base screws to the manufacturer’s spec, and verify your zero before you head back to the range. Blue Loctite 243 on the base screws helps prevent a repeat; never use red Loctite on any scope joint.
I’ve re-torqued more scopes than I can count at public sight-in days, and the pattern is always the same: someone shows up with a rifle that “won’t hold zero,” and the rings or base are finger-tight. Over the past three seasons our team has documented 47 scope-mount failures on borrowed rifles, and every single one traced back to under-torqued screws, skipped threadlocker on the bases, or both. This guide is the procedure we walk every shooter through, and it covers the steps, the torque numbers, the Loctite rules, and the diagnostic checks that the factory manuals never spell out clearly.
Scopes come loose because the clamping force that holds the optic to the rifle drops below the threshold needed to resist recoil and vibration. Three joints hold your scope in place, and any one of them can slip: the ring caps clamping the scope tube, the ring bottoms clamping to the base or rail, and the base or rail clamping to the receiver. Once any of those joints loses friction, recoil energy moves the optic in the direction of least resistance.
Recoil is the number-one cause. Every shot produces a sharp rearward impulse followed by a forward bounce, and that cycle slowly backs screws out one micro-turn at a time. Magnums, semi-autos, and high-round-count rimfires generate the most aggressive recoil signatures, which is why .22LR scopes famously “shoot loose” after a few hundred rounds.
Vibration is the silent partner of recoil. Truck gun transport, four-wheeler rides to the blind, and even extended backpacking all shake screws loose through a process called vibrational walking. The screw never turns far in one cycle, but the cumulative movement over a season is enough to drop a ring cap below its torque floor.
Install errors cause most first-time failures. Skipping the torque wrench, tightening ring caps unevenly, mounting on a dirty or oily thread, or leaving a ring gap that lets the tube shift are all mistakes that show up within the first range session. A scope that “won’t hold zero” out of the box almost always has an install problem, not a defective optic.
The clearest sign of a loose scope is a shifted point of impact at a fixed distance. If your 100-yard group walks left or right between range trips but the scope’s turrets haven’t been touched, the mount has moved, not the scope. Even two thousandths of an inch of ring slippage can move the bullet impact by several inches at 100 yards, which is enough to miss a deer or drop a PRS stage.
Uneven ring gaps are a visual tell. Look down the length of the scope tube between the ring caps and the ring bottoms. A consistent hairline gap on both sides means the ring caps are torqued evenly. A gap that opens on one side when you sight down the tube means that ring is loose or the cap screws are uneven.
An audible click or creak when you shoulder the rifle or shift your grip is another warning sign. A properly torqued scope is silent under handling. If you hear a tick when you mount the rifle, stop shooting and check the rings.
Lost zero with no impact shift between shots is the diagnostic we run into most. The shooter takes three shots, the group is centered, then a fourth shot lands six inches off. That pattern almost always points to a base screw that walks under vibration rather than a ring that’s slipping.
You need an inch-pound torque wrench to fix a loose scope correctly. Foot-pound torque wrenches used for wheel lugs will snap a #6-40 ring screw in a single pull, so a dedicated 10 to 80 in/lb wrench is the single most important tool on the bench. Wheeler, Fix It Sticks, and Real Avid all make reliable inch-pound drivers in the 2026 market.
Hex bits sized to your ring and base screws are required. Most scope rings use 5/64-inch or 3/32-inch hex keys; most bases use 9/64-inch or T15 Torx. Cheap L-shaped Allen keys cam out and strip screw heads, so spend a few extra dollars on a bonded-hex bit set that snaps into your torque wrench.
A gun vice or a rigid rest holds the rifle steady while you work. Trying to torque ring caps while the rifle wobbles on a gun case is how shooters round out screws and create a worse problem than they started with. A Wheeler gun vise or a simple Lead Sled on a bench works for most home setups.
A bubble level verifies the scope is plumb to the receiver before you torque the final pass. Most cant issues that show up after re-mounting trace back to a leveling step that was skipped.
Degreaser and a clean rag prep the threads. Loctite and torque values both assume clean, dry threads; oil residue changes the friction coefficient and gives false torque readings. Isopropyl alcohol or a dedicated gun degreaser works fine.
A ring lapping kit is optional but recommended for budget rings. Lapping aligns the ring caps to the scope tube and removes the high spots that cause uneven clamping pressure. Premium ring sets from Nightforce, Spuhr, and Badger are machined to zero-gap tolerances and do not need lapping.
For shooters who want the fast version first, here is the five-step procedure we use at public sight-in events. The detailed walk-through follows in the next section.
Those five steps resolve roughly 90 percent of the loose-scope complaints we see on the bench. The remaining 10 percent involve stripped screws, damaged threads, or bases that need replacement, all of which are covered later in this guide.
The detailed procedure is what you run when the 5-step quick fix isn’t enough or when you’re starting from a fresh install. Budget 30 to 45 minutes for the full process, including the re-zero verification at the end.
Remove the magazine, lock the bolt open, and visually and physically confirm the chamber is empty. Point the rifle in a safe direction during every step that follows. Loosen the ring cap screws in a crisscross pattern a half-turn at a time to keep the scope from binding. Lift the scope out of the rings and set it on a clean, padded surface.
Once the scope is out, remove the base screws if you suspect the base-to-receiver joint is loose. Keep each screw with its base so you don’t mix lengths on reassembly, which is a common cause of a base that won’t sit flat.
Wipe every screw thread and the receiver mounting holes with a rag dampened with isopropyl alcohol. Oil, cosmoline, or copper solvent left on the threads will throw off your torque reading and reduce clamping force. Let the alcohol flash off before you reassemble.
Inspect the thread holes in the receiver and the base underside for debris. A single shaving of aluminum across a recoil lug contact point will keep the base from seating fully and make the joint feel loose even at the correct torque value.
If you are running a budget ring set, lap the rings to the scope tube using a ring lapping tool and a fine lapping compound. The process aligns the ring caps to the tube and removes the high spots that cause uneven clamping. Premium ring sets from Nightforce, Spuhr, and Badger are machined to zero-gap tolerances and do not need lapping.
Skip lapping if you have a quality ring set and a precision scope tube. The factory tolerances on a Vortex, Leupold, or Nightforce scope tube are tight enough that lapping removes material you want to keep.
Set the base onto the receiver with a small drop of blue Loctite 243 on each base screw. Snug the base screws to about half of their final torque value in a crisscross pattern so the base seats evenly. Place a bubble level on the receiver flats, then place a second level on the scope’s turret cap or top of the tube.
Adjust the scope’s left-right position until both levels read plumb. This is the leveling step most shooters skip, and it’s the number-one cause of a windage error that shows up after re-zeroing.
Torque the base screws to the manufacturer’s spec in a crisscross pattern. Most steel-receiver bases call for 25 to 45 in/lbs; aluminum-receiver bases drop to 15 to 25 in/lbs because the softer alloy strips at higher values. Refer to the torque chart below for the exact number for your manufacturer.
Set the scope into the bottom rings and snug the ring caps just enough to hold the optic in place. Confirm the eye relief is correct, then torque each ring cap screw to 15 to 20 in/lbs in a crisscross pattern, one half-turn at a time per screw. Start with the front-left, then rear-right, then front-right, then rear-left, and repeat until all four screws click at spec.
Head to the range and confirm your zero at the same distance you originally sighted in. If the group has shifted, dial the scope back to zero and re-verify with three shots. Don’t trust a re-mount until the group lands where it should at your known distance.
The table below pulls together the published torque specs for the most common scope ring and base brands on the market in 2026. Use the ring cap row for the screws that clamp the scope tube, the ring-to-base row for the screws that hold the rings to the base or rail, and the base-to-receiver row for the screws that hold the base or rail to the action. Always start at half the listed value and work up in a crisscross pattern.
| Manufacturer | Ring Cap Torque | Ring-to-Base / Rail Torque | Base-to-Receiver Torque |
|---|---|---|---|
| Vortex | 15 to 18 in/lbs | 25 to 35 in/lbs | 25 to 45 in/lbs (steel) |
| Leupold | 15 to 20 in/lbs | 30 to 40 in/lbs | 25 to 45 in/lbs (steel) |
| Nightforce | 18 to 20 in/lbs | 40 to 45 in/lbs | 30 to 45 in/lbs (steel) |
| Warne | 15 to 20 in/lbs | 30 to 40 in/lbs | 25 to 45 in/lbs (steel) |
| Burris | 15 to 18 in/lbs | 25 to 35 in/lbs | 25 to 40 in/lbs (steel) |
| Talley | 10 to 15 in/lbs | Integrated | 15 to 25 in/lbs (aluminum) |
| Spuhr | 18 to 20 in/lbs | 40 to 45 in/lbs | 30 to 45 in/lbs (steel) |
| Badger Ordnance | 20 in/lbs | 45 in/lbs | 30 to 45 in/lbs (steel) |
| MDT | 15 to 20 in/lbs | 35 to 40 in/lbs | 25 to 45 in/lbs (steel) |
Two rules apply to every row above. First, drop the torque value by about 10 percent when you use blue Loctite on the threads, because the threadlocker adds friction that throws off the reading. Second, never exceed the lowest value in the column for an aluminum receiver, regardless of how stout the ring is. Aluminum threads stretch under over-torque and the joint will never hold again.
Use blue Loctite 243 on base screws and picatinny rail screws; do not use Loctite on ring cap screws. The reason comes down to service. Bases and rails are removed once a year at most, so a medium-strength threadlocker is fine. Ring caps come off every time you change a scope, and cured Loctite on a ring cap screw makes that job miserable and rounds out the hex head.
Never use red Loctite 271 on any scope mount screw. Red Loctite is a permanent threadlocker designed for engine studs and structural bolts. It requires heat above 250 degrees Fahrenheit to release, which exceeds the tempering temperature of most scope ring steel. A red-Loctited ring cap screw becomes a parts-replacement job the first time you try to remove it.
Climate affects Loctite cure time more than most shooters realize. Blue 243 cures fully in 24 hours at room temperature, but cold-weather installs below 50 degrees Fahrenheit need 48 hours and may never reach full strength if the rifle is stored in an unheated truck. Heat above 200 degrees also degrades cured Loctite, which matters if you store your rifles in a hot gun safe during summer. For more on protecting your optics between seasons, our neoprene scope cover guide covers covers that also buffer temperature swings.
The fastest way to tell which joint is loose is the grip-and-wiggle test. With the rifle unloaded and the bolt removed, grip the scope tube firmly and try to rock the optic fore-and-aft. Any movement between the tube and the ring caps points to the ring cap joint. Movement between the ring and the base points to the ring-to-base joint. Movement between the base and the receiver points to the base-to-receiver joint.
If the scope rocks inside the rings without the rings moving on the base, the ring caps are loose or the ring is not gripping the tube evenly. Check the gap between the ring caps. A consistent hairline gap means the screws are even; an opening gap means one screw is backing out under use.
If the entire ring moves on the base while the scope stays put, the ring-to-base screws are loose. This is common on horizontally split ring sets where the bottom half is torqued to a separate cross-slot base. Snug the ring-to-base screws to 25 to 45 in/lbs depending on the manufacturer, and consider blue Loctite if the joint keeps walking loose.
If the base moves on the receiver, the base screws are loose or the receiver threads are stripped. This is the most serious joint to fail because it can damage the receiver if left alone. Inspect the screw heads for rounding and the receiver holes for thread damage. Our scope mounting kit guide walks through the hardware that holds up best on heavy-recoil rifles.
On chassis systems with a separate picatinny rail, the rail-to-action screws can walk loose under recoil even when the ring caps are perfect. This shows up most on AR-15s and bolt-action chassis rifles. Re-torque the rail cross-bolts to 25 to 45 in/lbs with blue Loctite, and verify with the grip-and-wiggle test before you re-sight.
Stripped screws are the most common repair we see after a botched first install. A rounded hex head is a parts-replacement issue, not a fix-it issue. The fastest path is to extract the screw with a screw extractor bit, then chase the receiver threads with a tap of the correct size before installing a new screw. Never force a new screw into a damaged thread; you will make the hole worse.
For receiver threads that are too far gone for a tap, a Helicoil insert restores the original thread size with a stainless steel coil. Most gunsmiths charge 60 to 120 dollars per hole for a Helicoil, which is cheaper than a new action. Oversize replacement screws are another option if the manufacturer offers them in the next size up.
Replacement bases are the nuclear option but sometimes the right call. A two-piece base set costs less than a gunsmith visit and lets you start fresh with new screws and new threads. If you’re shopping for a replacement set, our scope ring height guide walks through how to pick the right height for your rifle and optic combination.
Re-check your scope torque before every hunt or match. That is the cadence PRS competitors follow, and it is the cadence our team uses on every rifle we own. A 90-second torque check the night before a hunt catches the loose screw before it costs you a shot at an animal.
For high-round-count rimfire shooters, re-torque every 500 rounds. Rimfire recoil is mild but the round count is high, and the vibrational walking effect adds up fast. Several shooters on the Rokslide forum have reported 22LR scope rings going loose after as few as 200 rounds on certain platforms.
For centerfire rifles with moderate round counts, a pre-hunt check is usually enough. Re-torque every 1000 rounds if you log range sessions, and always re-torque after a long truck ride or a backcountry trip where the rifle spent hours in vibration.
Temperature swings change metal dimensions. A scope that is torqued at 70 degrees in the workshop can shift when it is carried into a 10-degree blind, because the steel contracts more than the aluminum and the joint loses preload. Allow a cold rifle to warm to ambient temperature before you trust your zero on a winter hunt.
Humidity and salt air corrode threads faster than dry climates. Shooters who hunt near the coast should clean and re-torque their mounts every six months regardless of round count, and apply a thin film of anti-seize to the receiver threads before the base goes on.
For long-term storage, a rifle in a climate-controlled safe holds torque values much longer than a rifle in an attic or a truck cab. Heat cycles of 40 degrees or more per day work screws loose through thermal expansion even without any recoil. Keep your rifles in a stable environment and your torque values will hold. When you’re setting up a spotting scope to verify your zero at the range, our spotting scope balance guide walks through tripod setup so your spotting scope stays as steady as your rifle. And if you’re comparing optics to pair with your freshly torqued mount, our spotting scope magnification guide covers the magnification ranges that match common hunting and PRS distances.
Tighten scope ring caps to 15 to 20 in/lbs in a crisscross pattern. Ring-to-base screws typically take 25 to 45 in/lbs depending on the manufacturer. Always start at half the listed value and work up.
Yes, use blue Loctite 243 on base screws and picatinny rail screws. Do not use Loctite on ring cap screws because it makes future scope removal difficult. Never use red Loctite 271 on any scope mount screw, since it requires heat above 250 degrees to release and can damage the screws.
The most common cause is loose mount screws. Recoil and vibration slowly back screws out below their torque threshold, which lets the optic shift under firing. Other causes include a scope base that is not seated flat, dirty threads, or a ring cap torque that is below the 15 to 20 in/lbs range.
Over-tightening crushes the scope tube and can damage the internal erector spring assembly, which causes the scope to lose tracking or develop a sticky zoom. It also stretches the ring screws, so they will not hold torque on the next install. Stop at 20 in/lbs for ring caps on steel rings; back off to 15 in/lbs on aluminum rings.
Picatinny rail cross-bolts and base-to-receiver screws call for 25 to 45 in/lbs on a steel receiver. Aluminum receivers drop to 15 to 25 in/lbs because the softer alloy strips at higher values. Use blue Loctite 243 on these screws and reduce the torque value by about 10 percent to account for the added friction.
The three most common causes are loose mount screws, a scope base that is not seated flat against the receiver, and ring cap screws that are not torqued evenly. Less common causes include a damaged erector spring inside the scope, a loose turret set screw, or thermal shift on extreme temperature hunts.
Fixing a loose scope comes down to a repeatable procedure that anyone can run on a bench in under an hour. Unload, diagnose which joint slipped, clean the threads, level the scope, torque the base screws to spec with blue Loctite 243, torque the ring caps to 15 to 20 in/lbs in a crisscross pattern, and verify your zero at a known distance before you trust the rifle on a hunt or a match.
The pattern that shows up across every rifle we have re-torqued is simple: shooters who run a torque wrench and a drop of blue Loctite on the bases never come back with a loose scope. Shooters who skip the wrench and tighten by feel end up at the bench every season. The five-step procedure in this guide takes less time than driving to the range and gives you a mount that will hold zero through recoil, vibration, and weather. Bookmark the torque chart, buy an inch-pound wrench if you don’t already own one, and run the procedure before your next hunt or match in 2026.