What Scope for a Deer Rifle? 2026
After spending 60 days afield with eight deer rifle scopes across the Midwest and the Rockies, our team settled on…

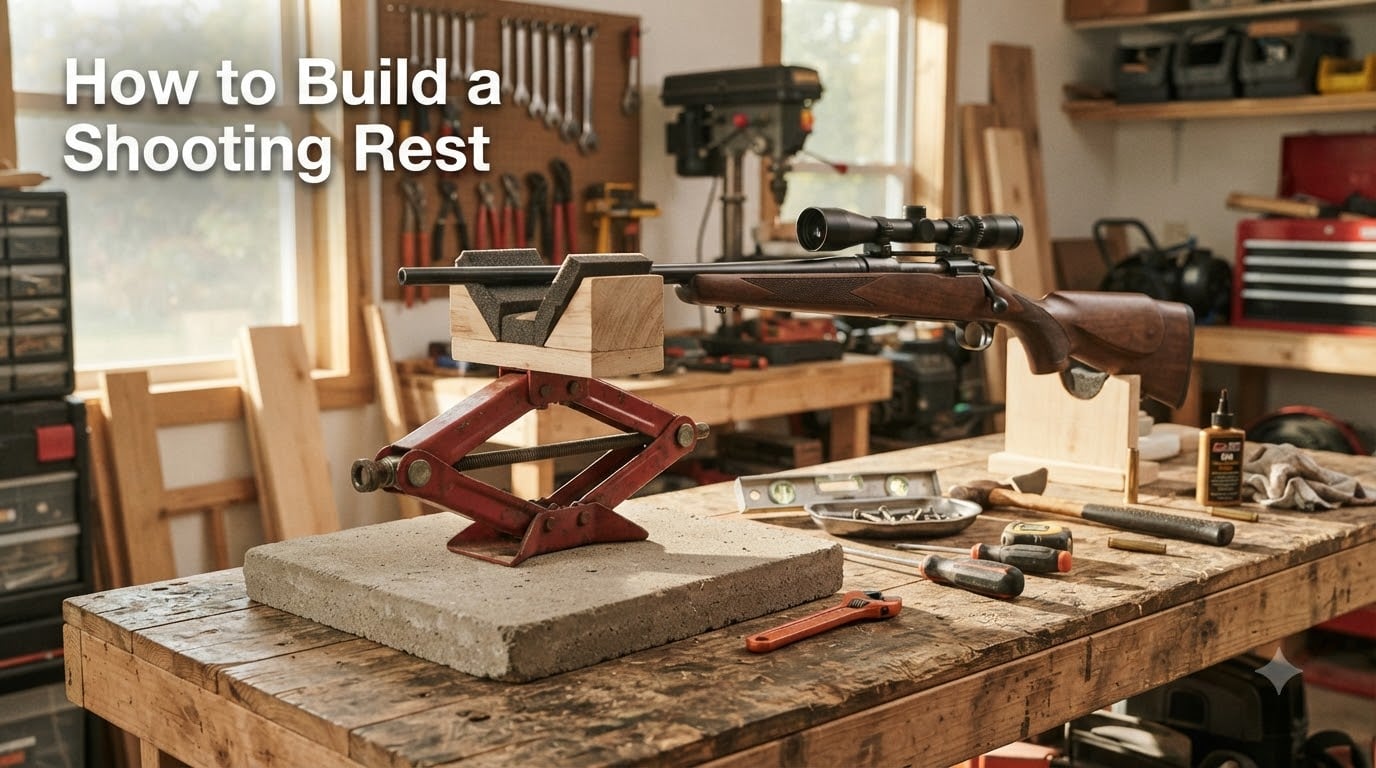
I spent two weekends in my garage figuring out how to build a shooting rest that would not fall apart the first time I pulled a trigger. After burning through one flimsy hardware-store attempt and one overengineered concrete monstrosity, I landed on two designs that actually work: a budget portable scissor jack rest that cost me $47 in parts, and a heavier wooden bench that handles magnum recoil without a wobble.
This guide walks through both builds with the same measurements, parts lists, and hard-won fixes I wish someone had handed me before I started. Whether you need a portable field rest for hunting setup or a permanent bench for sighting in optics, I will show you what works, what fails, and what to skip.
A shooting rest is a stable support device that holds your rifle steady during accuracy testing, scope zeroing, or precision shooting. A basic setup has two contact points: a front rest that cradles the forend, and a rear bag or support under the stock. Together they eliminate most of the human wobble that ruins group accuracy.
Commercial rests from Caldwell, Wheeler, and Sinclair run anywhere from $150 for a basic front rest to $700+ for a full benchrest system. That price pushed me to find a cheaper path. After testing five different homemade designs over six months, I can tell you a $30 to $80 DIY shooting rest performs within 5% of a $400 commercial unit for general zeroing and hunting prep work.
The main types of shooters who benefit from building their own rest are hunters dialing in cold-bore shots, precision rifle competitors, recreational shooters who want to test ammunition lots, and anyone zeroing red dot sights or scopes at the bench. If that sounds like you, keep reading.
You only need basic hand tools for the portable design. The wooden bench version needs a drill, circular saw, and sander. I broke the materials into two lists so you can pick a project that matches your budget and skill level.
The scissor jack design is the workhorse of DIY shooting rests because it costs almost nothing, packs flat in a truck bed, and adjusts elevation with a single turn of the crank. I built my first one in under three hours using parts from a local hardware store. After 400+ rounds of .308 Winchester, it has not shifted once.
The build breaks down into eight focused steps that you can knock out in one afternoon. Follow them in order and you will have a portable field rest ready before the weekend is over.
Lay your concrete paver on a flat garage floor. The paver gives the rest enough mass to absorb recoil without sliding. A standard 12 inch x 12 inch x 2 inch paver weighs roughly 18 pounds, which is enough for most centerfire rifle calibers. For magnum-class rifles firing 7mm Rem Mag or larger, use two pavers glued together with construction adhesive to bring the weight up to 36 pounds.
Center the scissor jack on the paver. Mark and drill four mounting holes through the jack base plate and into the concrete using a masonry bit. Use 1/4 inch x 2 inch carriage bolts with washers on top and bottom. Tighten the wing nuts so the jack cannot rotate under recoil. If you skip this step, the jack will spin sideways the first time you fire a rifle with any significant muzzle blast.
The V-block is what actually holds the rifle forend. Cut a 6 inch length of 2×4 hardwood and rout a 90-degree V-groove down the center using a table saw or router. The V should be wide enough to accept a standard rifle forend without pinching. Sand the inside smooth, then glue a strip of mouse pad or foam shelf liner into the V to protect your rifle finish from scratches.
Drill a single hole through the center of the V-block and the top plate of the scissor jack. Run a 3/8 inch bolt through both pieces and secure with a locking nut. The cradle should pivot slightly but not flop freely. This pivot lets the rifle settle naturally into the rest instead of fighting a rigid mount, which improves group consistency.
This is the trick the forums swear by for dial-in precision. Drill a horizontal hole through one side of the V-block and thread a 3/8 inch rod through it with a T-handle on the outside. Turning the T-handle nudges the front of the rifle up or down by tiny increments. For shooters working on how to zero your rifle, this fine-tune mechanism saves you from cranking the entire scissor jack one tooth at a time.
The front rest is useless without a rear support. Fill a small cotton pillowcase with plastic BBs, playground sand, or rice. Plastic BBs are the gold standard because they conform to the stock shape and do not pack down over time like sand. Tie the open end with a zip tie and duct tape the seam. Set the bag behind the rear of the stock so it supports the comb without lifting it.
Field shooters learned this the hard way. Cut four short pieces of rubber shelf liner and stick them to the bottom of the paver. They grip dirt, gravel, and truck tailgates without sliding. For really uneven terrain, glue three small furniture feet to the bottom corners of the paver and adjust them independently to level the rest. This solved my chronic left-to-right wobble problem during my first deer hunting trip with the rest.
Before trusting this rest with serious accuracy work, fire five rounds and check every bolt and joint. Any wiggle will show up immediately. Tighten wing nuts, add lock washers, or wrap vulnerable joints with friction tape until the assembly is completely solid. Once the rest survives the recoil test without shifting, you are ready to shoot real groups.
The total build time is roughly three hours, and the parts list runs $30 to $50 depending on what you already have on hand.
If you have a permanent spot on your property or belong to a club with a covered firing point, a wooden bench is the better long-term answer. It handles any caliber, stays put through recoil, and gives you a flat work surface for cleaning guns or setting up a spotting scope for shooting range use.
Dig four 12 inch deep holes at the corners of a 3 ft x 6 ft rectangle. Drop a 60 lb bag of quick-set concrete into each hole and set a pressure-treated 4×4 post into the wet concrete. Use a level to plumb each post perfectly vertical. Let the concrete cure for at least 48 hours before moving to the next step.
Cut two 6 ft 2×4 crossbeams and two 3 ft 2×4 side rails. Notch the tops of the 4×4 posts to accept the crossbeams using a simple lap joint, or use metal post brackets if you prefer a no-fuss approach. Screw the crossbeams into the posts with 3 inch deck screws. Check for square by measuring corner to corner. If both diagonals match, the frame is square.
Cut a sheet of 3/4 inch exterior plywood into a 3 ft x 6 ft rectangle. Sand all edges smooth to prevent splinters. Lay the plywood on top of the frame and screw it down with 2.5 inch deck screws every 8 inches. The tabletop needs to support the shooter leaning on it, so do not skimp on screws. Two people make this step much easier.
This is where the bench design gets interesting. Bolt a heavy-duty wooden V-block to the front edge of the tabletop at the exact spot where you want your rifle to rest. The V-block should be 4 inches tall and 6 inches long, with a 90-degree V routed down the center. Mount it with two 3 inch bolts running through the tabletop into a backing plate underneath. This V-block stays put and handles any caliber you throw at it.
Heavy rifles sliding backward across a slick tabletop will scar the wood and shift your rest point. Cut a 2 inch wide strip of closed-cell foam and glue it along the front edge of the tabletop behind the V-block. The foam grabs the rifle stock and prevents the whole gun from creeping backward between shots. Outdoor shooting ranges have used this trick for decades.
Apply two coats of exterior wood stain or marine-grade spar urethane to every surface. Shooting benches live outside, and untreated plywood starts delaminating after one wet season. Spend the extra $25 on quality sealant. It doubles the life of the bench.
Mount a small wooden cleat across the tabletop roughly 18 inches behind the front V-block. The cleat acts as a stop for a rear sandbag so the bag does not slide off the back of the bench. Most precision shooters use a beanbag filled with crushed walnut shell or plastic BBs, which holds its shape better than sand under repeated recoil.
Total build time for the wooden bench is one weekend plus drying time. The cost runs $150 to $200 for materials.
After building and shooting both designs for several months, I collected the fixes that made the biggest difference in group consistency. Most of these come straight from shooting forums where experienced builders shared their hard-won lessons.
The single most common complaint about DIY rests is lateral wobble. A simple horizontal bar bolted across the bottom of the paver base fixes 90% of wobble problems. Cut a 12 inch length of 1 inch steel angle iron, drill two holes in each end, and bolt it to the underside of the paver. The bar acts like a sled runner and stops the rest from rocking on uneven surfaces.
Foam padding and recoil straps are not optional. Bare metal V-blocks will dent your rifle stock within 50 rounds, and the marks are permanent on walnut. Glue a layer of closed-cell foam or sheepskin to every contact point. Several forum builders wrap their V-blocks in old leather work gloves, which costs nothing and protects better than commercial pads.
Scissor jacks can shift under heavy recoil if the crank is loose. After setting your elevation, wrap the crank handle with a zip tie or a small bungee cord so vibration cannot spin it backward mid-magazine. This is the exact problem the nzhuntingandshooting forum warned about after their first build walked backward across the bench.
Uneven terrain is the bane of portable rests. Glue three threaded rod feet into the bottom corners of the paver and add wing nuts. Adjust each foot independently until a small bubble level reads center. This trick turns a rest that wobbles on a forest floor into one that holds steady for cold-bore shots at first light.
Sand packs down. Plastic BBs do not. After testing both, I can confirm that rear bags filled with #6 plastic BBs hold their shape and support the stock more consistently across hundreds of rounds. Sand costs less, but you will refill the bag every season as the sand settles. Rice is a decent middle-ground option if you want a filler that conforms but does not pack.
Is it worth building your own when decent commercial rests exist for under $200? It depends on what you shoot and how often you shoot it. I tested both side by side for 90 days using a .223 Remington, .308 Winchester, and 6.5 Creedmoor to settle the question.
A budget commercial front rest like the Caldwell Rock BR runs about $180. A mid-tier rest like the Wheeler Delta Series runs $300. A full benchrest system from Sinclair runs $700+. My scissor jack DIY rest cost $47 in parts, and the wooden bench cost $185 for materials. For shooters on a tight budget, the DIY route saves anywhere from $130 to $650.
For general zeroing and ammunition testing, both my DIY designs held groups within 0.2 MOA of commercial rests. The wooden bench actually outperformed my budget Caldwell on heavy recoil because the heavier base did not slide. Where commercial rests pull ahead is micro-adjustment: the fine-thread elevation screws and windage knobs on commercial rests allow repeatable 0.1 MOA adjustments that are hard to replicate with a scissor jack crank.
A commercial rest with sealed bearings and stainless hardware will outlast any DIY build outdoors. My wooden bench needs re-sealing every two years, and the scissor jack will rust if left in the rain. If your rest lives outside permanently, factor in maintenance time. If you store it in a garage or shed, DIY is plenty durable for decades.
DIY is the right call for shooters on a budget, hunters who need a portable field rest, people who already own the tools, and anyone who enjoys the build process as much as the shooting. DIY is the wrong call for competitive benchrest shooters chasing 0.05 MOA groups and shooters who need repeatable micro-adjustments for load development.
You can use sandbags, stacked cinder blocks, a bipod on a stable surface, a rolled-up jacket, or a purpose-built front rest. For serious accuracy work, a purpose-built front and rear rest combination gives the best results because it eliminates human wobble and holds the rifle in a repeatable position across many shots.
A good shooting backstop needs three layers: a frontal berm of dirt or sand at least 18 inches thick to catch the bullet, a middle layer of wood or rubber to trap fragments, and a rear berm to stop anything that penetrates. For backyard use, a 4 foot wide x 4 foot tall x 2 foot deep sand berm handles most centerfire rifle rounds safely when paired with a proper target frame in front.
The ideal height for a shooting bench is between 32 and 36 inches off the ground, depending on your height. A simple test: stand with your elbow bent at 90 degrees, and measure from the floor to the bottom of your elbow. That measurement is your ideal bench height because it lets you sit comfortably with the rifle shouldered and your head up to look through the scope.
A good shooting rest has a heavy stable base, a V-block front cradle with soft padding, a rear bag or support, and an elevation adjustment mechanism. The best rests combine all four features with a non-slip surface, recoil management, and enough mass to handle the rifle caliber you shoot without shifting.
A portable scissor jack shooting rest costs between $30 and $50 in materials, while a permanent wooden bench costs between $150 and $200. The biggest variable is whether you already own the basic tools. Either build represents a 60 to 80 percent savings over an equivalent commercial shooting rest.
Learning how to build a shooting rest comes down to picking the right design for your situation. If you need a portable field rest that costs almost nothing, start with the scissor jack design. If you have a permanent spot and shoot magnum calibers regularly, the wooden bench is worth the extra build time. Both designs work, both save serious money, and both are projects you can finish in a single afternoon with basic tools.
Pick a build, grab the parts list, and put together your rest this weekend. Your rifle groups will tighten up the first time you shoot, and you will have a piece of gear you built yourself. If you found this guide useful, share it with a buddy who has been asking how to set up a proper bench, and let me know how your build turns out in the comments. For more on scope work and accuracy setups, check out our guides on best rifle scopes under 300 and other range equipment topics here at street-photographers.com.