8 Best Scope for the Weatherby Camilla (October 2026)
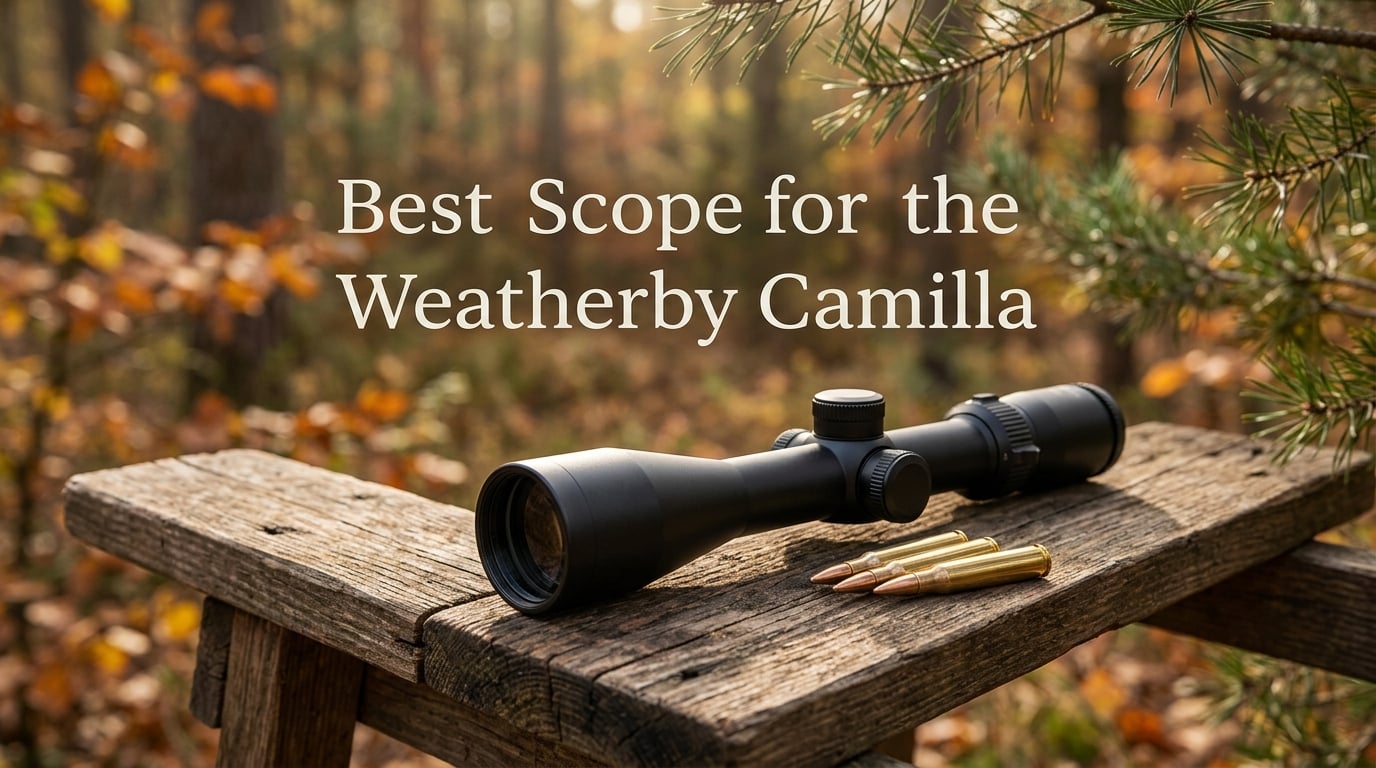
The best scope for the Weatherby Camilla balances low weight, magnum-rated durability, and the right magnification range for the rifle’s…


If you’ve ever stared at the knobs on top of your rifle scope and wondered what those numbers and clicks actually do, you’re not alone. Rifle scope turret systems are the precision mechanism that separates guessing from hitting, and understanding them transforms how you shoot. After spending years behind scopes and helping hunters dial in their optics, I’ve learned that mastering your turret system is the single most important upgrade you can make to your long-range accuracy.
Rifle scope turret systems are the adjustable knobs on a scope that control your reticle’s position. They allow you to compensate for bullet drop and wind drift by making precise angular adjustments. Most scopes feature an elevation turret on top for vertical adjustments and a windage turret on the right side for horizontal corrections.
Whether you’re a hunter preparing for elk season, a competitive shooter pushing past 600 yards, or simply want to understand your optic better, this guide will decode everything about rifle scope turret systems. We’ll cover how they work internally, the different types available, and how to choose the right system for your shooting needs.
Rifle scope turret systems are the precision adjustment interface between you and your bullet’s trajectory. These rotating knobs sit on top and on the sides of your scope, containing the mechanical linkage that moves your reticle inside the optic. When you understand how they work, you gain the ability to put rounds exactly where you want them, regardless of distance or conditions.
Turret System: The complete assembly of adjustment knobs on a rifle scope that controls reticle positioning. Includes the elevation turret (vertical adjustment), windage turret (horizontal adjustment), and potentially a parallax turret (focus adjustment), along with their internal mechanisms and locking features.
Modern turret systems have evolved significantly from simple friction-fit knobs. Today’s precision scopes feature sophisticated mechanisms including zero stops, revolution indicators, locking systems, and ballistic calibration marks. These advancements make long-range shooting accessible to anyone willing to learn the system.
The beauty of a well-designed turret system is its predictability. Once you understand your scope’s click value and measurement system, you can calculate exactly how many adjustments to make for any shot. This mathematical approach to shooting is what separates experienced long-range marksmen from those still guessing holdovers.
Understanding which turret does what is fundamental to operating your scope correctly. While not all scopes feature all three turrets, most precision optics include at least the first two.
Hunting scopes often omit the parallax turret to save weight and cost, relying on a fixed parallax setting optimized for typical hunting distances. Target and varmint scopes almost always include it, as precise focus matters more when shooting at tiny targets or extreme ranges.
I’ve watched countless hunters at the range accidentally turn the parallax knob thinking it was windage, then wonder why their zero shifted. The key distinction: parallax affects focus, not impact. When choosing hunting optics, consider whether you need the precision of a third turret or prefer the simplicity of two.
The magic of turret systems happens inside your scope, where your knob rotations translate into precise reticle movements. Understanding this internal mechanism helps you appreciate why quality matters and what’s actually happening when you hear that satisfying click.
Quick Summary: When you rotate a turret, you’re turning a threaded screw that tilts the erector unit holding your reticle. This tilt shifts your view, requiring you to move the rifle to realign with the target. Each click provides a specific angular adjustment measured in either MOA or MRAD.
Every click you hear represents a precise mechanical action happening inside your scope. Quality turret systems contain several components working in harmony:
When you rotate a turret, the screw advances into the erector housing, causing it to tilt. This tilt changes the angle of light passing through the erector lenses, effectively moving your reticle’s view relative to the target. To realign, you must physically move the rifle, which changes where the bullet impacts.
The precision of this system depends on manufacturing quality. Premium scope turrets are machined to tolerances of less than one thousandth of an inch, ensuring that each click produces exactly the same adjustment every time. Budget scopes may have more variation, which is why experienced shooters stick to reputable brands.
The “click” isn’t just satisfying feedback—it’s a precise unit of measurement. Every click on your turret represents a specific angular adjustment that translates to a specific distance change at a given range. Knowing your click value is non-negotiable for accurate shooting.
| Measurement System | Common Click Value | Adjustment at 100 Yards |
|---|---|---|
| MOA (1/4) | 0.25 inches | 0.25 inches |
| MOA (1/8) | 0.125 inches | 0.125 inches |
| MRAD (1/10) | 0.1 milliradian | 0.36 inches (1 cm) |
The most common click values are 1/4 MOA for hunting scopes and 1/10 MRAD for tactical and competition optics. Fine-adjustment target scopes may offer 1/8 MOA clicks for extreme precision. The key is consistency—every click should produce the same adjustment, rotation after rotation.
I’ve worked with shooters who couldn’t understand why their groups were inconsistent, only to discover they’d been mixing 1/4 MOA and 1/10 MIL math in their heads. Pick one measurement system and stick with it. Your brain will thank you under pressure.
Not all turret systems are designed the same. Manufacturers have developed various configurations to suit different shooting applications, from big-game hunting to precision competition. Understanding these types helps you choose the right system for your needs.
The most fundamental distinction in turret design is whether the adjustment knobs are protected by removable caps or left exposed for direct access. This choice significantly impacts how you use your scope in the field.
| Feature | Capped Turrets | Uncapped/Target Turrets |
|---|---|---|
| Protection | Caps protect against accidental adjustment during field use | Exposed, can be bumped or turned inadvertently |
| Profile | Low profile, sleek design that won’t snag on gear | Tall, easy to grip but more likely to catch on vegetation |
| Adjustment Speed | Slower, requires removing caps before making changes | Fast, direct access for quick adjustments |
| Best Use | Hunting, general shooting, tactical applications | Target competition, benchrest, varmint hunting |
Capped turrets are the standard for hunting scopes. When you’re scrambling through timber or hauling your rifle up a mountain, the last thing you want is your zero shifting because a knob bumped against your pack. The caps provide peace of mind that your settings will remain exactly where you left them.
Uncapped target turrets shine in controlled environments where you need to make frequent adjustments. Benchrest and F-class competitors dial for every target, and they need quick access without fumbling with caps. These tall turrets also feature more visible markings and often include revolution indicators.
For tactical optics and defensive applications, capped turrets with locking mechanisms are preferred. These situations demand absolute confidence that your zero hasn’t shifted, even if the rifle gets handled roughly or stored for extended periods.
Target turrets represent the exposed turret design taken to its precision-focused extreme. These tall, prominent knobs are engineered specifically for dialing adjustments quickly and accurately.
Varmint hunters who spend days at the prairie dog town love target turrets. They can quickly dial between targets at varying distances without losing their shooting rhythm. The exposed design makes it easy to see exactly where their settings are at a glance.
However, target turrets aren’t ideal for rough hunting. I’ve seen enough snagged turrets in the field to recommend capped versions for anyone hunting in thick cover or mountainous terrain. If you go exposed, ensure your scope has quality first focal plane optics to maximize the precision advantages.
Ballistic turrets represent a significant departure from standard MOA or MRAD marking. Instead of angular measurements, these turrets are engraved with yardage distances that correspond to your specific rifle and ammunition’s trajectory.
Ballistic Turret: A custom-calibrated turret marked with yardage distances rather than MOA or MRAD values. When you dial “4” on a ballistic turret, you’re setting the elevation for a 400-yard shot with your specific load. Simply range the target, dial the distance, and hold dead center.
The appeal of ballistic turrets is obvious for hunters. When a bull elk steps out at 447 yards, you don’t want to be calculating MOA conversions or consulting drop charts. You just want to dial “450” and focus on making a clean shot. These turrets eliminate mental math under pressure.
I’ve watched ballistic turrets transform average hunters into confident long-range shooters. The simplicity of dialing the distance removes a significant source of anxiety and potential error. When time matters and adrenaline is high, simpler is better.
However, ballistic turrets come with important limitations. They’re tied to one specific ammunition load. Change your bullet, powder, or even barrel length, and your turret marks no longer match your trajectory. For shooters who experiment with different loads, standard turrets offer more flexibility.
A zero stop is one of the most valuable features in modern turret systems, especially for long-range shooting. This mechanism prevents you from dialing below your established zero, providing a reliable reference point you can return to without thinking.
Zero stops come in several designs. Some use removable shims that you stack under the turret to set the stop point. Others feature adjustable collars that you set once and forget. Premium tactical scopes often have integrated zero stops built directly into the turret mechanism.
After losing track of my revolutions during a prairie dog shoot years ago, I won’t own a tactical scope without a zero stop anymore. The peace of mind it provides is worth every penny, especially when shooting at distances where every adjustment counts.
Locking turrets combine the accessibility of exposed knobs with the security of capped designs. These systems allow you to lock your adjustments in place, preventing accidental movement while still offering quick access when needed.
Forum feedback on locking turrets is mixed. Some users love the security they provide, while others complain that certain models are too difficult to engage or disengage in the field. Vortex Razor locking turrets, for example, are frequently described as “very hard” to unlock—a serious issue when game is on the line.
If you choose a locking turret system, test it thoroughly before hunting season. Ensure you can operate the mechanism with gloves on and in adverse conditions. A locking system that’s too finicky defeats its own purpose.
One of the most significant developments in modern turret technology is the LRZ system—an integrated approach that combines Lock, Revolution indicator, and Zero stop into a cohesive package. This system, popularized by premium European scope manufacturers, addresses the three biggest challenges of long-range shooting in one design.
LRZ System: An integrated turret design featuring Lock (secure your adjustments), Revolution indicator (track your turret rotations), and Zero stop (return to baseline). This triad of features provides complete control over your elevation adjustments for long-range precision.
The Lock component prevents accidental turret movement during field use. A simple pull-up or lever-release mechanism unlocks the turret for adjustments, then locks it securely when not in use. This gives you the security of capped turrets with the accessibility of exposed target knobs.
Revolution indicators solve the critical problem of tracking rotations during multi-revolution elevation dialing. Color-coded markings, tactile indicators, or separate gauges show you exactly which revolution you’re on, eliminating dangerous confusion at long range. Schmidt & Bender’s color-coded system, for example, uses different colors for each revolution so you can see your position at a glance.
The Zero stop completes the system by providing a positive return-to-zero reference. Combined with the revolution indicator, you always know exactly where you are relative to your baseline zero. This integrated approach gives long-range shooters complete confidence in their adjustments.
While LRZ systems were once found only on premium European scopes costing thousands, they’re increasingly appearing on mid-range optics as shooters recognize their value. For serious long-range hunting or competition, an LRZ system is worth the investment.
An important distinction in turret design that often gets overlooked is whether adjustments require tools or can be made by hand. This design choice reflects different priorities in turret security versus accessibility.
Tool-adjustable turrets appeal to hunters who prioritize zero security above all else. If you’re backpacking into rough country or hunting in thick brush where your rifle will get bumped around, tool-adjustable windage ensures your horizontal zero won’t shift.
However, the inconvenience becomes apparent when you need to make quick windage adjustments. Fumbling for a tool while game stands in front of you is not ideal. Most modern scopes use fingertip-adjustable turrets with locking mechanisms instead, offering both accessibility and security.
When you’re shooting long enough to make multiple full rotations of your elevation turret, knowing which revolution you’re on becomes critical. Revolution indicators solve this problem through various design approaches.
Without a revolution indicator, long-range shooting becomes an exercise in memory and counting. Dial past your zero on the way back down, and suddenly you’re off by a full revolution—a potentially disastrous error at 800 yards. Quality indicators eliminate this risk.
For serious long-range work, especially in competition or hunting situations, a revolution indicator is non-negotiable. The cognitive load of tracking rotations manually is too high when pressure is on.
The materials used in turret construction significantly affect durability, weight, and long-term reliability. While most shooters focus on glass quality and reticle design, turret materials determine how well your adjustment system will withstand field use and maintain precision over time.
Premium turret systems are typically machined from aircraft-grade aluminum alloys, with two grades dominating the market. Understanding the differences helps you assess scope quality and durability.
The difference between 6061 and 7075 becomes apparent in extreme conditions. 7075-T6 resists deformation from impacts better, maintaining precise thread engagement even if dropped. For tactical applications or rough hunting, the stronger alloy provides extra insurance.
However, 6061-T6 is perfectly adequate for most hunting and shooting applications. The manufacturing quality and machining precision often matter more than the specific alloy used. A well-made 6061 turret will outperform a poorly machined 7075 one every time.
Turret systems are particularly vulnerable to moisture intrusion, as they penetrate the scope body and contain moving parts. Quality sealing is essential for maintaining precision adjustments over the life of the scope.
Internal moisture is a scope killer, causing fogging, corrosion, and eventual failure. Quality turret sealing is especially important for hunters who may encounter rain, snow, or rapid temperature changes. Once moisture gets inside, precision adjustments become inconsistent and unreliable.
When evaluating scopes, check reviews for reports of internal fogging or moisture issues. A turret system that seals properly will maintain consistent adjustments for years of field use.
The debate between MOA and MRAD turret systems has raged for years, with passionate advocates on both sides. Understanding the practical differences helps you choose the system that fits your shooting style and needs.
| Feature | MOA (Minute of Angle) | MRAD (Milliradian) |
|---|---|---|
| Origin | Imperial system, based on dividing a circle into 21,600 minutes | Metric-based, designed around the radian mathematical system |
| Size at 100 Yards | 1.047 inches (often rounded to 1 inch) | 3.6 inches (exactly 10 cm at 100 meters) |
| Common Click Value | 1/4 MOA (0.26 inch) or 1/8 MOA (0.13 inch) | 1/10 MRAD (0.36 inch) or 1/20 MRAD (0.18 inch) |
| Full Circle | 21,600 minutes (360 degrees) | 6,283 milliradians (roughly 6.283 per circle) |
| Best Applications | American hunters, shooters comfortable with inches | Tactical, competition, shooters using metric system |
MOA (Minute of Angle): An angular measurement where 1 MOA equals approximately 1.047 inches at 100 yards. It’s based on dividing a circle into 21,600 equal parts (360 degrees × 60 minutes). The system is intuitive for shooters who think in inches and yards.
MRAD (Milliradian): An angular measurement based on the radian mathematical system, where 1 MRAD equals 3.6 inches at 100 yards (exactly 10 cm at 100 meters). The base-10 system simplifies calculations and aligns with metric measurements, making it popular for tactical and competition shooting.
Practically speaking, both systems work equally well. The 1/10 MRAD click value (0.36 inches) is slightly larger than the 1/4 MOA click (0.26 inches), but this difference is negligible in real shooting. What matters is consistency and familiarity with your chosen system.
My recommendation? If you shoot with friends who use one system, match theirs for simplicity. If you’re starting fresh, MRAD’s base-10 system is slightly easier for mental math, especially when working with rangefinders and ballistic apps. However, MOA is perfectly fine if you’re comfortable thinking in inches and yards.
The key is committing to one system and learning it thoroughly. Switching back and forth between MOA and MRAD is a recipe for confusion and errors under pressure. Pick the system that matches your gear, shooting partners, and mental math preferences, then master it completely.
Properly zeroing your scope with turret adjustments is the foundation of all accurate shooting. A solid zero gives you confidence that your first shot will find its mark, and understanding the process ensures you can return to that zero if adjustments become necessary.
Quick Summary: Zeroing involves establishing a known alignment between your reticle and bullet impact at a specific distance. The process requires boresighting, firing confirmation groups, calculating adjustments based on impact location, and fine-tuning until your point of aim matches your point of impact.
One of the most common questions shooters ask is which direction to turn turrets for adjustment. While most scopes have directional arrows, understanding the underlying logic prevents confusion in the field.
Forum discussions reveal that this simple concept causes immense confusion for new shooters. The key is remembering you’re moving the reticle, not the bullet. When you adjust the turret, you’re changing where the scope looks relative to the barrel.
After hundreds of range sessions helping shooters zero their optics, I’ve learned which practices produce consistent results and which lead to frustration.
After helping a client zero his new scope last fall, we spent an hour chasing our zero before discovering his rings had loosened during transport. Always check your hardware before blaming the optics. A simple torque check can save hours of frustration.
Custom ballistic turrets represent the ultimate convenience in turret systems, promising to eliminate mental math and speed up target engagement. But they come with trade-offs and limitations that every shooter should understand before investing.
Custom ballistic turrets are manufactured specifically for your rifle, ammunition, and shooting conditions. You provide ballistic data including bullet type, muzzle velocity, ballistic coefficient, and typical shooting conditions, and the manufacturer creates a turret engraved with yardage marks that correspond to your bullet’s actual trajectory.
Instead of dialing “15 MOA” for a 600-yard shot, you simply dial “6” on a custom turret. The turret marks represent hundreds of yards, and each position has been precisely calculated to match your load’s ballistics. It’s point-and-shoot simplicity for long-range shooting.
Several companies and manufacturers offer custom turret programs. Major scope brands like Vortex and Leupold have their own systems (CDS for Leupold, Custom Turret Program for Vortex). Aftermarket specialists like Kenton Industries, Outdoorsmans, and Huskemaw can make custom turrets for various scope brands.
The advantages of custom ballistic turrets explain their growing popularity among hunters and long-range enthusiasts:
Forum users consistently report that custom turrets improved their long-range confidence and success. The psychological benefit of eliminating math under pressure shouldn’t be underestimated. When you trust your system, you shoot better.
Despite their appeal, custom turrets have significant limitations that make them unsuitable for some shooters:
For shooters who want the benefits of yardage-based turrets without the cost of custom machining, ballistic turret tape offers an excellent alternative. These adhesive tapes feature yardage marks that you apply to your existing turret after calculating your ballistics.
The trade-off is durability and appearance. Turret tapes are less elegant than machined markings and can be damaged by rough use. However, for hunters on a budget or shooters still dialing in their preferred load, they’re an excellent entry point into yardage-based turret systems.
After using custom turrets on my hunting rifles for the past five years, I believe they’re worth it for dedicated long-range hunters who have settled on a specific load. The confidence of knowing my exact drop compensation, combined with faster target engagement, has improved my hunting success.
However, if you’re still experimenting with loads or shoot a variety of ammunition, stick with standard MOA or MRAD turrets. You’ll waste money on custom turrets that become paperweights every time you switch ammunition. Build your load first, then invest in the custom turret.
For competitive shooters who dial frequently, standard turrets are usually preferable. You likely need to adjust for varying conditions anyway, and the flexibility of MOA/MRAD systems serves you better than yardage-specific marks.
The best approach is to master standard turrets first. Learn to make quick MOA or MRAD adjustments and understand your ballistics. Then, if you commit to one load and hunt in conditions where custom turrets make sense, you’ll appreciate them even more.
Even the finest turret systems require care and occasional troubleshooting. Understanding common problems and maintenance practices keeps your adjustments reliable and extends the life of your optic.
Recognizing turret issues early prevents frustration and missed shots. Here are the most common problems shooters encounter:
Mushy or Indistinct Clicks: If your turret clicks don’t feel positive and crisp, you may have debris in the mechanism or a weakening plunger spring. Compressed air can sometimes clear debris from around the turret cap, but internal issues require professional service. Consistent tactile feedback is essential for accurate adjustments.
Backlash (Hysteresis): This occurs when there’s mechanical slack in the adjustment system. Dialing clockwise then counter-clockwise produces different points of impact because the internal components have free movement. The solution is to always approach your target adjustment from the same direction. For elevation, most shooters dial up past their target, then come down to the desired setting.
Backlash: Mechanical slack in the turret adjustment system that causes inconsistent point of impact depending on which direction you approach from. Also called “hysteresis” in technical terms, this is inherent in all mechanical systems but becomes problematic when excessive.
Turret Slippage: Your zero changes without touching the turrets. This usually indicates loose mounting hardware, a failed internal component, or a broken turret screw. Check your ring and base screws first, as these are the most common culprits. If hardware is tight, the scope likely needs professional service.
Tracking Errors: You dial 10 MOA but only get 8 MOA of actual movement on target. This is a serious issue indicating internal problems with the erector spring or turret mechanism. Tracking errors require scope repair or replacement. You can test tracking by dialing up a known amount, shooting, dialing down the same amount, and verifying you return to the original point of impact.
Turret Spinning Freely: The turret turns without resistance or click feedback. This usually means the plunger or detent system has failed, leaving you with no way to make precise adjustments. Professional repair is required.
Regular turret maintenance prevents many common problems and keeps your adjustments smooth and consistent. Forum members at AccurateShooter recommend regular turret exercises to maintain optimal performance.
Users on precision shooting forums swear by turret exercise routines, noting that scopes left unused for long periods sometimes develop stiff or sticky adjustments. Running through the full range periodically keeps everything moving smoothly.
Some turret issues require professional service. Quality scope brands offer excellent warranty support, and attempting repairs yourself often voids the warranty and can make problems worse.
Most quality scope manufacturers stand behind their products and will repair or replace defective turret systems. Contact the manufacturer’s customer service and describe the problem clearly. They’ll often provide a return label and repair the scope at no cost if it’s under warranty.
Mastering rifle scope turret systems transforms how you shoot. Whether you’re a hunter extending your effective range, a competitive shooter dialing for precision, or simply want to understand your optic better, the knowledge in this guide will serve you well every time you head to the field or range.
We’ve covered the mechanics of how turrets work internally, the various types available from capped to ballistic, and the critical differences between MOA and MRAD systems. You now understand LRZ systems, revolution indicators, zero stops, and how to maintain your turret system for years of reliable performance.
The key takeaway is that turret systems are the bridge between knowing your ballistics and applying them in the field. Invest time in understanding your specific scope, practice your adjustments, and verify everything at the range before trusting it on a hunt. Quality glass deserves quality turret systems—don’t compromise on the interface between you and your bullet’s trajectory.
Whether you choose standard MOA turrets, MRAD for tactical applications, or invest in custom ballistic turrets for your hunting rig, the principles remain the same. Consistent adjustments, thorough documentation, and regular practice will make you a more effective shooter regardless of the system you use.
The elevation turret on top adjusts bullet impact up and down for trajectory compensation. The windage turret on the right side adjusts left and right for wind drift. Some scopes also have a parallax turret on the left side for focus adjustment, which eliminates parallax error at high magnification.
When you rotate a turret, it turns a threaded screw that tilts the erector unit holding your reticle. This tilt shifts your view, requiring you to move the rifle to realign with the target. Each click provides a specific angular adjustment measured in MOA or MRAD, changing your point of impact relative to your point of aim.
Many premium scope manufacturers offer locking turrets including Vortex (Razor and Viper PST series), Leupold (Mark series and some VX models), Nightforce (ATACR and Beast series), and Schmidt & Bender. Locking mechanisms include pull-up designs, lever locks, and Allen-head set screws depending on the model.
Custom turrets are worth it if you shoot one load consistently and hunt at varying distances. They eliminate mental math and speed up target engagement. However, if you experiment with different ammunition or shoot competitively where conditions change frequently, standard MOA or MRAD turrets offer more flexibility.
A zero stop prevents you from dialing below your established zero setting. This allows you to quickly return to your baseline zero after dialing for longer shots, and prevents confusion about which revolution you’re on. Zero stops are especially valuable for long-range shooting where multiple turret revolutions are common.
Backlash is mechanical slack in the turret system that causes inconsistent adjustments depending on which direction you dial. When you approach from different directions, the point of impact may vary. To compensate, always approach your final adjustment from the same direction, typically dialing past and coming back to your target setting.
For the elevation turret on top, turn clockwise to move impact UP and counter-clockwise to move impact DOWN. For the windage turret on the right side, turn clockwise to move impact RIGHT and counter-clockwise to move impact LEFT. Think of it as chasing your bullet with the reticle.
LRZ stands for Lock, Revolution indicator, and Zero stop—a modern turret design that integrates these three features. Lock prevents accidental adjustments, Revolution indicator tracks multi-revolution dialing, and Zero stop provides a positive return-to-zero reference. This system is common on premium tactical scopes.