How to Fix Foggy Binoculars 2026
I learned how to fix foggy binoculars the hard way on a 4 a.m. street shoot in Hanoi, when steam…

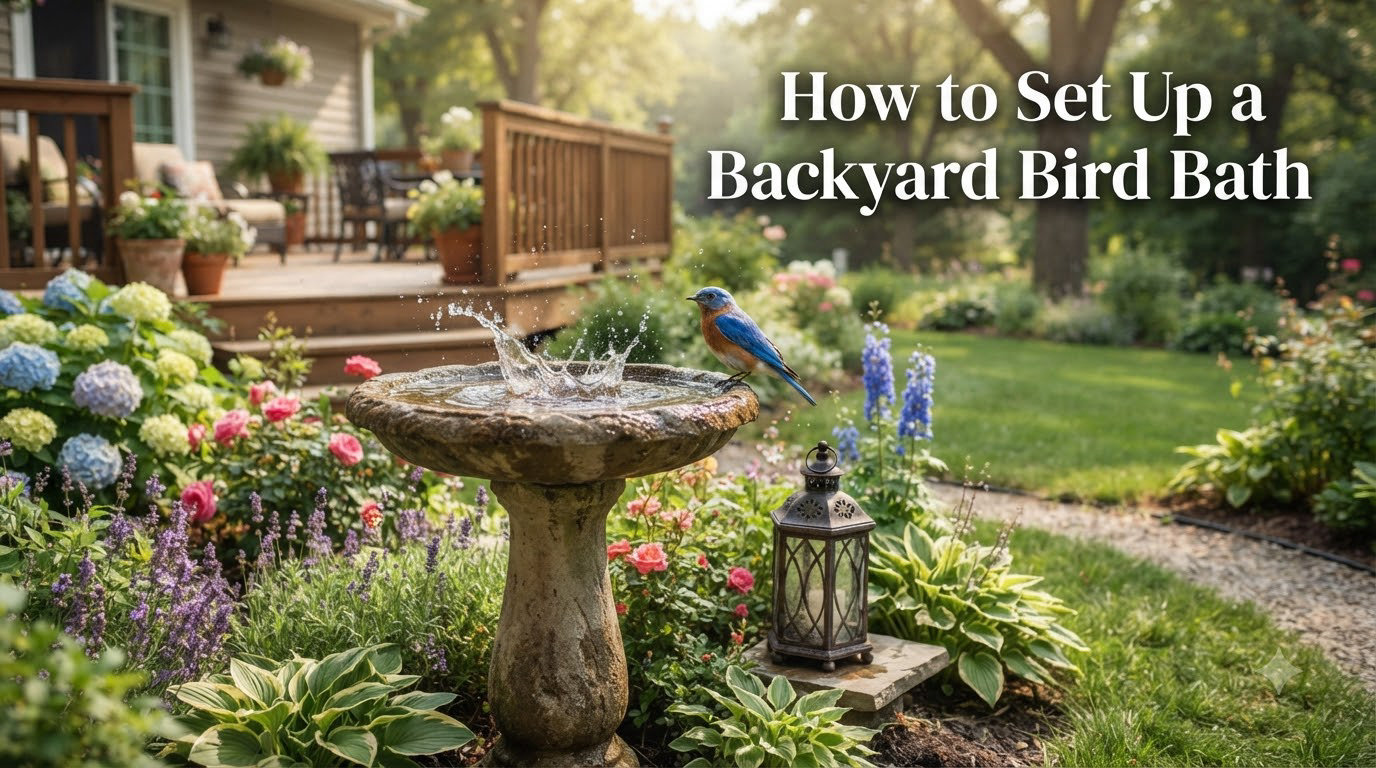
I’ve set up six bird baths across three different yards over the past decade, and I’ve made every mistake possible along the way: the bath that sat empty for five weeks, the pedestal that toppled in a windstorm, the glazed basin so slippery no bird ever landed in it. Learning how to set up a backyard bird bath correctly is the difference between an ornament and the busiest water hole on your street. Water attracts more species than any feeder ever will, including warblers, tanagers, and buntings that ignore seed entirely. In this guide, our team distills what actually works, drawing on recommendations from the Cornell Lab of Ornithology, the RSPB, Audubon chapters, and years of watching birds ignore my early attempts.
Here’s the short version before we get into details. Pick a spot with partial shade near cover but not under it, level the base, keep water between one and two inches deep with rocks at the edges, add some kind of movement to the water, then change the water every day or two. That’s it. The rest of this article walks you through each step properly, plus maintenance, winter care, and troubleshooting if birds ignore your setup.
The full setup takes under an hour. What follows is the exact order we use for every new bath, refined through trial and error and cross-checked against Cornell Lab and RSPB guidance. Work through the steps in sequence because each one builds on the last.
Choose a partially shaded, open area roughly 10-15 feet from shrubs or trees. Shade slows evaporation and keeps water cooler and fresher, while nearby cover gives birds a safe retreat after they bathe. Never place the bath directly under branches, though. Overhanging foliage drops debris and droppings into the water and gives cats a launch point above bathing birds.
Birds also need clear sightlines all around the basin. A bath tucked against a solid fence feels like an ambush zone to a songbird mid-bathe. Open ground with an escape route within a short flight wins every time.
If you live somewhere hot, this step matters even more. Forum discussions from desert-region birders repeatedly describe water getting dangerously warm by midday in full sun. Morning shade from an east-facing wall or fence solves most of that problem.
Set the bath on firm, level ground and rock it gently with your hand. If it wobbles at all, re-seat it or shim it until it doesn’t. A rocking basin spooks birds and, over a season, cracks concrete pedestals as freeze-thaw cycles widen the gap underneath.
Weight helps here. Heavy concrete baths resist wind and raccoons better than lightweight plastic ones, which is why material choice (covered below) affects placement too. If you must use a lighter bath, sink its base a half-inch into the soil or surround it with flat pavers to lock it down.
Fill the basin so the water is about 1 inch deep at the edges and never deeper than 2 inches anywhere. Songbirds are surprisingly fragile swimmers, and deep water genuinely frightens small species away. Most commercial baths are molded too deep, which brings us to the next step.
Place a few clean rocks or pebbles in the basin, building them up so they break the surface. This gives birds a landing pad, a grip surface, and a perch partway in. Glazed ceramic bottoms are notoriously slick, and forum reports confirm that slippery bottoms alone can keep a bath unused for months.
Rocks solve three problems at once: footing, graduated depth, and confidence for nervous first-timers. Choose rough-textured stones rather than polished decorative ones. A medium-sized branch laid across one edge works just as well and looks more natural.
Give the water motion with a dripper, a solar fountain, or a water wiggler. Moving water is visible from much farther away, and community consensus treats it as the proven difference between ignored and popular baths. Solar floating fountains come up again and again in birder forums as the single best attraction upgrade you can make.
You don’t need to buy anything to test the effect. The classic DIY trick, made famous by the Cornell Lab, costs nothing: punch a tiny hole in the bottom of a plastic jug, fill it with water, and hang it above the bath so water drips steadily into the basin. Refill the jug daily and you have a functioning dripper.
Fill the bath with fresh tap water to your target depth. There’s no need for additives, vitamins, or anything sold as “bird bath treatment”; plain clean water beats everything else. Let a hot hose run for a moment first in summer, since very cold water straight from sun-heated pipes can be shockingly hot.
One caution: avoid water softened with salt systems if you have one, because sodium isn’t good for feathers. Standard municipal tap water is fine everywhere else.
Observe from indoors or from far enough away that birds don’t feel watched. Most activity happens at dawn before heat sets in, so check early. Then give the neighborhood birds time to find it; realistic expectations are covered in detail further down.
The best place for a bird bath is a partially shaded open spot about 10-15 feet from cover, visible to flying birds and safe from ambush. Placement causes more failed setups than any other single factor, so we’ve condensed the rules into a quick reference table. No major competitor publishes distance specs like these, which seems like a strange oversight given how often placement questions appear in forums.
| Do This | Not This |
|---|---|
| Partial shade that limits evaporation | Full blazing sun all day |
| 10-15 ft from shrubs/trees (escape cover) | Directly beneath overhanging branches |
| Clear sightlines on all sides | Tucked against a wall or dense hedge |
| About 10+ ft from feeders | Right under a feeder (seed debris fouls water) |
| Roughly 3+ ft from windows, or closer than 1.5 ft | The danger zone halfway between |
| Level, stable ground | Sloped, soft, or wobbly ground |
| Visible from the house so you enjoy it | A forgotten corner behind the garage |
That window rule deserves a quick explanation. Birds collide with glass when they fly off at speed from a midpoint distance where they can’t register the reflection. Either keep the bath well back from windows or place it close enough that takeoff speed stays low.
Cat safety is the top deal-breaker reported by birders. Low-hanging cover near the bath reads as predator shelter, while a bath in open ground with a clear escape route reads as safe. If outdoor cats roam your area, skip ground-level placement entirely and go higher.
If you haven’t bought or built yet, match the bath to your climate and yard. Material determines weight, durability, and how the bath survives winter, and each option trades something different. Here’s how the common choices compare based on our team’s experience and manufacturer specifications.
| Material | Durability | Freeze-Thaw Risk | Best For |
|---|---|---|---|
| Plastic/resin | Moderate (fades, cracks over years) | Low | Budget setups, winter use, easy cleaning |
| Concrete | High (very stable) | High (can crack) | Windy yards, permanent placements |
| Ceramic/glazed | Moderate | High | Decorative gardens in mild climates |
| Metal/copper | High | Low | Hot climates (copper slows algae), modern styles |
Ground level versus pedestal is a genuine debate, not just a style question. Ground-level basins match how many species drink naturally and attract birds that never visit raised feeders, but they only work where cats aren’t a threat. Pedestal baths offer better visibility and safety at the cost of looking less natural.
Color matters less than people hope. Neutral earth tones and light gray or pale blue basins suit nearly every yard; there’s no magic color that draws birds in. What actually pulls them in is the glint of moving water from a distance, which loops right back to Step 5.
No budget? Build instead of buying. The RSPB’s version takes five minutes: a plant saucer on four bricks with a wooden ramp sticking out of the water for escape access. A shallow trashcan lid on a level patch of dirt works on the same principle.
Change the water every 1-2 days, scrub the basin weekly, and deep clean monthly with a nine-parts-water-to-one-part-vinegar solution. Dirty water is the fastest way to undo a perfect setup; algae and droppings drive birds off and can spread disease among visiting flocks. Fresh water outranks aesthetics and price in every birder survey and forum thread we reviewed.
The schedule matters beyond comfort, too. Standing water left untouched for a week can hatch mosquito larvae, which is both a nuisance and a public-health concern given mosquito-borne illness. Frequent water changes break the mosquito breeding cycle completely without any chemicals.
Never use bleach or harsh detergents in the basin itself. If you need extra cleaning power between vinegar sessions, a dilute bleach soak followed by extensive rinsing away from the yard works, but vinegar handles almost everything.
In freezing climates, keep water available with a heated bird bath or an immersion heater rather than letting ice win. Birds need open water in winter for drinking and preening, and an ice-free bath draws remarkable traffic in otherwise barren months. Use a heater rated thermostatically controlled, so it only runs when temperatures drop near freezing.
Two hard warnings here. First, plug any heater into a GFCI (ground-fault interrupted circuit) outlet, because you’re mixing electricity with water outdoors. Second, never add antifreeze or glycerin to lower the freezing point; the Cornell Lab flags both as toxic to birds.
Plastic basins handle winter better than concrete or ceramic, which absorb water and crack as it expands during freeze-thaw cycles. Drain and store fragile baths indoors before the first hard freeze unless they’re rated for winter use.
Most backyards see their first bath visitors within a few days to two weeks, though shy neighborhoods can take longer. This is the question nobody in the ranking results answers, and it’s the number one emotional pain point across r/birding and related communities. People install a bath, see nothing for a week, and assume they failed. They didn’t. Birds explore gradually, and consistent fresh water gets remembered.
Timing your setup helps. Spring and especially fall migration push large numbers of unfamiliar birds through unfamiliar yards, and migrating birds actively seek water stopovers. A new bath filled during a migration window often earns visitors within days.
If weeks pass with zero interest, work through this troubleshooting list. Each row maps directly to a complaint we found repeated across multiple forums.
| Symptom | Likely Cause | Fix |
|---|---|---|
| Nobody visits at all | No moving water; bath invisible from above | Add a dripper or solar fountain; move to a more open spot |
| Birds approach but won’t land | Slippery bottom or water too deep | Add rough rocks; reduce depth to 1-2 inches |
| Birds land but leave instantly | Feeling exposed to predators | Create clear sightlines and nearby escape cover |
| Used only occasionally | Warm, stale, or dirty water | Change water daily; shift to morning shade |
| Only pigeons/doves visit | Pedestal height fine but no small-bird footing | Add pebbles and a branch for smaller species’ grip |
One habit change worth adopting: check the bath at dawn. Community observers consistently report peak bathing in the early morning before heat sets in, so a lunchtime glance can miss hours of heavy traffic.
Since we write for photographers, here’s the angle no other guide mentions: a reliable bird bath is the most predictable wildlife studio you’ll ever build. Birds return to the same water source daily at dawn, which means repeatable subjects, angles, and light. Set your camera on a tripod inside with a window as cover, and you’ll get closer frames than any stakeout at a distant pond.
Once birds start arriving regularly, you may want optics to ID the warblers passing through. Our guide on how to choose binoculars for bird watching covers magnification and close-focus specs that matter at backyard distances. Families setting up their first bath-station might prefer our picks for the best binoculars for kids, so younger birders can watch visitors up close.
Put clean, rough-textured rocks or pebbles in the bottom of a bird bath. They create a non-slip surface for gripping, build up graduated depth so edges stay around 1 inch, and give nervous birds a landing spot. Avoid polished stones and never add sand, soap, or chemicals.
Yes. Rocks give birds secure footing on slippery bottoms, raise the floor of overly deep basins toward the ideal 1-2 inch range, and provide a dry perch partway into the water. Rough, unpolished stones work best because birds need texture to grip.
Expect the first visitors within a few days to two weeks in most yards. Birds discover new water sources gradually as they patrol the neighborhood. Adding moving water, keeping it fresh daily, and timing setup with spring or fall migration all shorten the wait.
No color reliably attracts more birds. Neutral tones such as gray, tan, and pale blue blend naturally and suit most yards. What draws birds from a distance is the sparkle and sound of moving water, not basin color.
Place a bird bath in partial shade. Shade slows evaporation, keeps water cooler, and limits algae growth, while full sun makes water hot and stale fast. Keep the site open with clear sightlines and position it 10-15 feet from trees or shrubs rather than beneath them.
Keep a bird bath at least 10 feet from bird feeders. Seed hulls and droppings from feeder traffic foul bath water quickly and increase disease risk. Separate placement keeps the water clean and gives bathing birds calm space.
Setting up a backyard bird bath comes down to four commitments: partial shade with nearby cover, one to two inches of water with rocky footing, daily freshness, and some form of movement. If you want maximum species variety, go ground level with a dripper. If cats prowl your block, choose a weighted pedestal bath in the open. And if your first goal is simply enjoying the show from your kitchen window, any bath placed per the steps above will deliver within weeks.
Fill it, keep it fresh, and let the birds do the discovering. By this time next month, 2026 could be the year your yard became the neighborhood’s favorite watering hole. Once regulars settle in, our roundup of the best binoculars under $100 is the sensible next read.