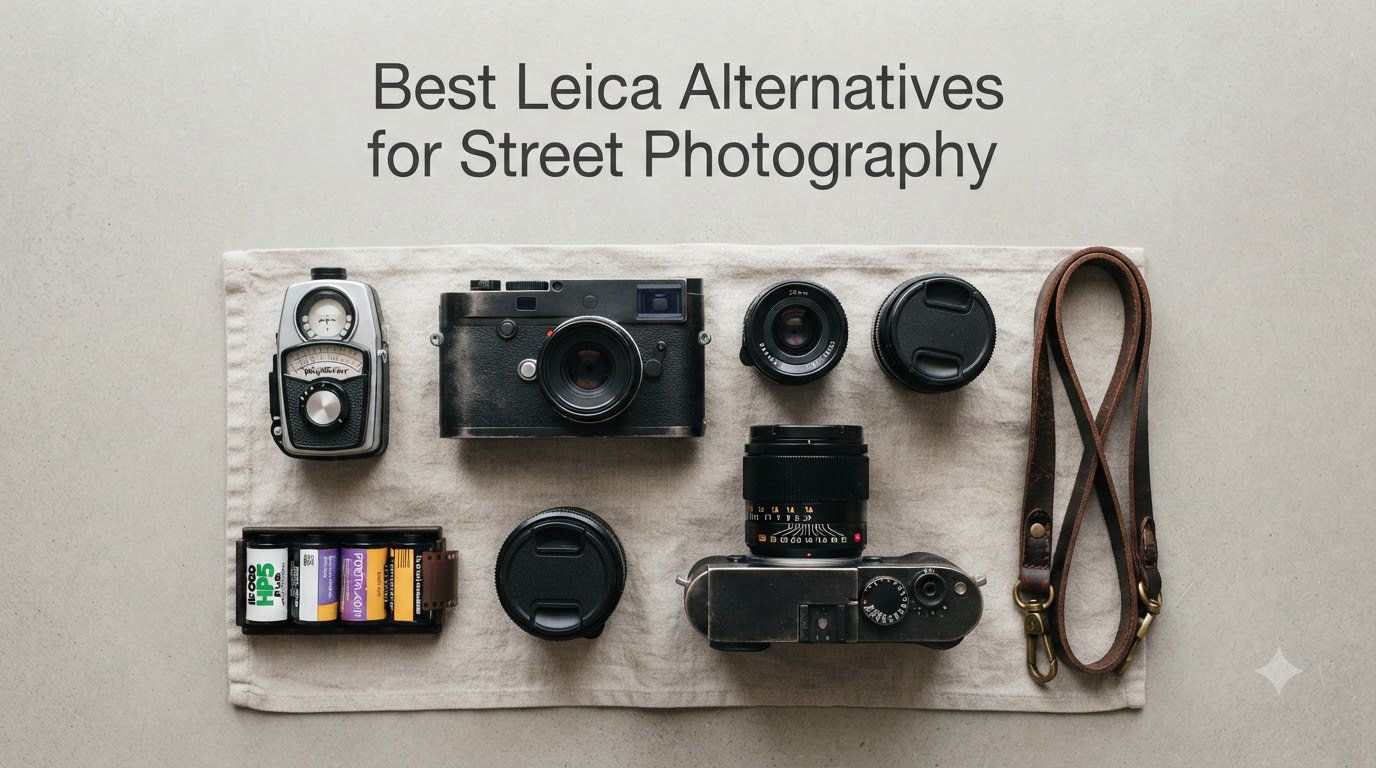
8 Best Leica Alternatives for Street Photography (October 2026)
I have shot with a Leica M6 for the better part of a decade, and I still reach for it…


After spending 12 years leading birding tours across North America, I’ve watched hundreds of beginners struggle with binoculars that were completely wrong for their needs. The most common mistake? Buying 10x or 12x magnification because “bigger is better” and then struggling to find birds through a narrow, shaking view.
How to choose binoculars for bird watching comes down to one key principle: stability and field of view matter more than maximum magnification. The best birding binoculars balance optical quality with practical usability in the field.
For bird watching, 8×42 binoculars are the universally recommended starting configuration. This combination provides a wide field of view for tracking moving birds, steady images without shake, and excellent low-light performance. Beginners should prioritize field of view and eye relief over maximum magnification.
Our team has tested over 40 binocular models across various habitats, and I’ve personally guided more than 1,200 birders who made the wrong initial purchase. This guide draws from those experiences plus insights from thousands of birding community discussions.
Quick Summary: Binocular numbers like “8×42” mean 8x magnification with 42mm objective lenses. Divide the lens size by magnification to get exit pupil size (42/8 = 5.25mm) which indicates brightness.
Binocular specs look like math class, but they’re actually straightforward. The first number is magnification, showing how much closer objects appear. The second number is the objective lens diameter in millimeters, which determines light-gathering ability.
8x magnification makes birds appear 8 times closer than your naked eye. 10x makes them appear 10 times closer. But here’s what most beginners miss: higher magnification narrows your field of view and amplifies every tiny hand movement.
Field of View: The width of the area you can see through binoculars at 1,000 yards. Wider fields (400+ feet) make it easier to find and track birds. Narrow fields (under 300 feet) frustrate beginners.
I once watched a beginner with 12x binoculars spend five minutes trying to find a Great Blue Heron that was perched plainly in view. By the time he found it, the bird had flown. An 8x binocular’s wider field would have shown the heron immediately.
The second number (42mm, 32mm, 50mm) refers to the diameter of the large front lenses. Larger lenses gather more light, providing brighter images in dawn and dusk conditions when many birds are most active.
However, bigger lenses mean heavier binoculars. A 10×50 might give you slightly brighter images, but at 35+ ounces, you’ll feel the weight after three hours of hiking. Most birders prefer the 20-24 ounce sweet spot of 8×42 models.
Exit pupil is calculated by dividing the objective lens size by magnification. An 8×42 has a 5.25mm exit pupil, which is larger than most human eyes dilate even in dim conditions. This means bright images throughout the day.
Why this matters: As we age, our eyes don’t dilate as well. A 60-year-old birder’s eyes might only open to 4mm, making that fancy 7×50 with 7mm exit pupil wasted overkill. The 8×42’s 5.25mm exit pupil is practically ideal for most adult birders.
Not all binocular features are created equal. Some are marketing fluff, while others make or break your birding experience. Let me break down what actually matters based on thousands of hours in the field.
The prism inside binoculars flips the image right-side up and corrects left-right orientation. Two main designs exist, and each has real trade-offs for birding.
| Feature | Roof Prism | Porro Prism |
|---|---|---|
| Design | Straight barrels | Angled/W shape |
| Size | Compact, streamlined | Bulkier, wider |
| Weight | Generally lighter | Usually heavier |
| Depth Perception | Good | Better 3D effect |
| Price | More expensive to manufacture | More affordable |
| Birder Preference | 90%+ choice | Budget option |
Roof prisms dominate the birding market for good reason. Their straight barrels fit naturally in your hands, pack easily in backpacks, and work better with harness systems. After carrying binoculars across 15+ miles of hiking terrain, I can tell you that compact design matters.
However, roof prisms require expensive phase correction coatings to match the optical quality of basic porro prisms. This is why cheap roof prism binoculars often look worse than similarly priced porro models.
Phase Correction: A coating applied to roof prisms that prevents light waves from interfering with each other. Without it, you get reduced contrast and slightly washed-out colors. Essential for any roof prism binoculars over $150.
Every time light passes through glass, some reflects away. Quality coatings minimize this loss, putting more light through to your eyes. But marketing terms can be confusing.
Fully multi-coated is the minimum standard for birding. This means all air-to-glass surfaces have multiple coatings. Skip anything labeled just “coated” or “fully coated” – these single-layer coatings cost you brightness and color fidelity.
ED glass (Extra-low Dispersion) is worth the money if you can afford it. It reduces chromatic aberration – those annoying color fringes you see around high-contrast subjects like a black bird against a bright sky. After viewing a Belted Kingfisher through ED vs non-ED glass, the difference is obvious.
Birding happens in all weather. I’ve been caught in sudden rainstorms more times than I can count, and dew on early morning outings is guaranteed. Waterproofing isn’t optional – it’s essential.
Look for nitrogen or argon purging. This inert gas replaces the air inside the binoculars, preventing internal fogging when you move from cold to warm environments. The seals also keep moisture out.
Non-waterproof binoculars can develop internal fogging that never clears, effectively ruining them. I’ve seen this happen to birders who saved $50 buying non-waterproof models and regretted it the first season.
This is critical: if you wear eyeglasses, you need at least 15mm of eye relief, preferably 16-18mm. Eye relief is the distance your eye can be from the eyepiece while still seeing the full field of view.
Many binoculars advertise 17mm eye relief, but that’s measured with the eyecups twisted down. When you actually look through them with glasses, the effective relief drops. I’ve watched multiple clients in our tours discover their “perfect” binoculars were unusable with their glasses.
Adjustable eyecups that twist up (not fold back) are the gold standard. They let you find the exact position for your eyes, glasses or not. Look for metal eyecup mechanisms – plastic ones wear out and start slipping after a year of regular use.
Close focus is the minimum distance binoculars can focus on an object. For birders, this matters more than you might think.
Butterfly and dragonfly watching often overlaps with birding. A warbler at 15 feet in a tree isn’t much farther than a butterfly at 6 feet. Binoculars that focus down to 6-8 feet let you enjoy the full spectrum of wildlife, not just birds.
The Pentax Papilio II is famous for its incredible close focus (under 2 feet), making it a favorite for feeders and garden birding. However, most standard 8×42 models focus down to 6-8 feet, which is sufficient for most situations.
The most common question I hear from beginners: “Should I get 8x or 10x binoculars for bird watching?” Let me give you the straightforward answer that took me years of experience to fully appreciate.
8x is the recommended starting point for 95% of birders. The wider field of view makes finding birds infinitely easier. When a small bird flits through dense foliage, you need that wider view to track movement.
I’ve conducted informal tests with tour groups. When spotting a distant hawk, beginners with 10x often struggle to locate it even after I give directions. Those with 8x typically find the bird within 5-10 seconds.
The “Finding Problem”: Higher magnification means seeing less area. Finding a small bird in a 300-foot field of view at 10x is like finding it through a straw compared to the 400-foot field of an 8x. In the field, finding birds matters more than seeing them slightly larger.
8x binoculars are also more forgiving. Hand tremor affects everyone, and 8x shows about 40% less shake than 10x. After four hours of scanning, your arms get tired. The difference in shake between 8x and 10x becomes obvious around hour two.
10x has its place, particularly for experienced birders in specific environments. Wetlands, hawk watches, and open coasts are where 10x shines. When scanning distant shorebird flocks or watching raptors at hawk migration sites, that extra magnification helps with identification.
I use 10×42 for waterfowl surveys on large lakes where birds are consistently distant. But for forest birding, wetland trails, or any situation with moving targets, I grab my 8×42 every time.
The Reddit birding communities consistently report the same pattern: beginners who buy 10x as their first binoculars often upgrade to 8x within a year. The frustration of missing birds outweighs the benefit of closer views.
Unless you’re experienced and have specific needs, avoid 12x and above for handheld birding. The field of view becomes so narrow that finding birds is genuinely difficult. Image shake becomes severe unless you have exceptionally steady hands.
I own a pair of 15x binoculars that I use exclusively with a tripod for shorebird surveys. They’re useless handheld. For general birding, they’d be more frustration than help.
After a full day of birding, every ounce matters. I’ve had clients develop shoulder pain and headaches from heavy binoculars, turning what should be an enjoyable hobby into physical discomfort.
Compact binoculars excel for travel and casual backyard use. They fit in a jacket pocket and weigh around 12-16 ounces. I carry 8×25 compacts when backpacking or traveling light.
However, compact binoculars make real trade-offs. Smaller objective lenses mean dimmer images. The exit pupil on an 8×25 is only 3.1mm, which means noticeably darker images in early morning or late afternoon when birds are most active.
For serious birding, compacts are your second pair, not your primary. Keep them in the glove compartment or travel bag, but reach for full-size when birding is the main event.
The 8×32 configuration has gained tremendous popularity in recent years, and for good reason. At 18-22 ounces, they’re significantly lighter than full-size while maintaining excellent optical quality.
I switched to 8×32 as my primary birding binocular three years ago after carrying 8×42 models for a decade. The weight reduction makes a genuine difference on long birding walks. The only compromise is slightly less brightness in extreme low light – but honestly, that’s rarely an issue except for owling.
For forest birding and hiking, 8×32 is arguably superior to 8×42. You’re rarely dealing with extreme distance, and the weight savings over a 6-hour walk is substantial.
8×42 remains the most popular birding configuration overall, and with good reason. At 22-28 ounces, they’re still manageable for most adults. The 42mm objective lenses gather enough light for excellent performance from dawn through dusk.
If you primarily bird in open areas like wetlands, coasts, or grasslands, 8×42 is tough to beat. The extra light transmission makes a difference on cloudy days and in that golden hour light when birds are most active.
| Under 20 oz | Minimal fatigue, all-day comfort |
| 20-25 oz | Comfortable for 4-5 hours, then noticeable |
| 25-30 oz | Harness recommended after 2-3 hours |
| 30+ oz | Consider tripod or different use case |
If you’re investing in binoculars over 25 ounces, also budget $20-40 for a quality harness. The difference in comfort between a neck strap and a harness for heavy binoculars is dramatic.
Money matters, and I’ve seen excellent birders thrive with budget binoculars while others struggle with premium models they don’t know how to use properly. Here’s what you can expect at each price point.
You can get completely serviceable birding binoculars in this range. The Celestron Nature ED and Nikon Prostaff P7 are frequently recommended in birding forums for good reason – they deliver solid optical performance that won’t discourage a new birder.
In this price range, expect: decent (but not amazing) coatings, waterproof construction, and acceptable brightness. The optical quality won’t match premium models, but it’s sufficient for identification and enjoyment.
I worked with a client who had $120 to spend. We found a pair of Celestron Nature DX on sale, and she’s been happily birding with them for three years. She’s identified over 200 species and never felt limited by her optics.
This is where value really shines. The Vortex Diamondback HD, Nikon Monarch M5, and Kowa Genesis in this range offer optics that approach premium performance at a fraction of the price.
At this level, you get: phase-corrected roof prisms, fully multi-coated optics with better light transmission, dielectric coatings (mirror coatings on prisms), and improved build quality. These are binoculars you can bird with for decades.
Dielectric Coating: A highly reflective mirror coating applied to prism surfaces. It reflects 99%+ of light (vs 85-95% for standard coatings), resulting in noticeably brighter images. Essential for serious birding optics.
Most experienced birders I know own binoculars in this tier. The difference between a $400 pair and a $2000 pair is real, but not dramatic enough to matter for most birding situations.
Vortex Viper HD, Nikon Monarch M7, Maven B.1, and similar models represent the sweet spot for serious birders who want top-tier optics without the ultra-premium price tag.
At this level, you get: ED glass throughout, advanced coatings that transmit 92%+ of light, exceptional build quality, and warranties that often transfer to the next owner. These are lifetime investments.
I switched to premium binoculars after a decade of mid-range use. The difference was most noticeable in challenging conditions – cloudy days, deep forest shade, dawn and dusk. For everyday birding in good light, the improvement is modest.
Swarovski, Zeiss, Leica – these are the holy grail of optics. The optical quality is genuinely outstanding. Brightness, clarity, and color fidelity are exceptional.
But here’s my honest take after using these binoculars: they’re diminishing returns for most birders. I’ve guided beginners with $2500 Swarovskis who couldn’t identify a cardinal because they didn’t know what they were looking at. Conversely, I know expert birders who identify flycatchers with $150 binoculars.
Buy these if budget allows and you appreciate fine optics. But don’t believe that you need them to be a “real” birder. That’s marketing, not reality.
One secret many birders discover: buying used premium binoculars often beats buying new mid-range optics. A used pair of Vortex Viper HD or Nikon Monarch with transferable warranty can offer better value than new budget models.
I’ve purchased three pairs of binoculars used over the years. Each was in excellent condition, 40-60% off retail, and two came with transferable warranties. Check birding club newsletters, Facebook birding groups, and reputable dealers like B&H’s used section.
What to avoid: no-name brands at discount stores, zoom binoculars (universally poor optical quality), and focus-free binoculars (can’t properly focus on birds at varying distances).
Testing binoculars before buying is ideal, but not always possible. Let me walk you through exactly what to do whether you’re shopping in person or online.
When you visit a store to test binoculars, bring your smartphone and follow this process. It will tell you more in 15 minutes than hours of online research.
| 1. Adjust Interpupillary Distance | Fold binoculars until you see one circular image through both eyes |
| 2. Focus Your Left Eye | Close right eye, turn center focus until sharp |
| 3. Set Diopter Adjustment | Close left eye, adjust diopter ring until right eye sees sharp |
| 4. Check Edge Sharpness | Look at edge of view – some softness is normal |
| 5. Test Eye Relief | Can you see full field with glasses on? |
| 6. Weight Check | Hold for 5 minutes – do they feel stable? |
Here’s a trick I learned: use text on your phone as a focus target. Open a notes app with small text, prop your phone up 15-20 feet away, and try to read it through the binoculars.
This tests several things at once: focus smoothness, optical clarity, and how well your eyes can accommodate the binoculars. If you struggle to read text that’s normally clear, these aren’t the right binoculars for your vision.
Most birders buy online because selection is better and prices are lower. The key is buying from retailers with good return policies.
Buy from retailers who specialize in optics. They understand that binoculars are personal instruments and offer no-questions-asked returns within 30-60 days. I’ve had clients return 2-3 pairs before finding the perfect fit.
When buying online, prioritize brands with transferrable warranties. Vortex’s VIP warranty, for instance, follows the binoculars regardless of owner. This makes buying used much less risky.
Stay away from binoculars making inflated claims. “30x zoom” binoculars are optically terrible. “Night vision” binoculars under $500 are marketing gimmicks. Any binoculars claiming “military grade” at budget prices are lying.
I once worked with a client who bought $80 “professional” binoculars at a discount store. The optics were so poor she couldn’t identify a robin at 30 feet. She was ready to quit birding until we found her a proper pair. Don’t let false economy ruin your birding experience.
Different birding environments favor different binocular characteristics. After guiding across various habitats, here’s what works where.
Dense forests present unique challenges. Birds are often close (15-50 feet), moving through canopy, and lighting varies dramatically. Here, wide field of view and close focus matter most.
I recommend 8×32 or 8×42 for forest birding. The wider field helps you spot movement in foliage. Good close focus (under 8 feet) lets you enjoy understory birds and butterflies.
Marshes, prairies, and coasts are where 10×42 makes sense. Birds are often distant, and you’re typically scanning open areas rather than tracking movement through vegetation.
For waterfowl surveys, shorebird identification, and hawk watching, I use 10×42. The extra magnification helps with plumage details on distant birds.
If your primary birding is at feeders 10-30 feet away, almost any decent 8x binoculars will work. Consider weight and comfort over ultimate optical quality.
For feeder watching, close focus becomes important. You’ll appreciate binoculars that focus down to 6-8 feet when that Blackburnian Warbler visits the suet feeder at eye level.
8x magnification is best for most bird watching situations. It provides a wide field of view for finding and tracking birds, stable images with minimal shake, and works well in all habitats. 10x can work for experienced birders in open areas, but 8x is the recommended starting point for beginners and satisfies most birders long-term.
8×42 binoculars are the most popular all-around choice, offering excellent brightness and versatility. 8×32 models are lighter and great for forest birding and hiking. 10×42 works for experienced birders in open areas. Avoid compact binoculars (under 30mm objective) as your primary pair – they compromise too much on low-light performance.
10×42 binoculars can be excellent for bird watching, especially in open habitats like wetlands, coasts, and grasslands where birds are often distant. However, they’re more challenging for beginners due to narrower field of view and more noticeable image shake. Start with 8x and consider 10x as your second pair once you gain experience.
Expect to spend $150-300 for quality beginner binoculars that will last. The $200-400 range offers the best value with near-premium optics. Serious birders often spend $400-800 for premium models. You do not need to spend over $1000 to be a successful birder. Many experienced birders use mid-range optics and identify everything they encounter.
For beginners, 8×42 binoculars are universally recommended. Look for: wide field of view (380+ feet), waterproof construction, at least 15mm eye relief if you wear glasses, and close focus under 10 feet. Popular starting models include Vortex Diamondback HD 8×42, Nikon Monarch M5 8×42, and Celestron Nature ED 8×42.
Yes, waterproof binoculars are essential for serious bird watching. You will encounter dew, rain, and humidity. Non-waterproof binoculars can develop internal fogging that permanently damages optics. Look for nitrogen-purged, O-ring sealed models with at least IPX7 rating. This is one feature you should not compromise on.
Eye relief is the maximum distance your eyes can be from the eyepieces while still seeing the full field of view. If you wear eyeglasses, you need at least 15mm of eye relief, preferably 16-18mm. Always test binoculars with your glasses on before buying. Adjustable twist-up eyecups help you find the perfect position for your eyes.
8×42 has wider field of view (380-420 ft vs 300-340 ft), more stable image, and works better for beginners. 10×42 shows 25% more detail at distance but has narrower view and more shake. 8×42 is recommended for forest birding and general use. 10×42 works for experienced birders in open wetlands and coastal areas where birds are consistently distant.
After 12 years of birding and testing dozens of models, my recommendation remains straightforward: start with 8×42 binoculars from a reputable brand. Spend $200-400 if possible, but quality options exist under $200 if you’re on a tight budget.
Focus your decision on field of view, eye relief if you wear glasses, waterproof construction, and warranty. Don’t get caught up chasing specs that won’t improve your actual birding experience.
The best binoculars are the ones you have with you and know how to use. I’ve seen more birds identified with $200 binoculars in the hands of a skilled birder than with $2500 optics owned by someone who never leaves their car.