How to Set Eye Relief on a Scope? 2026
When I first mounted a scope on my bolt-action rifle years ago, I skipped the eye relief step and went…

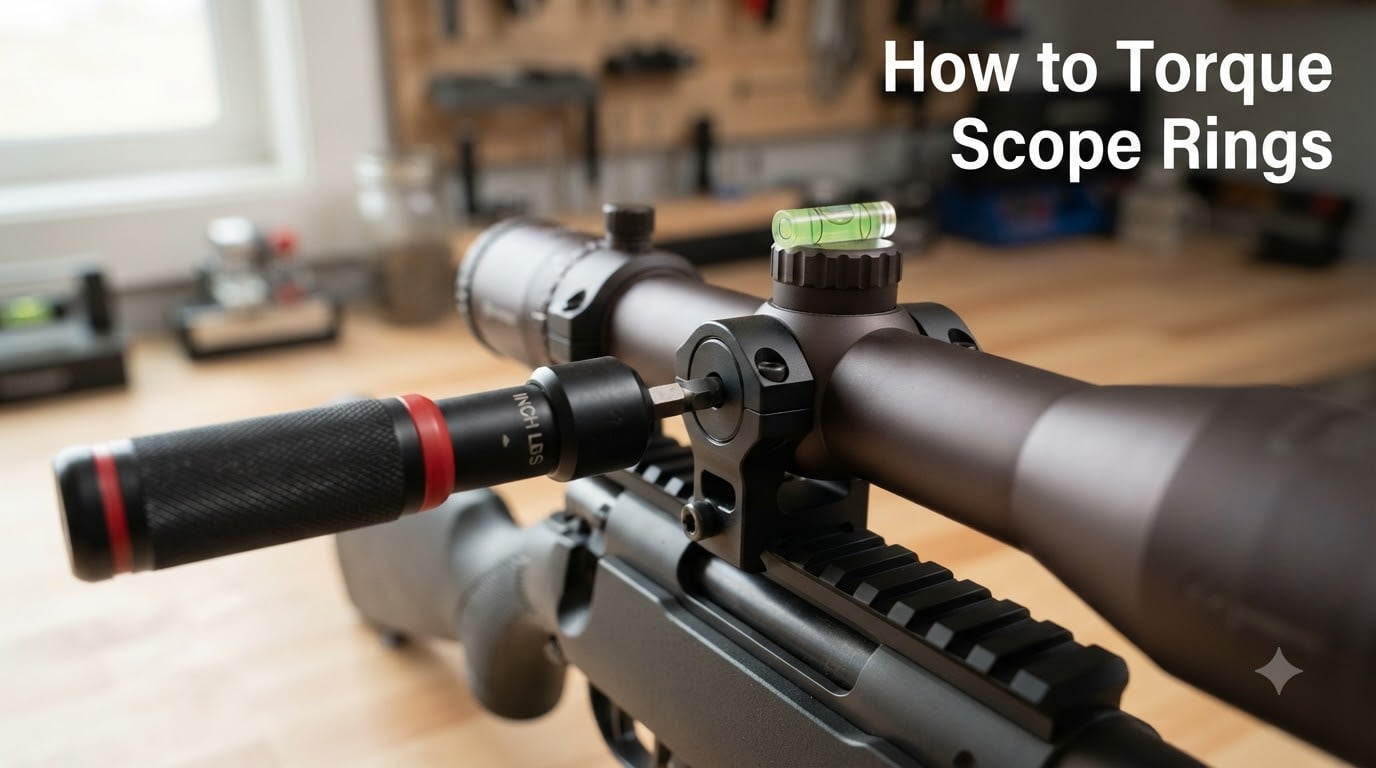
If you have ever pulled a rifle from the safe expecting a tight group and watched your shots walk six inches off target, you already know why learning how to torque scope rings matters. I learned the hard way during my first deer season when a scope slipped two clicks low after a single round of 30-06, costing me a clean broadside shot at 180 yards. The problem was not the scope, not the rifle, and not the ammunition. The problem was a ring cap I snugged down by feel until it stopped turning.
That moment sent me down a rabbit hole of torque specifications, crisscross patterns, and inch-pound wrenches. Today I want to share what I wish someone had told me before I mounted that first scope, so you do not have to discover your own expensive mistake. If you already understand how rifle scope turret systems work, you will recognize that the torque you apply at the rings directly controls whether those turrets hold the zero you dialed in.
Torque is the rotational force you apply to a screw to clamp two parts together. For scope rings, that means the force pulling the top and bottom halves of each ring against the scope tube. We measure it in inch-pounds (in-lbs), not foot-pounds, because the values are small enough that foot-pounds would be awkward fractions.
One inch-pound equals one pound of pressure applied at a one-inch lever arm. Most scope ring cap screws require between 15 and 20 in-lbs, and base screws typically need 25 to 30 in-lbs. These numbers come from manufacturers like Vortex, Leupold, and Nightforce who have tested their rings with thousands of rounds.
The reason consistent torque beats hand-tightening is simple: human hands vary. One day you are rested and squeeze tighter. Another day your hands are cold or sore and you stop early. A torque wrench removes that variation and gives you the same clamp force every time.
The table below covers the most common values. Always confirm with your specific scope and ring manual before final assembly.
These ranges work because scope tubes are thin-walled aluminum or steel tubes that only need enough clamping force to resist recoil. More force does not equal more accuracy. Past a certain point, you are simply deforming the tube.
You only need four tools to do this job right. Each one matters, and skipping any of them is where most mounting errors start.
When picking a scope, you can read about choosing the right scope for your cartridge, but none of that matters if you mount it with the wrong torque. The wrench is the smallest investment that protects the largest one.
Follow this sequence in order. Skipping steps or reordering them is how rifles end up with shifted zeros.
Remove the magazine, lock the action open, and visually check the chamber. This should be obvious, but it is worth saying: never torque screws on a loaded firearm.
Clean the receiver rail. Apply a drop of blue Loctite 243 to each base screw thread. Set the base in place and start each screw by hand. Then torque them in stages to 25 to 30 in-lbs in a star pattern so the base seats evenly.
Place the scope in the bottom ring halves and slide it forward or back until you get full sight picture when you mount the rifle normally. Use a small bubble level on the scope tube and on the receiver to confirm the reticle is vertically aligned with the bore.
Place each top ring half and start the cap screws by hand. Tighten them until they just touch the ring bottom, then back off a quarter turn. The scope should still slide slightly with firm hand pressure.
Set your torque wrench to 15 to 18 in-lbs for ring caps. Tighten each screw to half the final value first, then go around again at full torque. Alternate between the front ring and rear ring on each pass so the scope stays centered.
Look through the scope at a plumb line or square target to confirm the reticle is still vertical. Fire 10 to 15 rounds, then recheck torque and re-zero if needed. Rings can settle slightly during break-in.
The crisscross pattern matters because scope tubes are flexible. When you tighten one screw all the way before touching the others, you push the tube to one side of the ring. The opposite screw then has to fight that offset to clamp evenly.
Alternating between opposing screws lets the tube center itself in the ring as each side takes a little more load. By the time you reach final torque, the tube sits in the geometric middle of the ring bore and the clamp force is symmetrical.
I have mounted scopes both ways. The crisscross method consistently produces better groups at 100 yards because the internal erector system stays aligned. A tube twisted even a few thousandths of an inch off-center can introduce point-of-impact shift when you dial elevation or windage.
Over-torquing is the single most common way shooters destroy good optics. The damage is not always visible from outside, which is what makes it dangerous.
A scope that has been over-torqued often shows no external damage but consistently holds a sloppy zero. If your groups are spreading mysteriously and the rings feel tight, suspect over-torque damage before suspecting the ammunition.
Under-torquing is less common but equally frustrating. The signs are different and easier to diagnose.
Most under-torque problems show up after a few hundred rounds rather than the first magazine. That delay is what tricks shooters into blaming the rings or the mount rather than the torque value.
This is one of the most debated questions in shooting forums, and the answer depends on which screws you are talking about.
For ring cap screws, Vortex officially recommends no thread locker at all. Their reasoning is that the clamping force alone should hold the screw, and thread locker can creep into the scope tube and stain the finish. Most other manufacturers agree.
For base screws that thread into the receiver, a small drop of blue Loctite 243 is widely accepted. Blue Loctite is removable with hand tools and resists vibration. Red Loctite 271 is permanent and generally overkill for scope bases. Skip the red.
Some shooters skip thread locker entirely and rely on torque plus the screw’s own preload. That works on steel receivers. On aluminum receivers, the threads are softer and can loosen over time, so blue Loctite is worth the extra minute.
If you do not own an inch-pound torque wrench, you can still get acceptable results, but you need to accept the limitations.
The most common fallback method is the snug plus quarter-turn approach. Tighten each ring cap screw until it stops, then add one quarter turn past that point. With quality rings and clean threads, this often lands close to the 15 to 20 in-lb range.
The trouble is consistency. Hand strength varies. The same shooter may torque one ring to 12 in-lbs and the other to 22 in-lbs. If you must use this method, finish by mounting the rifle and pushing firmly on the scope while looking through it. Any movement means the rings are too loose.
My honest recommendation is to buy a $25 inch-pound wrench. That single purchase prevents more scope damage than any other piece of gear you can add to your range bag. Skip the coffee for a week if you have to.
Even with the right torque, problems can appear. Here is how to diagnose the usual suspects.
Check ring cap torque first. Then confirm base screws are torqued to spec. If both are correct, suspect ring or base alignment on the rail. A scope can only hold zero if the mount is square to the bore.
Over-torque or scope movement under recoil. Loosen ring caps, clean the tube with alcohol, and re-torque. If the wear is into bare metal, the scope may need service or replacement.
Check that your rings are matched to the scope tube diameter (1 inch or 30 mm). Mismatched rings force the scope to sit at an angle. Also verify the base is seated fully against the receiver rail before tightening screws.
This is almost always torque related. Uneven ring pressure can warp the erector tube enough to shift the zero slightly off the reticle center. Re-torque in the crisscross pattern and re-zero.
Most manufacturers recommend 15 to 20 inch-pounds for ring cap screws and 25 to 30 inch-pounds for base screws. Vortex officially suggests 15 to 18 in-lbs on ring caps. Always check your specific scope and ring manual first, since values vary slightly between brands.
Vortex and most other manufacturers recommend no thread locker on ring cap screws, because the clamping force alone is enough. A drop of blue Loctite 243 on base screws is widely accepted and helps prevent loosening on aluminum receivers. Avoid red Loctite, which can permanently bond screws.
Yes, using the snug plus quarter-turn method. Tighten each cap screw until it stops, then add one quarter turn. This lands near 15 in-lbs on most rings but lacks consistency. A $25 inch-pound torque wrench is a better long-term investment.
Yes, especially if you are mounting expensive optics or shooting precision rifles. A torque wrench removes guesswork, prevents crushed tubes, and ensures the same clamp force every time. Experienced shooters still use one because hand strength varies day to day.
Learning how to torque scope rings is one of those small skills that pays back every time you pull the trigger. A proper 15 to 20 in-lbs on ring caps and 25 to 30 in-lbs on bases, applied in a crisscross pattern, will hold your zero through thousands of rounds without damaging the scope.
Once your optics are mounted correctly, the next step is dialing them in. Our guides on choosing the right scope for your caliber and optics mounting best practices for red dots will round out the rest of your setup. Pick up that torque wrench before your next scope install and your groups, and your wallet, will thank you for 2026 and beyond.