8 Best Microscopes for Insect Collecting (September 2026) Picks
I’ve spent the last three years chasing beetles, springtails, and the occasional confused moth through backyard pitfall traps, and one…

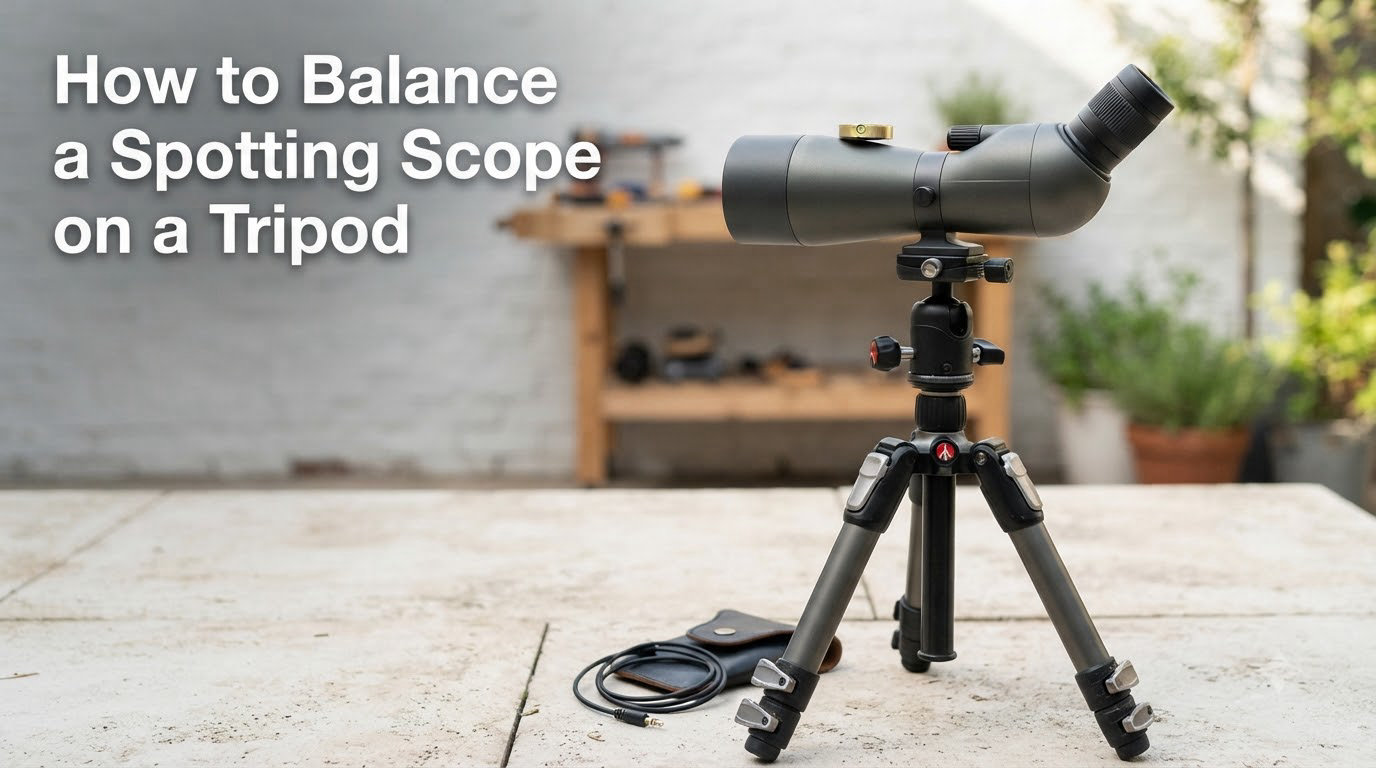
Nothing kills a glassing session faster than a spotting scope that drifts forward the moment you let go of the tripod head. I learned this the hard way on a windy ridge in Montana, watching my scope sag toward the ground every time I loosened the tilt lock. The fix was a 30-second adjustment that changed everything. Below is the exact process I now use to balance a spotting scope on a tripod, plus the small head and plate choices that make the result stick.
Balancing a spotting scope means positioning its center of gravity directly over the tripod head’s tilt axis. When the scope is balanced, tilt adjustments feel smooth and the optic stays put when you release the lock. When it is not, the scope fights you, vibrates at high magnification, and slowly creeps in one direction until you tighten it again. If you have been asking how to balance a spotting scope on a tripod without buying new gear, the answer is almost always yes. A few seconds of plate adjustment is usually all it takes.
A balanced spotting scope is one whose weight is centered directly over the point where the tripod head tilts and pans. Think of the tilt axis as a pivot point. If the scope’s mass sits behind that pivot, the back end drops; if it sits in front, the eyepiece dives toward the ground.
Why does this matter in practice? Three reasons stand out from my own field testing and from forum reports across birding and hunting communities.
For anyone spending real time behind high-magnification glass, a balanced setup is the single biggest upgrade you can make for zero dollars. It also matters for ergonomic comfort. A scope that does not self-rotate keeps your neck and shoulders relaxed during long watches, which is something we cover in our hunting optics buying guide.
This is the core technique I teach every new scope owner. It works for compact 50mm scopes all the way up to 100mm observation models. The total time is under three minutes once you have done it a few times.
A quick sanity check that I use in the field: with the tilt lock open, the scope should hover within 5 degrees of horizontal for at least three seconds. If it does, you are balanced. If it swings fast, you still have work to do.
The head you choose decides what kind of balance is even possible. Three styles cover almost every spotting scope user.
Pan heads use separate knobs for pan and tilt, with the tilt knob controlling up-and-down motion. They are simple, affordable, and a solid pick for most 65mm and 80mm scopes. The downside is that they often lack the fine friction control needed for very heavy or very long scopes.
Fluid heads have a built-in fluid cartridge that creates smooth, controlled movement. They shine with large 80mm to 100mm scopes because the fluid lets you make tiny adjustments at high magnification without jerking the optic. They cost more and weigh more, but for long glassing sessions they are worth it.
Ball heads lock a single ball joint in any direction. They are popular with photographers and can work for lighter scopes, but most birders and hunters avoid them because balancing a long, heavy optic on a ball head is genuinely awkward. The leverage is wrong.
For most readers buying their first spotting scope setup, a mid-weight fluid head or a quality pan head is the right answer. If you already own a scope and want to understand the trade-offs better, our angled vs straight spotting scope comparison explains how head and scope geometry work together.
The plate is the small metal piece that screws into the bottom of your scope. There are two common setups, and the difference matters for heavier scopes.
Standard quick release plate. This is the small Arca-Swiss or proprietary plate that comes with most tripod heads. It is plenty for compact scopes and for most 65mm models with a straight, centered tripod foot. The screw sits roughly under the scope’s center of gravity already, so balance is easy.
Balance rail. A balance rail is a longer plate with a sliding clamp that lets you move the scope forward or backward over a range of several centimeters. It is genuinely useful when a scope has a tail-heavy design (heavy eyepiece assembly, or a camera mounted on the eyepiece for digiscoping). Without a rail, you cannot move the scope far enough forward to find the true balance point.
Forum users on BirdForum and Reddit’s r/longrange agree on a clear rule of thumb. If your scope is in the 50mm to 65mm class, a standard plate is all you need. If you own an 80mm or larger scope, or if you attach a camera for digiscoping, a balance rail saves you a lot of frustration.
One often-overlooked detail: the screw that attaches the plate to the scope is either 1/4 inch or 3/8 inch. Most modern spotting scopes use 1/4-20, but a few European models use 3/8. Check your scope’s manual before buying plates or rails. The wrong thread simply will not fit, and forcing it strips the mount.
Spotting scope size affects balance more than almost any other factor. Heavier, longer optics create more leverage against the tripod head, which is why a setup that feels perfect on a 65mm scope can feel twitchy when you upgrade to an 85mm.
Compact scopes (50mm to 65mm objective). These are short, light, and almost always balance easily on a standard plate. Even cheap tripod heads handle them well. The Nikon Fieldscope ED50 we reviewed is a great example of a scope that practically balances itself.
Mid-range scopes (65mm to 80mm). This is the most common class, including popular 20-60×80 models like the Gosky 20-60×80 ED. Balance is achievable with a standard plate but may require careful positioning. A fluid head starts to pay off here, especially at the high end of the magnification range.
Large scopes (85mm and up). Anything in this range is long, heavy, and tail-heavy due to the big objective lens. A balance rail is the right tool. Pair it with a heavy-duty fluid head rated for at least 10 to 15 pounds. Anything less will struggle to hold the scope steady at 60x.
Most guides stop at horizontal balance. That is a mistake, because most real glassing happens at an angle. When you tilt the scope up to look at a hillside or down into a valley, the center of gravity shifts relative to the tripod head.
Picture the scope’s mass as a weight on a lever. As you tilt the head up, that lever becomes longer in the direction gravity pulls. Even a perfectly balanced horizontal setup can drift forward when the scope is pointed at 60 degrees or more.
The fix is simple. Repeat the sliding test from step three with the scope tilted at your steepest common viewing angle. If you glass mostly uphill, balance with the scope pointed up. If you spend more time looking down into canyons or ravines, balance with the scope pointed down. A setup balanced for horizontal use will fail on a steep angle, and a setup balanced for a 45-degree angle is the best compromise for mixed terrain.
Hunters who glass from below ridges especially notice this. Forum reports from Western hunting communities confirm that the most common balance complaint in the field is forward drift when the scope is angled up, and the fix is always the same: balance at the angle you actually use.
Even with good technique, things go wrong. Here are the issues I see most often and how to fix them.
The scope tilts forward as soon as you release the lock. The plate is too far back. Slide it forward 5 to 10 millimeters and retest.
The scope tilts backward or the eyepiece falls. The plate is too far forward, or your scope is tail-heavy. Try sliding the plate backward first. If that fails, switch to a longer balance rail.
The scope spins on the plate. The plate clamp is not fully tightened, or the plate’s rubber pads have worn smooth. Re-tighten, and if spinning continues, add a thin piece of gaffer tape between the plate and the scope foot for extra grip.
Excessive vibration at high magnification. Balance is only part of the answer. A tripod that is too light, or legs that are not locked out fully, will wobble no matter how well you balance the scope. Add weight to the tripod’s center column hook, and make sure each leg section is firmly locked before fine-tuning balance.
The scope creeps no matter what you do. Your head may simply be under-rated for the scope’s weight. Check the head’s stated load capacity and compare it to your scope’s actual weight including any eyepiece or camera. A head at 80 percent of its rated capacity will struggle to hold a heavy scope still.
Loosen the tripod head’s tilt lock and slide the quick release plate forward or backward until the scope stays roughly level on its own for two to three seconds. Then tighten the tilt lock. A balanced scope steadies itself with minimal lock pressure and shows far less vibration at high magnification.
Screw a compatible quick release plate into the spotting scope’s tripod foot on the bottom of the body. Slide the plate into the tripod head’s clamp until it clicks or seats firmly. Make sure the plate screw matches the scope’s thread, which is 1/4 inch on most modern models and 3/8 inch on some European brands.
For most users, a carbon fiber tripod with a fluid or quality pan head rated for at least 10 pounds of payload is the right answer. Compact scopes work fine with lighter pan heads, while 80mm and larger scopes need a fluid head for smooth control at high magnification. Match the tripod’s load rating to your scope’s weight plus any eyepiece or camera.
Your scope’s center of gravity sits behind the tripod head’s tilt axis, which means gravity pulls the eyepiece end down whenever the tilt lock is loose. Slide the quick release plate forward toward the objective lens until the scope holds level without help. If a standard plate does not give you enough travel, upgrade to a longer balance rail.
Learning how to balance a spotting scope on a tripod is one of those small skills that pays back every time you go outside. The whole process takes under three minutes once you have the hang of it, and the result is a setup that feels lighter, looks steadier, and lets you glass longer without fatigue.
If you take one thing away, take this: do your final balance test at your highest common viewing angle, not just at horizontal. That single change fixes more drift problems than any other adjustment. Pair it with a quick recheck before each session, and your scope will stay exactly where you point it for years to come.