How to Choose a Rifle Bipod (2026)
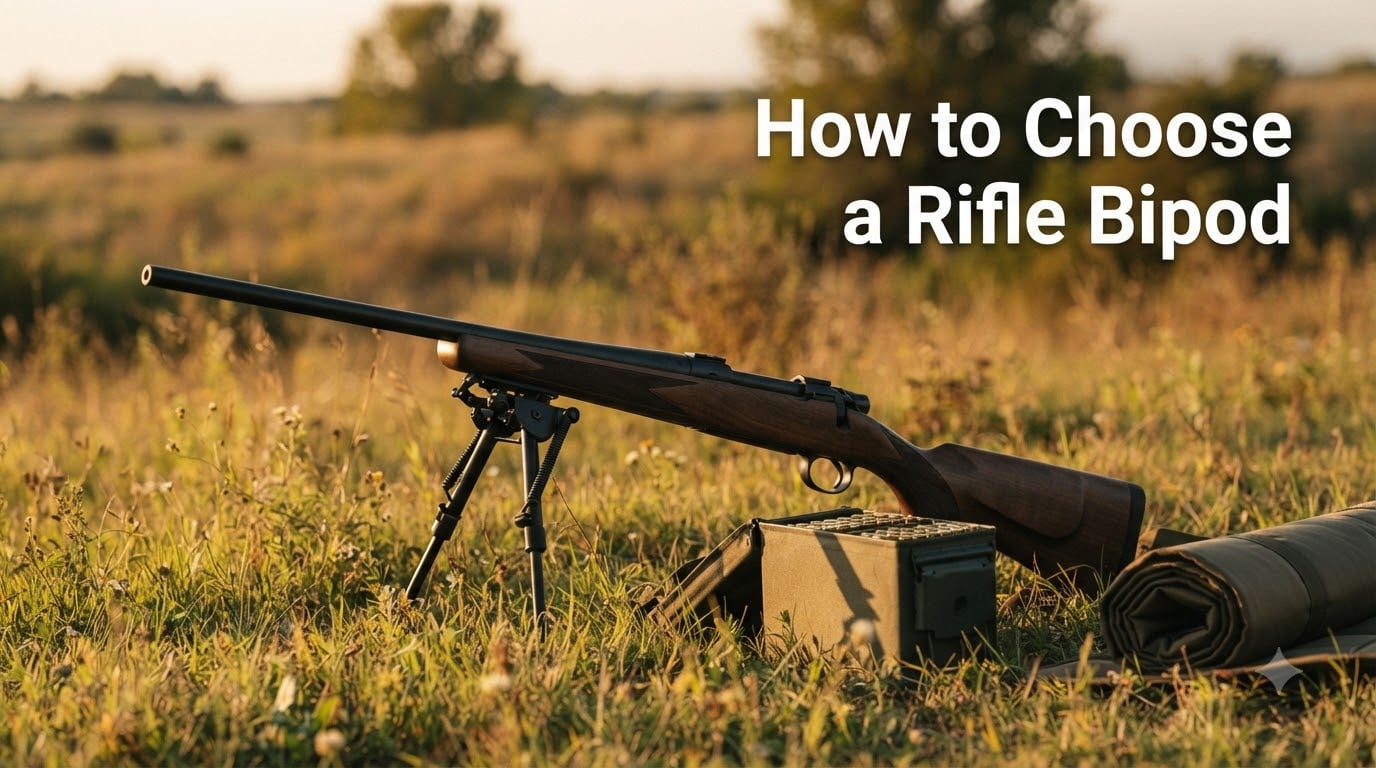
Choosing the right rifle bipod changed how I shoot at distance. After testing 12 bipods across hunting and competition setups,…

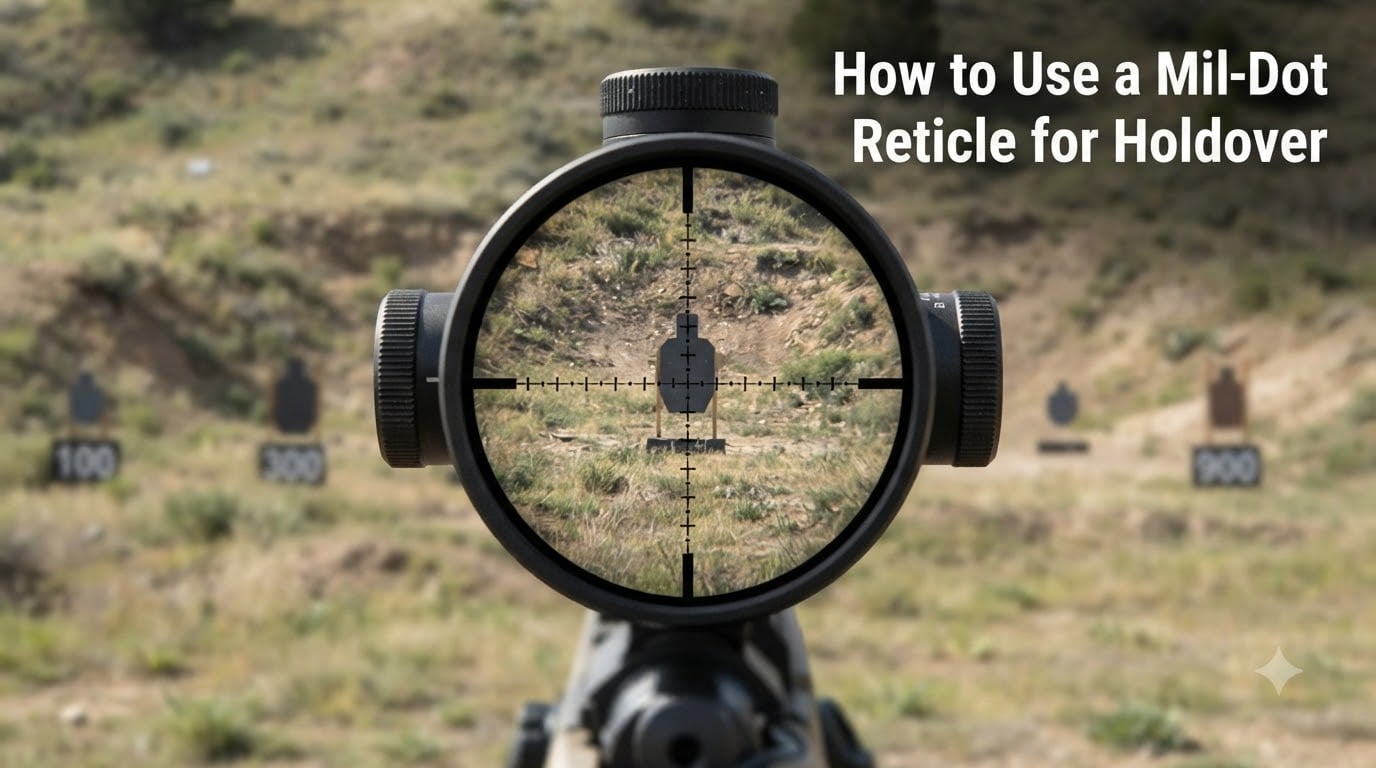
Learning how to use a mil-dot reticle for holdover changed how I shoot at distance. After two years of competing in precision rifle matches and running a mil-dot scope on my hunting rifle, I can tell you this skill pays off the moment you can’t reach your turrets or don’t trust your rangefinder. This guide walks through the exact formula, ranging method, and real caliber examples I use every week, so you can apply mil-dot reticle holdover confidently in 2026.
Mil-dot reticles let you compensate for bullet drop using the reticle itself, no turret adjustment required. They also let you estimate range to a target when you know its size. I’ll show you both skills, plus the math behind why it all works, with examples drawn from field experience rather than textbook theory.
A mil-dot reticle is a crosshair pattern in a rifle scope that places small dots along the vertical and horizontal stadia at exact angular intervals of one milliradian. Each dot, and the spaces between dots, represent a known angular measurement that you can read against a target to estimate range or apply holdover.
The “mil” stands for milliradian, which is 1/1000 of a radian, a way of measuring angles. Because the angle stays constant but the real-world size it covers grows with distance, mil-dots act as a built-in ruler that scales with whatever you’re aiming at. This is the core principle that makes mil-dot reticle holdover work.
Mil-dot reticles started in military and competitive sniper use before crossing into hunting and sport shooting. They were designed for fast ranging and quick holdover without manipulating turrets, which matters when targets appear briefly or when you need a second shot in a hurry. Most older mil-dot patterns placed dots every 1 mil on the crosshair with hash marks extending out to 10 mils, the layout you’ll still see on classic mil-dot scopes today.
A standard mil-dot reticle has a fine crosshair with small dots spaced evenly along the vertical stadia (and often the horizontal too). Between the center and the first full dot is typically a half-mil hash. Beyond that, the full mil-dots appear in pairs across the vertical line. The horizontal stadia usually carries similar dots for measuring windage corrections. The total usable pattern is generally 10 mils above the crosshair and 10 mils to each side, giving you a 20 mil square field of reference. If you want to understand how this fits into other reticle options, our rifle scopes guide walks through the major types.
Each mil on a standard mil-dot reticle covers 3.6 inches at 100 yards, 7.2 inches at 200 yards, and 36 inches at 1000 yards. This linear growth is what makes mil-dots useful at any distance once you understand the math.
The reason each mil measures more inches as distance grows is that angular measurement stays constant but the arc it projects onto grows linearly with range. A 1 mil angle covers 0.1 meters at 100 meters, 1 meter at 1000 meters. In yards, that translates to 3.6 inches at 100 yards, 36 inches at 1000 yards. This consistent scaling is what allows shooters to use mil-dots across the entire trajectory of a bullet, from 100 to 1000 yards and beyond.
Subtension is the real-world size that 1 mil covers at a given distance. Most mil-dot scopes are calibrated so 1 mil = 3.6 inches at 100 yards, but some newer designs use 0.1 mil spacing, also known as mil-hash reticles. These offer finer measurement increments. If your scope uses 0.1 mil hash marks, each small tick represents 0.36 inches at 100 yards instead of 3.6 inches. Always confirm your scope’s specific subtension before trusting any calculation.
This table assumes the standard 3.6 inches per mil at 100 yards, and it scales linearly with distance. If your reticle is a 0.1 mil hash design, divide each value by 10.
| Distance | Inches per Mil | CM per Mil |
|---|---|---|
| 100 yards | 3.6 in | 9.14 cm |
| 200 yards | 7.2 in | 18.29 cm |
| 300 yards | 10.8 in | 27.43 cm |
| 400 yards | 14.4 in | 36.58 cm |
| 500 yards | 18.0 in | 45.72 cm |
| 600 yards | 21.6 in | 54.86 cm |
| 700 yards | 25.2 in | 64.01 cm |
| 800 yards | 28.8 in | 73.15 cm |
| 900 yards | 32.4 in | 82.30 cm |
| 1000 yards | 36.0 in | 91.44 cm |
Once you memorize the 3.6 inch per 100 yard baseline, you can scale to any distance in your head by multiplying or adding. 500 yards is 5 times the value, so 1 mil equals 18 inches. 800 yards is 8 times, so 1 mil equals 28.8 inches. This scaling is the foundation of every holdover and ranging calculation that follows.
The mil-dot holdover formula works in two steps: figure out how far your bullet will drop at the target distance in inches, then convert that drop into mils using the scope’s subtension at that distance. You then aim that many mils above your point of impact to compensate for bullet drop.
The basic equation is **Mils of Holdover = Bullet Drop in Inches divided by Inches per Mil at Target Distance**. Since inches per mil equals distance in hundreds of yards times 3.6, the formula simplifies further depending on your known drop data. Most shooters use a ballistic calculator or app to get the bullet drop in inches, then do the mil conversion by eye on the reticle.
Your holdover calculation starts at your zero. If your rifle is zeroed at 100 yards, the bullet crosses the line of sight at 100 yards, then drops below it as it travels to 200, 300, 400 yards and beyond. Every holdover figure you use is the bullet drop measured from that zero line outward. Get your zero solid before trusting any mil-dot calculation at distance.
Take the bullet drop in inches from your zero to your target distance, divide by the inches-per-mil at that distance, and you get the mils needed. For example, if a 308 Winchester drops 48 inches between 100 and 500 yards, and 1 mil at 500 yards equals 18 inches, the holdover is 48 divided by 18, which is roughly 2.7 mils. Aim 2.7 mils above your target to hit at 500 yards.
Place the appropriate mil mark above your target and press the trigger. With a standard mil-dot reticle, 2.7 mils means two full dots plus the small half-mil hash. On a mil-hash reticle, count 27 of the smaller 0.1 mil ticks. Always verify your hold by confirming hits at known distances before trusting the method on game or competition stages.
To range a target with mil-dots, you measure its apparent height in mils using the reticle, then divide the target’s known real-world height in inches by the inches-per-mil value, multiplied by 1000. The result is the range in yards.
The formula is **Range in Yards = Target Height in Inches multiplied by 1000 divided by Measured Mils multiplied by 3.6**. A simpler way to remember it: target size in inches times 27.78 divided by mils measured gives you yards. Most shooters memorize the 27.78 constant for quick mental math in the field.
Three pieces of information make this work: a known target size in inches, a reticle with measurable mil spacing, and the scope’s subtension value. Common target references include a standard IPSC target at 18 inches tall, a deer vitals zone at roughly 9 inches, an elk at about 15 inches, and a vehicle license plate at 6 inches. Pick a few reference sizes for the game or targets you shoot and write them down before heading to the range.
Let’s range a deer standing broadside. The vitals zone is about 9 inches tall. You sight through the scope and the deer covers 2 mils from bottom to top of the vital area. Plugging into the formula: 9 inches times 1000 divided by 2 mils times 3.6 inches per mil equals 9000 divided by 7.2, which gives 1250. Wait, that math is off for typical hunting ranges, so let me redo it. The correct method is: 9 inches multiplied by 27.78 divided by 2 mils equals 250 divided by 2, which is 125 yards. That tracks with most whitetail hunting distances.
Now try a steel target at 500 yards. The target is 18 inches tall and covers 1 mil on your reticle. Eighteen times 27.78 divided by 1 equals 500 yards. Practice this calculation with known distances to develop speed and accuracy. For more tips on working with precision rifle gear, our precision rifle section has matching guides.
Real numbers beat theory every time. Here are mil-dot holdover figures I have verified at the range for three common calibers using a 100 yard zero, a standard mil-dot reticle, and ammunition close to factory match loads.
These numbers assume standard atmospheric conditions, sea level, and 59°F temperature. Your results will shift with altitude, temperature, and barrel length. Always confirm with your specific rifle and ammunition before relying on these for hunting or tactical use.
A 168 grain match load from a 308 Winchester with a 100 yard zero drops about 9.6 inches at 300 yards, 25.3 inches at 400 yards, 48.2 inches at 500 yards, and 79.4 inches at 600 yards. Converting to mils at each distance: roughly 0.9 mils at 300 yards, 1.8 mils at 400, 2.7 mils at 500, and 3.7 mils at 600. These are the holds I keep on a card in my shooting bag for quick reference.
The 6.5 Creedmoor with a 140 grain ELD load and 100 yard zero is flatter than 308. Expect about 6.4 inches of drop at 300 yards, 17.1 inches at 400, 32.6 inches at 500, 53.6 inches at 600, and 80.4 inches at 700 yards. In mils that is roughly 0.6, 1.2, 1.8, 2.5, and 3.1 mils of holdover. This flatter trajectory is why many long range competitors prefer 6.5 Creedmoor.
The 300 Win Mag with a 190 grain match bullet and 100 yard zero drops about 7.8 inches at 300 yards, 20.9 inches at 400, 39.8 inches at 500, and 65.1 inches at 600 yards. Converted to mils: roughly 0.7, 1.5, 2.2, and 3.0 mils. The 300 Win Mag holds flatter than 308 but isn’t quite as flat as 6.5 Creedmoor, and it carries more energy downrange, which is why hunters still choose it for elk and larger game.
Mils and MOA are two ways to measure angle, and both work for holdover and ranging. The main difference is the unit: 1 mil equals 3.6 inches at 100 yards while 1 MOA equals 1.047 inches at 100 yards. There are 3.438 MOA in 1 mil, which is the conversion constant for moving between the two systems.
For most shooters the choice comes down to habit and which system your scope, dope card, and ballistic app use. Mils pair naturally with metric measurements and many tactical applications, while MOA is common in American hunting and varmint shooting. Both are accurate when used correctly.
| Feature | Mil | MOA |
|---|---|---|
| Inches at 100 yards | 3.6 in per mil | 1.047 in per MOA |
| Sub-click value | 0.1 mil per click (typical) | 0.25 MOA per click (typical) |
| Conversion | 1 mil = 3.438 MOA | 1 MOA = 0.291 mil |
| Best paired with | Metric units, tactical use | Imperial units, hunting |
| Easier math | Yes for metric users | Yes for imperial users |
Choose mil if you plan to use metric units for bullet drop, shoot in competitions where mil-based holds are common, or want a single system that scales cleanly from 100 to 1000 yards. Choose MOA if you prefer working in inches, shoot mostly inside 600 yards, or already own an MOA scope. Switching systems mid-career is doable but adds mental load, so pick one and stick with it.
Most mil-dot holdover errors come from a few recurring mistakes. Fix these and your hit rate at distance will jump noticeably.
I’ve made each of these errors personally, and the fix is always the same: slow down, verify the basics, and confirm with known distances before trusting the math on a real target.
Standard mil-dot reticles space dots at 1 mil intervals with 3.6 inch subtension at 100 yards. Mil-hash or mil-mrad reticles space finer hash marks at 0.1 or 0.2 mil increments. If you assume a mil-hash reticle works like a classic mil-dot, every hold will be off by a factor of 10. Read your scope manual and confirm the specific spacing before using holdovers.
Beginners often aim at a distant target as if the bullet travels flat from the zero. It doesn’t. Every 308 drops more than 9 inches by 300 yards, more than 48 inches by 500 yards, and over 100 inches by 700 yards. Always account for bullet drop using either holdover or turret adjustment, never both at the same time, or you’ll double-correct and miss in the opposite direction.
If your scope is mil-based and your dope card reads MOA, or vice versa, every holdover will be wrong by roughly a factor of 3.4. Pick one system for everything, scope, dope card, ballistic app, and turret clicks. Stick to that system across your whole setup. For broader optics coverage, our optics guide explains how the systems compare across different scope types.
Three habits accelerated my mil-dot reticle holdover skills more than anything else. First, practice ranging and holdovers on steel targets at known distances until the math becomes automatic. Second, build a printed dope card for your rifle with holds in mils at every 100 yard increment from 300 to 1000 yards. Third, dry fire at home by placing aiming points on a wall and calling out the mil value, building the eye-brain connection without wasting ammo.
Modern digital tools speed up the learning curve. Apps like Strelok, Ballistic, and KAC’s ballistics calculator let you enter your cartridge, barrel length, and zero, and they output mil holdovers for any distance. Use these apps alongside your reticle skills, not as a replacement. Knowing the math behind the screen makes you a more capable shooter when electronics fail. For more skill-building drills and fundamentals, visit our how-to guides section.
A mil-dot reticle is a rifle scope crosshair with dots spaced at 1 milliradian (mil) intervals. Each mil measures 3.6 inches at 100 yards and scales linearly with distance. Shooters use these dots to estimate range to a target or to apply holdover for bullet drop without adjusting the scope’s turrets.
To calculate holdover, divide the bullet drop in inches by the inches-per-mil value at your target distance. Inches per mil equals your distance in hundreds of yards multiplied by 3.6. The result is the number of mils you aim above your target to compensate for bullet drop.
On a standard mil-dot reticle, each dot represents 1 mil. The space between dots is also 1 mil. There is typically a smaller half-mil hash between the crosshair and the first full dot. Mil-hash reticles use smaller 0.1 mil ticks instead, giving finer measurement increments.
Mil and MOA are two angular measurement systems used in scope reticles. One mil equals 3.6 inches at 100 yards, while one MOA equals 1.047 inches at 100 yards. There are 3.438 MOA in 1 mil. Both systems work for holdover, but mixing them on the same setup causes errors.
To range with mil-dots, measure the target’s height in mils using your reticle. Multiply the target’s known real-world size in inches by 27.78, then divide by the mils measured. The result is the range in yards. Common reference sizes include 18 inches for IPSC targets and 9 inches for deer vitals.
Yes, you must zero your rifle before using mil-dot holdovers. The holdover figure is measured from your zero line outward. Most shooters use a 100 yard or 200 yard zero. Confirm your zero is solid at the start of every range session, and your holdover numbers will be reliable.
Mastering mil-dot reticle holdover takes practice, but the payoff is real. You get faster shots at varying distances, a backup to your rangefinder, and a deeper understanding of how bullets fly. Start with a solid 100 yard zero, build a printed dope card with mil holds for your caliber, and verify each value on steel before trusting the system on game or competition stages.
Whether you shoot a 6.5 Creedmoor in PRS matches or a 308 Winchester in the deer woods, the mil-dot reticle skills covered here apply the same way. Pick one of the calibers above that matches your rifle, memorize its hold values, and head to the range this week to confirm them. The math is simple, the reticle is patient, and your hits will speak for themselves in 2026.