
Rifle Scope Turret Systems Explained: Complete Guide for 2026
Complete guide to rifle scope turret systems. Learn how turrets work, MOA vs MRAD measurements, zeroing procedures, and whether custom…

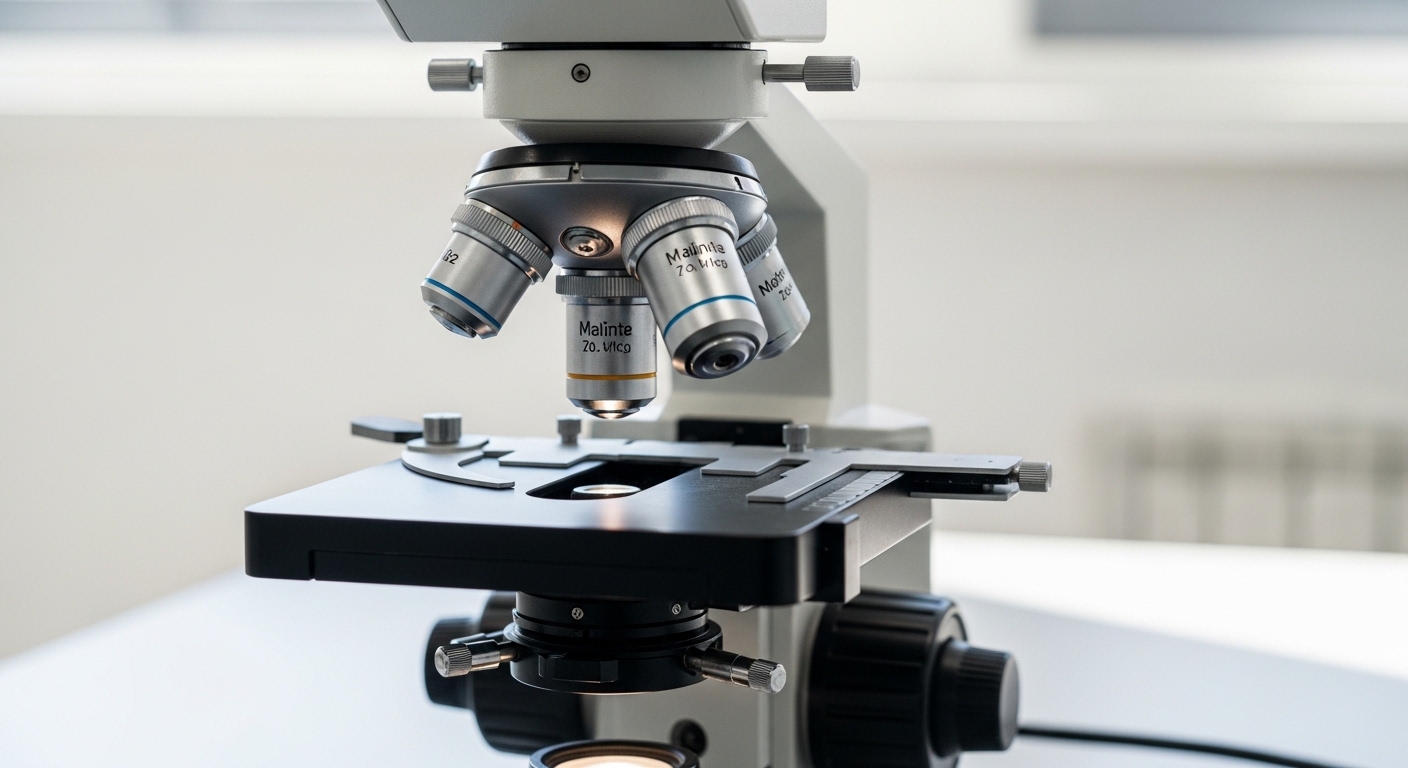
Every microscope enthusiast eventually discovers that image quality depends on more than just the objective lens. After helping dozens of students troubleshoot their microscopy setups, I’ve found that the condenser is often the overlooked component making the difference between mediocre and stunning images. The substage condenser transforms scattered illumination into a precisely controlled light cone that reveals specimen details otherwise invisible to the observer.
A microscope condenser is an optical lens system positioned beneath the stage that gathers light from the illumination source and focuses it onto the specimen plane. This critical component ensures even illumination across the entire field of view while dramatically enhancing resolution, contrast, and overall image clarity. Without proper condenser adjustment, even the most expensive microscope optics cannot achieve their theoretical performance limits.
The condenser’s impact on image quality cannot be overstated. I’ve routinely seen educational microscopes with properly aligned basic condensers outperform premium research instruments with neglected illumination systems. The difference lies in understanding how the condenser works and taking the time to optimize it for each specimen and magnification level.
In this comprehensive guide, I’ll explain exactly what the condenser does, the different types available, how to adjust it properly, and how to troubleshoot common problems that affect image quality.
The microscope condenser collects light from the illumination source and concentrates it into a precise cone that illuminates the specimen evenly. This controlled illumination improves resolution, enhances contrast, and reduces glare, revealing fine details that would otherwise remain invisible.
The condenser serves three essential functions in your microscope’s optical system, each directly affecting the quality of the images you observe.
Light Gathering and Focusing: The condenser lens captures divergent light rays from your microscope’s illumination source and redirects them upward. Think of it as a light funnel that collects scattered photons and concentrates them into a focused beam that passes through your specimen. This focused illumination is far more efficient than scattered light for revealing fine details.
Illumination Control: By adjusting the condenser’s position and aperture diaphragm, you control the angle and intensity of light reaching the specimen. This control directly affects image contrast and the microscope’s ability to resolve fine details. The aperture diaphragm regulates the numerical aperture of the condenser, determining the maximum angle of light that can enter the objective lens.
Resolution Enhancement: The condenser’s numerical aperture (NA) determines the maximum angle of light that can illuminate the specimen and subsequently enter the objective lens. Higher NA condensers enable higher resolution, allowing you to see finer details in your specimens. When the condenser NA matches or exceeds the objective NA, you achieve maximum theoretical resolution for your optical system.
I once worked with a frustrated researcher who couldn’t resolve bacterial flagella despite using a premium 100x oil immersion objective on a research-grade microscope. The problem wasn’t the objective or the specimen preparation—it was her condenser. After five minutes of adjustment, the structures became clearly visible. This experience perfectly illustrates why the condenser deserves as much attention as the objective lens.
The relationship between condenser and objective lens determines your microscope’s resolving power. Resolution—the ability to distinguish two closely spaced objects as separate—depends on the numerical aperture of both the objective and the condenser. When the condenser NA matches or exceeds the objective NA, you achieve maximum resolution for your optical system.
Proper condenser adjustment provides these specific benefits for your images:
Numerical Aperture (NA): A measure of a lens’s ability to gather light and resolve fine details, calculated as NA = n × sin(θ), where n is the refractive index of the medium and θ is the half-angle of the light cone. Higher NA means better resolution. The condenser NA should typically match or slightly exceed the objective NA for optimal performance.
On an upright compound microscope—the most common type for laboratory and educational use—you’ll find the condenser mounted beneath the stage in what’s called the substage position. It’s typically housed in a cylindrical metal assembly that can move up and down using a dedicated focus knob. The condenser sits directly below the specimen slide, with the illumination source (often LED or halogen) positioned underneath it.
This substage position is critical because it allows the condenser to focus light precisely onto the specimen before it enters the objective lens above. The vertical adjustment capability lets you optimize the light cone for different specimen types and objective magnifications.
On inverted microscopes used for cell culture and living specimens, the condenser is positioned above the stage. The light comes from above, passes through the condenser, then through the specimen growing on the bottom of the culture dish. This inverted arrangement requires special considerations for working distance, especially with thick culture vessels.
Most educational and laboratory microscopes include a condenser assembly with these visible components that you should familiarize yourself with:
When starting your microscopy session, position the condenser at its highest point (closest to the specimen). Then lower it gradually while observing your image to find the optimal position for maximum clarity and contrast.
The condenser assembly contains several critical components that work together to control illumination. Understanding each part helps you diagnose problems and optimize your images for different specimens and techniques.
The heart of the condenser is its lens system, which may contain one or multiple optical elements depending on the condenser type and quality. Basic condensers use a single lens, while advanced models incorporate multiple lens elements for better light correction and higher numerical aperture capabilities.
The lens quality directly affects image quality through its ability to correct optical aberrations. Premium condensers correct for spherical and chromatic aberrations, producing cleaner, sharper illumination across the entire field of view. These corrections become increasingly important at higher magnifications and for critical applications like photomicrography.
Condenser lenses are designed with specific free working distance—the space between the top condenser lens and the specimen plane. Standard condensers typically have a working distance of several millimeters, while special long-distance (LD) condensers for inverted microscopes provide extra clearance for thick culture vessels, Petri dishes, and heating stages.
The iris diaphragm, also called the aperture diaphragm, is a circular aperture with overlapping leaves that open and close like the pupil of your eye. Located within or just below the condenser lens, it controls the diameter of the light cone entering the specimen by adjusting the condenser’s effective numerical aperture.
Opening the diaphragm widens the light cone, increasing resolution but potentially reducing contrast. Closing it narrows the cone, increasing contrast but reducing resolution. Finding the right balance is key to optimal imaging for each specimen type and magnification level.
Iris Diaphragm: An adjustable circular aperture that controls the amount and angle of light passing through the condenser. It’s the most frequently adjusted condenser component and essential for controlling image contrast. The aperture diaphragm should not be confused with the field diaphragm, which controls the area of illumination.
The condenser is the complete optical assembly that focuses light, while the iris diaphragm is a component within that assembly that controls light quantity and angle. Think of the condenser as the lens system and the diaphragm as the aperture that regulates that lens. They work together: the condenser positions and focuses the light, while the diaphragm fine-tunes the light cone for optimal contrast and resolution.
It’s important to note that many microscopes also have a field diaphragm, which is separate from the aperture diaphragm. The field diaphragm controls the area of illumination and is typically located on the light source itself, not in the condenser assembly. This distinction becomes crucial when setting up Koehler illumination for critical work.
Microscope condensers come in several types, each designed for specific applications and magnification ranges. The type of condenser you need depends on your microscopy work, the magnifications you typically use, and the level of image quality you require. Understanding the differences between condenser types helps you choose the right one for your needs and optimize your imaging results.
The main difference between condenser types lies in their optical correction for aberrations—imperfections in how lenses bend light. Higher-quality condensers correct for spherical aberration (where light rays through different parts of the lens don’t focus at the same point) and chromatic aberration (where different colors focus at different distances). These corrections become increasingly important at higher magnifications and for critical applications like photomicrography and research.
The Abbe condenser, invented by Ernst Abbe in 1870, is the most common type found on educational and routine laboratory microscopes. Named after its creator who revolutionized microscope optics, this condenser design has stood the test of time and remains the standard for general-purpose microscopy.
An Abbe condenser typically consists of two or three lens elements that provide good illumination for most brightfield applications. The simple yet effective design makes it affordable and durable, which explains its widespread use in educational settings and routine laboratory work.
Abbe condensers typically have a numerical aperture of 1.25 when used with immersion oil, or 0.90 when used dry. They’re excellent for general-purpose microscopy at magnifications up to 1000x, though they lack optical correction for the various aberrations that can affect image quality at the highest magnifications.
Best For: Routine laboratory work, education, brightfield microscopy, general applications where cost-effectiveness is important
Limitations: Not corrected for spherical or chromatic aberrations, which can affect image quality at very high magnifications and for critical applications requiring the highest image quality
Aplanatic condensers represent a significant step up from basic Abbe condensers through their correction for spherical aberration. Spherical aberration occurs when light rays passing through different parts of a lens converge at different focal points, causing a slight blurring of the image. Aplanatic condensers are specially designed to eliminate this problem.
By correcting spherical aberration, aplanatic condensers produce sharper, more uniform illumination across the entire field of view. This correction is particularly noticeable at higher magnifications where even small optical imperfections can significantly degrade image quality.
These condensers typically offer NA values of 1.4 or higher, providing superior light-gathering capability compared to standard Abbe condensers. The higher NA, combined with spherical correction, makes them ideal for applications demanding the highest possible resolution.
Best For: Photomicrography, critical research applications, high-resolution work, situations where image sharpness across the entire field is crucial
Spherical Aberration: An optical defect where light rays passing through the edges of a lens focus at a different point than rays passing through the center. This causes slight blurring and reduces image sharpness. Aplanatic lenses use specially shaped surfaces to eliminate this defect for sharper images across the entire field of view.
Achromatic condensers address a different type of optical imperfection: chromatic aberration. This phenomenon occurs because lenses bend different colors of light by different amounts, causing red and blue wavelengths to focus at slightly different distances. While this effect might seem minor, it can create color fringing and reduce overall image sharpness, especially when using color filters or fluorescence techniques.
Achromatic condensers use special glass combinations that bring two colors (typically red and blue) to the same focal point, dramatically reducing chromatic aberration. This correction is especially important when working with color-sensitive techniques or when accurate color reproduction is essential.
Many high-quality condensers are both aplanatic and achromatic, providing correction for both spherical and chromatic aberrations. These premium condensers deliver the best possible illumination for demanding applications where image quality cannot be compromised.
Best For: Color photography, fluorescence microscopy, techniques using specific wavelengths, applications requiring accurate color reproduction and maximum image clarity
The aplanatic-achromatic condenser represents the pinnacle of condenser design, combining corrections for both spherical and chromatic aberrations in a single optical system. These condensers provide the highest quality illumination possible for demanding microscopy applications.
With NA values typically reaching 1.4 or higher, these condensers maximize resolution while eliminating the optical defects that can degrade image quality. They’re the standard choice for research-grade microscopes and any application where image quality is paramount.
While significantly more expensive than basic Abbe condensers, aplanatic-achromatic models deliver performance that justifies the investment for serious microscopy work. The difference in image quality becomes obvious when viewing challenging specimens or capturing images for publication.
Best For: Advanced research, publication-quality photomicrography, fluorescence and phase contrast techniques, any application demanding the highest possible image quality
Chromatic Aberration: An optical defect where different colors of light focus at different distances from the lens because the lens material refracts different wavelengths by different amounts. This causes color fringing and reduces sharpness. Achromatic lenses use combinations of glasses with different refractive properties to bring two colors to the same focal point, dramatically reducing this problem.
Darkfield condensers are specially designed for darkfield illumination, a technique that produces dramatic images of transparent or unstained specimens. Unlike brightfield condensers that send light directly through the specimen, darkfield condensers illuminate specimens with oblique light from the sides.
Darkfield condensers have a central stop that blocks direct light from traveling straight up through the specimen. Only light scattered or refracted by the specimen enters the objective lens, causing the background to appear dark while the specimen glows brightly against the dark background.
This technique is excellent for visualizing transparent specimens that are nearly invisible in standard brightfield illumination. Live bacteria, diatoms, aquatic organisms, and other unstained samples often show stunning contrast under darkfield illumination.
Best For: Live specimen observation, unstained transparent samples, microbiology, demonstrating motility and morphology of living organisms
Swing-out condensers, also called flip-top condensers, can pivot out of the optical path for low-magnification objectives. This feature addresses a common problem: at very low magnifications (4x and below), the condenser can actually obstruct light rather than improve it.
The issue arises because the illumination cone diameter from the condenser is designed for higher magnifications. When using low-power objectives with large fields of view, the condenser’s focused light cone may be too narrow to evenly illuminate the entire field. Swinging the condenser aside allows the full, unmodified light from the source to reach the specimen, providing better illumination for low-magnification work.
This feature is particularly useful when you frequently switch between scanning (4x) and high-magnification objectives during the same session. Rather than constantly adjusting the condenser height and aperture, you can simply swing it out for low magnification and swing it back in for higher magnifications.
Best For: Multi-magnification workflows, educational settings with frequent objective changes, users who regularly scan specimens at low power before examining details at higher magnifications
Understanding how different condenser types handle optical aberrations helps you choose the right condenser for your applications. The table below compares the main condenser types and their correction capabilities:
| Condenser Type | Numerical Aperture | Spherical Correction | Chromatic Correction | Best Magnification | Typical Use |
|---|---|---|---|---|---|
| Abbe | 0.90 – 1.25 | None | None | Up to 1000x | General use, education |
| Aplanatic | 1.0 – 1.4 | Yes | None | 400x – 1000x | Photography, research |
| Achromatic | 1.0 – 1.4 | None | Yes | 400x – 1000x | Color work, fluorescence |
| Aplanatic-Achromatic | 1.3 – 1.4 | Yes | Yes | 1000x+ | Advanced research |
| Darkfield | Varies | Specialized | Specialized | 100x – 400x | Transparent specimens |
| Swing-Out | Varies | Varies | Varies | 4x – 1000x | Multi-magnification work |
Proper condenser adjustment is essential for optimal image quality, yet it’s a step many microscope users skip or perform incorrectly. Through years of microscopy work and training countless students, I’ve developed this systematic approach to condenser adjustment that consistently produces excellent results.
Follow these steps to achieve basic condenser alignment for routine brightfield microscopy. This procedure works well for most everyday applications and provides a solid foundation for more advanced techniques.
This basic adjustment works well for most brightfield applications at low to medium magnifications. However, for critical work at higher magnifications or when capturing images, proceed to the Koehler illumination setup for the best possible illumination quality.
Koehler illumination is the gold standard for microscope lighting, providing perfectly even illumination with minimal glare across the entire field of view. Named after August Koehler who developed this technique in 1893, it remains the preferred method for critical microscopy, photomicrography, and any application demanding the highest image quality.
The key principle of Koehler illumination is focusing the light source onto the condenser aperture diaphragm plane, which then creates evenly illuminated specimen details. This technique requires both a field diaphragm (on the light source) and an aperture diaphragm (on the condenser), each serving different purposes.
Koehler Illumination: An illumination technique that provides evenly distributed light across the specimen plane with minimal glare. It focuses the light source onto the condenser aperture, creating optimal contrast and resolution. Essential for critical microscopy, photomicrography, and achieving maximum resolution from your optical system.
To set up Koehler illumination, follow this detailed procedure:
Properly set up Koehler illumination dramatically improves image quality. I’ve seen mediocre microscopes produce excellent images simply by optimizing illumination using this technique. The difference is especially noticeable when capturing images or observing challenging specimens with low contrast.
Your condenser settings need to change as you switch objectives. The optimal illumination configuration varies significantly with magnification, and proper adjustment ensures you get the best possible image at each magnification level.
For oil immersion work with high-NA condensers, you may need to place a drop of immersion oil on the top lens of the condenser (where it contacts the slide). This eliminates the air gap between condenser and slide, preventing refraction that would reduce the effective numerical aperture. When using immersion oil on the condenser, both the top condenser lens and the slide bottom must be oiled for the technique to work properly.
Remember that microscope slide thickness matters when using high-NA condensers. Standard microscope slides should be 1.0 mm thick with a tolerance of ±0.05 mm. Thicker slides can prevent the condenser from focusing properly, especially with high-magnification oil immersion objectives that have very short working distances.
After helping dozens of students and researchers with microscopy issues, I’ve identified these common condenser-related problems and their solutions. Most condenser problems are simple to fix once you understand what’s causing the issue.
Cause: Condenser is too low or iris diaphragm is closed too far. This is the most common condenser problem I encounter, especially with users who are unfamiliar with proper condenser adjustment.
Solution: Raise the condenser and open the iris diaphragm gradually. For brightfield microscopy, the aperture diaphragm should be open to about 70-80% for most specimens. Close it only for very transparent specimens that need extra contrast. Remember that the condenser height should be adjusted whenever you change objectives.
Cause: Condenser is misaligned or not centered. This problem often develops over time as the condenser centering screws gradually loosen from normal use and vibration.
Solution: Use the condenser centering screws to center the light cone. If your microscope has a field diaphragm, close it and adjust the centering until the diaphragm image is perfectly centered in your view. This is easiest to see with a 10x objective and the condenser at its highest position.
Cause: Condenser numerical aperture is too low for your objective, or iris diaphragm is closed too much. The condenser NA should match or exceed the objective NA for maximum resolution.
Solution: For high-magnification objectives (40x and above), ensure your condenser NA matches or exceeds your objective NA. Open the iris diaphragm to allow more light angles to enter the specimen. If using oil immersion objectives with NA above 1.0, you may need to use immersion oil on the condenser to achieve full NA utilization.
Cause: Iris diaphragm is too open or condenser is too high. Too much light entering the specimen at high angles can wash out contrast, especially with transparent specimens.
Solution: Close the iris diaphragm slightly to increase contrast. If using Koehler illumination, ensure the field diaphragm is not over-opened—it should illuminate just the field of view with minimal excess light. For very transparent specimens, closing the aperture diaphragm to 50-60% may be necessary.
Cause: Condenser mechanism is dirty, damaged, or at its limit of travel. This problem often develops in older microscopes or instruments in heavy use environments like teaching laboratories.
Solution: Clean the condenser focus mechanism if accessible. Check for mechanical obstructions or debris in the rack-and-pinion gear. If the condenser rack and pinion are damaged, professional repair may be necessary. In some cases, the condenser may simply be at its travel limit and needs to be repositioned.
These are the most frequent errors I’ve seen users make with condensers over years of microscopy work and training. Avoiding these mistakes will dramatically improve your image quality.
When you encounter condenser problems, work systematically through these potential causes. Most issues are resolved with simple adjustment rather than requiring repair or replacement. The condenser is a robust component that rarely fails if maintained properly.
Basic Abbe condensers included with educational microscopes are adequate for routine work at low to medium magnifications. However, as your microscopy skills advance and your applications become more demanding, you may benefit from upgrading to a higher-quality condenser.
Consider upgrading your condenser if you encounter these situations in your microscopy work:
Before upgrading, ensure you’ve optimized your existing condenser. I’ve seen many labs purchase expensive equipment while their basic condensers sat misaligned. Proper adjustment and cleaning of your current condenser may resolve the issues you’re experiencing without requiring replacement.
If you’re considering upgrading your entire microscope system, our guide to the best digital microscopes covers models with premium condenser systems included. Sometimes upgrading the entire microscope makes more sense than replacing individual components.
The microscope condenser is arguably the most misunderstood component of a compound microscope, yet it has perhaps the greatest impact on image quality. Understanding how it works and how to adjust it properly transforms your microscopy experience from frustrating to rewarding.
Throughout this guide, we’ve explored what the condenser does, the different types available, how to choose the right one for your applications, and how to adjust it for optimal image quality. We’ve covered the importance of numerical aperture, the role of the aperture diaphragm, and the critical technique of Koehler illumination.
Remember these key points about microscope condensers:
Whether you’re a student, researcher, or microscopy enthusiast, taking time to understand and optimize your condenser will dramatically improve your images. The condenser deserves as much attention as the objective lens—it’s the foundation of quality microscope illumination and the key to unlocking your microscope’s full potential.
The condenser is an optical lens system positioned beneath the microscope stage that gathers light from the illumination source and focuses it onto the specimen. This focused illumination provides even lighting across the field of view while dramatically enhancing resolution, contrast, and overall image clarity.
The condenser’s primary purpose is to collect and focus light onto the specimen, creating a controlled cone of illumination that maximizes the microscope’s resolving power. By regulating light angles through the aperture diaphragm, the condenser also controls image contrast and reduces glare, making fine details visible that would otherwise be lost.
The condenser is the complete lens assembly that focuses light onto the specimen, while the diaphragm is a component within the condenser system that regulates light. The aperture diaphragm controls the angle and amount of light passing through, while the field diaphragm (if present) controls the illuminated area. Think of the condenser as the lens system and the diaphragm as the aperture that regulates it.
The condenser and diaphragm work together to optimize illumination for each specimen. The condenser focuses light onto the specimen, while the aperture diaphragm adjusts the light cone angle to balance resolution and contrast. This combination allows you to tailor illumination for different specimen types and magnifications, revealing details that would be invisible with uncontrolled lighting.
The condenser gathers light from the microscope’s illumination source and focuses it into a precise cone that passes through the specimen. This focused illumination improves image resolution, enhances contrast, and reduces glare, making fine details visible that would otherwise remain hidden in poor lighting conditions.
On an upright compound microscope, the condenser is located beneath the stage in a movable assembly called the substage. On inverted microscopes used for cell culture, the condenser is positioned above the stage. It sits directly in the light path between the illumination source and the specimen, focused onto the specimen plane through a rack-and-pinion adjustment mechanism.
The condenser is the complete lens system that focuses light onto the specimen, while the iris diaphragm is a component within the condenser assembly that controls the amount and angle of light. The condenser positions and directs light through optical elements, while the diaphragm regulates the light cone for optimal contrast and resolution by adjusting its aperture size.
The condenser focus knob moves the condenser up and down to optimize the focus of light on the specimen. Proper positioning ensures the light cone converges at the correct plane for maximum illumination efficiency and image clarity. It should be adjusted whenever changing objectives to maintain optimal illumination at each magnification level.
The condenser dramatically improves image quality by providing even illumination, enhancing contrast, reducing glare, and enabling higher resolution. Without proper condenser adjustment, images appear dark, flat, and lacking in detail regardless of objective lens quality. The condenser is essential for revealing fine specimen structures and maximizing your microscope’s optical performance.
An Abbe condenser is the most common type of microscope condenser, invented by Ernst Abbe in 1870. It typically consists of two or three lenses providing good illumination for most brightfield applications up to 1000x magnification. While not corrected for optical aberrations, it’s the standard condenser found on educational and routine laboratory microscopes due to its affordability and effectiveness for general use.
To fix a misaligned condenser, first close the field diaphragm if your microscope has one. Use the condenser centering screws to center the diaphragm image in your field of view. Then adjust the condenser height until the diaphragm edges appear sharp. Open the field diaphragm and fine-tune the iris diaphragm for optimal contrast. Recheck centering after changing objectives, as condenser alignment can drift with use.


