10 Best Coyote Hunting Electronic Callers (September 2026)
I spent the last three coyote seasons running electronic callers across open Wyoming wheat fields, frozen North Dakota CRP, and…

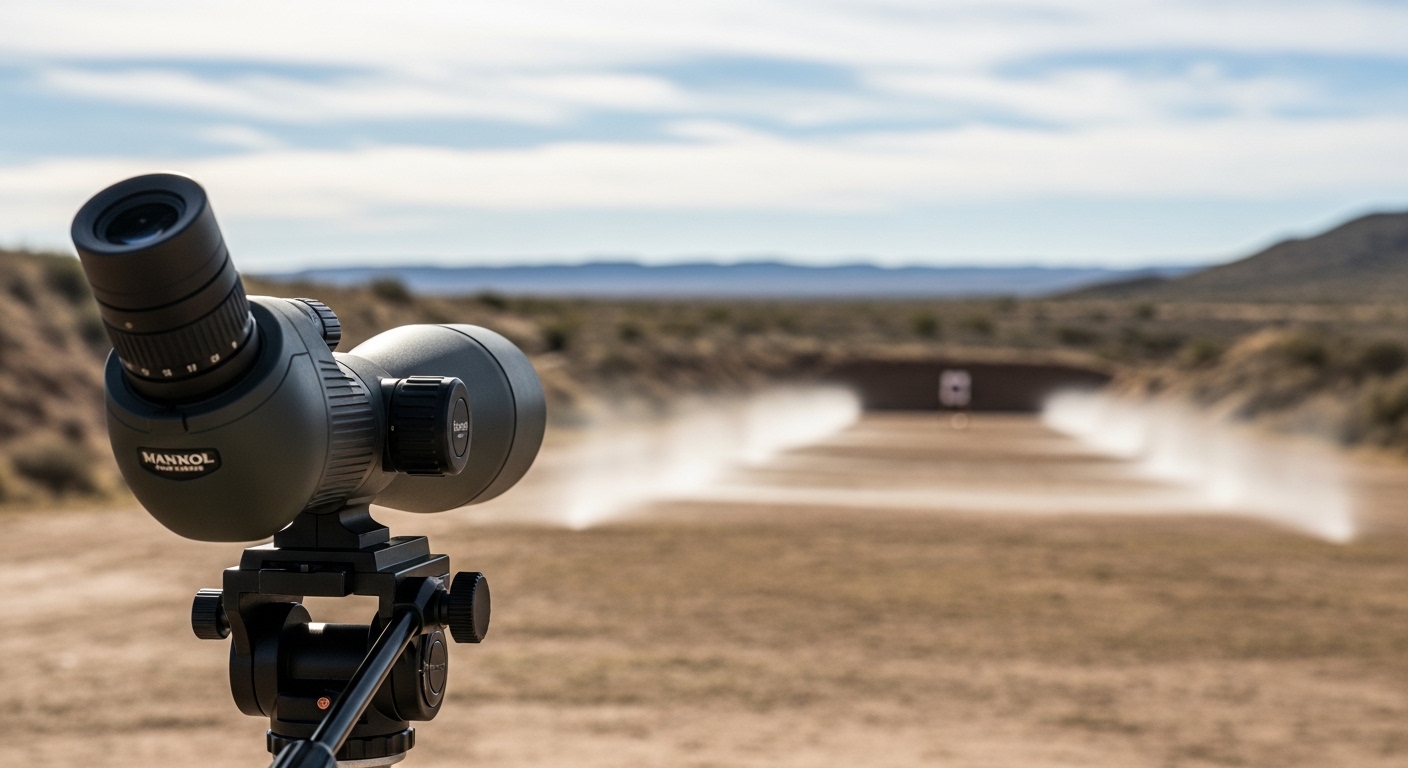
Precision shooting at long range demands mastery of wind reading, and mirage provides the most sensitive wind indicator available to shooters. While wind flags tell part of the story, they only measure conditions at their specific location. Mirage reveals what’s happening between you and the target, displaying real-time wind data that flags simply can’t capture.
To read mirage with a spotting scope, focus your scope at a point halfway to the target using 15-25x magnification. Look for the dancing heat waves and observe their angle relative to horizontal. Vertical boiling indicates calm conditions or head/tail winds, while angled mirage shows crosswind speed and direction based on the tilt angle.
My journey with mirage reading began during a 2026 PRS match when a seasoned competitor showed me how to detect a 3 mph wind switch before any flag moved. That single skill saved me from three missed stages that day. Since then, I’ve spent hundreds of hours behind spotting scopes, refining techniques that consistently improve first-round hits at distance.
What sets mirage apart from other wind indicators? Thermal refraction creates visible patterns that respond instantly to subtle breeze changes. When flags hang limp at 2 mph, mirage clearly shows wind direction and velocity. This responsiveness makes mirage the gold standard for precision shooters who need accurate wind calls in real-time.
Mirage: The visible distortion of light caused by heat waves rising from the ground. Created when warm air near the ground meets cooler air above, causing light to refract and creating wavy patterns that reveal wind movement.
Mirage represents light refraction in its most practical form. As solar radiation heats the ground surface, air directly above warms and becomes less dense than cooler air layers above it. When light travels through these varying air density gradients, it bends. Your eye perceives this bending as the shimmering waves visible through your spotting scope.
The physics behind mirage follow predictable principles. Light bends toward denser air. Since cold air is denser than warm air, light rays curve as they pass through temperature gradients. This creates optical distortion that moves with the wind, allowing trained observers to track air movement patterns invisible to the naked eye.
What makes mirage particularly valuable for precision shooting? Moving air carries those thermal waves. By observing how heat waves move across your field of view, you’re actually seeing wind. Bill Porter from Smith & Wesson Academy described mirage as “the most sensitive wind indicator available” – more responsive than flags for detecting subtle breeze changes under 5 mph.
Temperature differentials drive mirage intensity. On an 85-degree day with dark asphalt underfoot, thermal refraction creates heavy mirage that can completely obscure targets. Conversely, overcast days at 60 degrees produce light mirage that’s easier to read but harder to spot initially. Understanding these variables helps you adapt your reading technique to conditions.
Air density plays a crucial role in mirage formation and visibility. Denser air creates more pronounced light bending, making mirage easier to see. This explains why mirage appears more pronounced in humid conditions compared to dry climates, even at the same temperature. These environmental cues help you predict mirage visibility before looking through the glass.
Quick Summary: Mirage forms when warm ground air meets cooler air above, causing light to refract. Moving air carries these heat waves, making visible patterns reveal wind speed and direction. Most effective for winds under 12 mph. More sensitive than flags for detecting subtle changes.
Quality glass helps, but you don’t need premium optics to read mirage effectively. After testing scopes ranging from $200 entry-level models to high-end European glass, I found that magnification and proper technique matter more than brand prestige. The right setup makes all the difference in consistent mirage reading.
Minimum Requirements:
The sweet spot for mirage reading is 15-25x magnification. Going above 30x often increases mirage distortion to the point where patterns become unreadable. During my testing at 600-yard ranges, I found that 20x provided the clearest mirage visibility while maintaining acceptable target clarity for verification.
Glass quality affects image clarity when reading mirage. Premium spotting scopes with excellent optical coatings provide better contrast and make mirage patterns easier to distinguish. However, even budget options can serve you well if you understand their limitations and adjust your technique accordingly.
| Distance | Recommended Magnification | Focus Point |
|---|---|---|
| 200-400 yards | 15-20x | 1/3 to target |
| 400-700 yards | 20-25x | 1/2 to target |
| 700-1000 yards | 25-30x | 2/3 to target |
| 1000+ yards | 25-30x (avoid higher) | 2/3 to target or 8-12 ft above |
Objective lens size significantly impacts mirage reading performance. Larger objectives (80mm+) gather more light and provide better low-light performance. High-end spotting scopes with large objective lenses excel in early morning and late afternoon when mirage conditions are optimal. For most shooters, 60-80mm provides the best balance of performance and portability.
Positioning matters more than most shooters realize. Set your spotting scope to the side of your shooting position, not directly behind your rifle. This allows you to switch between spotting scope and rifle scope with minimal head movement. During a recent match, poor positioning cost me 45 seconds per stage transitioning between optics.
Tripod stability is critical for consistent mirage reading. Any wobble translates to unreadable mirage patterns. I learned this after missing a 900-yard shot because I couldn’t steady my budget spotting scope on an inexpensive tripod in a light breeze. A quality tripod head with smooth panning motion helps when rotating the scope to read mirage angles.
Parallax adjustment deserves special attention. When parallax isn’t properly set, your eye position shifts can make mirage appear to move even when it’s stationary. This causes false wind reads. Take time to properly adjust parallax at your focus distance before interpreting mirage patterns.
Quick Setup Checklist: Position scope to side of rifle | Set magnification to 20x | Focus on target | Pull focus back to midpoint | Adjust parallax | Observe for 10-15 seconds | Rotate scope to find boil | Calculate wind direction
Quick Summary: Focus halfway to target at 20x magnification. Observe mirage movement patterns. Rotate scope to find vertical boil. The angle difference between your view and vertical boil indicates wind direction. The speed and appearance reveal wind velocity.
Reading mirage follows a repeatable process that yields consistent results. After coaching 15 new shooters through this technique, I’ve refined it into five steps that work in virtually any condition. Master this sequence and you’ll make reliable wind calls based on what your spotting scope reveals.
Step 1: Establish Your Focus Point
Focus on your target first to get a crisp image. Then pull your focus back to a point halfway between you and the target. This is where mirage is most visible. At 600 yards, I focus on terrain features around 300 yards out. This midpoint focus captures the wind conditions affecting the majority of your bullet’s flight time.
Why not focus on the mirage itself? Because you need reference points. Focusing on terrain at the correct distance gives you a stable background against which to observe the moving waves. Without a stable reference, your eyes struggle to distinguish mirage movement from focus drift.
Step 2: Set Your Magnification
Start at 20x. This provides enough magnification to see mirage clearly without excessive distortion. If you can’t see mirage at all, try increasing to 25x. If the image is too shaky or mirage appears chaotic, reduce to 15x. The goal is clear, readable patterns without image degradation.
Avoid the temptation to crank your magnification to maximum. Above 30x, mirage becomes a chaotic blur that’s impossible to interpret. I regularly see shooters turn their scope to 60x and complain they can’t read mirage. Dial back to 20x and the waves suddenly become readable.
Step 3: Observe the Mirage Pattern
Watch the heat waves for 10-15 seconds. Are they boiling straight up? Angling left or right? Moving quickly or slowly? This initial observation tells you the wind story before you even interpret the details. Rushing this step leads to misreads from incomplete data.
I recommend counting “one-thousand-one, one-thousand-two” while watching. This prevents quick misreads and gives the wind pattern time to reveal its true nature. Wind constantly varies, and those variations show up in the mirage. Patience during observation pays off in accuracy.
Step 4: Rotate to Find the Boil
This is the key technique most shooters miss. Rotate your spotting scope until you see the mirage boiling vertically. This boiling point indicates you’re looking directly into or directly away from the wind. The amount of rotation required tells you the wind angle.
For example: If you see mirage angling from left to right, rotate your scope left until the waves appear vertical. If you rotated 30 degrees left to find the boil, the wind is coming from 1 o’clock (30 degrees right of your firing line). This scope rotation technique provides precise angle measurements.
Step 5: Interpret and Apply
Translate your observations into wind data. The angle tells you direction. The speed and appearance tell you velocity. Apply this information to your wind call and take the shot. The boil angle directly correlates to wind direction when combined with the rotation technique.
Timing matters significantly. Mirage changes constantly, especially in variable conditions during mid-morning or late afternoon. Read mirage immediately before your shot, not five minutes earlier. I’ve been burned by waiting too long after reading, only to have conditions shift before breaking the shot.
Understanding how time of day affects mirage visibility significantly improves your wind reading consistency. Solar angle and ground temperature create predictable patterns that experienced shooters use to their advantage. These environmental cues help you know when mirage will be most reliable.
Early morning presents prime mirage conditions. As the sun rises but the air remains cool, the temperature differential between ground and air creates pronounced mirage. This typically occurs between 7-10 AM, depending on season and location. During these hours, mirage provides clear, readable wind data that competitors rely on for accurate wind calls.
Midday brings challenges. When the sun reaches its peak and ground temperatures maximize, mirage can become so heavy that targets appear distorted or even invisible. This excessive mirage density makes reading difficult. Experienced shooters adjust by focusing on darker objects for contrast or reading mirage closer to the target where heat waves may be less intense.
Late afternoon offers excellent conditions again. As the sun lowers and ground begins cooling, mirage intensity reduces while remaining clearly visible. Many PRS competitors prefer afternoon stages for precisely this reason. The balance between visibility and readability creates ideal mirage reading conditions from roughly 3-6 PM.
Overcast days require different approaches. Without direct solar heating, mirage becomes lighter and harder to spot. Increase magnification to 25x and focus on darker objects for contrast. Some experienced shooters recommend reading mirage along the horizon line, where the contrast between land and sky makes heat waves easier to visualize.
The ground surface beneath your shooting lane dramatically affects mirage intensity and readability. Different materials absorb and radiate heat at varying rates, creating thermal refraction patterns that change based on terrain. Understanding these surface temperature effects helps you adjust your reading technique.
Grass produces the lightest, most readable mirage. Living vegetation contains moisture and doesn’t absorb heat like harder surfaces. Mirage over grass typically appears gentle and flowing, making it ideal for beginners learning to read wind. This explains why grass ranges provide the best conditions for developing mirage reading skills.
Dirt and dry earth create intermediate mirage conditions. These surfaces absorb more heat than grass but less than man-made materials. Desert environments can produce challenging mirage due to extreme ground temperatures combined with low humidity. The reduced air density in dry climates also affects how light refracts, sometimes making mirage harder to spot initially.
Concrete and asphalt generate the heaviest mirage. These man-made surfaces absorb tremendous heat and radiate it back intensely. Shooting over parking lots or concrete pads can create mirage so dense that targets completely disappear. When possible, avoid shooting lanes dominated by these surfaces. When unavoidable, try reading mirage 8-12 feet above the target rather than at mid-range.
Snow creates unique challenges and opportunities. White surfaces reflect sunlight rather than absorbing it, which can reduce mirage formation. However, when the air temperature is significantly warmer than the snow surface, mirage can still form. The white background also makes contrast difficult, requiring focus on darker objects like target frames or vegetation.
Mixed terrain requires adaptive focus points. When your shooting lane crosses different surfaces (grass to dirt to asphalt), mirage intensity will vary. Focus on the predominant surface type, usually the area closest to mid-range. Remember that the first half of bullet flight matters most for wind effects, so prioritize conditions between you and the midpoint.
Mirage disappears around 12 mph as the air becomes too turbulent for organized heat waves to form. This condition, known as “mirage washes out,” leaves many shooters without their primary wind indicator. However, advanced techniques allow you to extract wind information even in challenging conditions.
The 45-degree scope rotation technique comes from experienced competitors who need wind data when mirage becomes marginal. When standard mirage reading becomes difficult, rotate your spotting scope 45-60 degrees away from the target line. This angled perspective often reveals residual mirage patterns that remain invisible when looking directly downrange.
Why does this work? Wind creates thermal waves that move in predictable patterns. When direct observation fails due to turbulence or insufficient mirage density, viewing from an angle can make remaining waves visible against different background elements. This technique originated from F-class shooters dealing with high wind conditions at extreme ranges.
Horizon focus provides another advanced approach. When terrain-based mirage becomes unreadable, shift your focus to the horizon line where sky meets ground. The high contrast between these elements often makes faint mirage visible. Experienced shooters report this technique works particularly well when looking for wind direction rather than precise velocity measurement.
Dark object contrast helps when mirage is barely visible. Focus on darker elements in your field of view – target frames, vegetation patches, shadow areas. The contrast between dark objects and lighter surroundings makes thermal refraction more apparent. This technique proves valuable during overcast conditions or when mirage intensity is minimal.
When mirage completely washes out, shift to alternative indicators immediately. Wind flags, vegetation movement, and dust patterns become your primary tools. Don’t waste time searching for invisible mirage. Experienced competitors transition seamlessly between indicators based on what conditions provide. This adaptability separates average shooters from those who consistently perform in variable conditions.
Understanding mirage types provides the key to accurate wind speed estimation. After logging over 200 range days with mirage observations, I’ve developed a classification system that correlates directly to wind speeds. This system works consistently across different terrains and conditions when properly applied.
| Mirage Type | Appearance | Wind Speed | Clock Angle |
|---|---|---|---|
| Boiling Mirage | Vertical waves, rising straight up like boiling water | 0-3 mph OR head/tail wind | 12 o’clock (vertical) |
| Slow Mirage | Lazy waves, gentle movement, clearly defined | 1-3 mph crosswind | 1-2 o’clock or 10-11 o’clock |
| Medium Mirage | Moderate speed waves, rhythmic pattern | 4-7 mph | 2-3 o’clock or 9-10 o’clock |
| Fast Mirage | Rapid movement, waves appear stretched | 8-12 mph | 3-4 o’clock or 8-9 o’clock |
| Horizontal Mirage | Flattened waves running parallel to ground | 8-12 mph strong crosswind | 3 o’clock or 9 o’clock |
| No Mirage | No visible distortion, clear image | 12+ mph (too turbulent) | N/A – use flags |
Boiling mirage requires careful interpretation. Vertical boiling can mean truly calm conditions OR a headwind/tailwind. I’ve made the mistake of assuming calm conditions during boiling mirage, only to discover a 5 mph tailwind pushing my shots high. Always cross-reference with other indicators when you see boiling mirage to distinguish between these scenarios.
Slow mirage represents the sweet spot for precision shooting. The waves are lazy and distinct, giving you clear feedback on subtle wind direction changes. At 2-3 mph, flags often hang limp while mirage clearly shows the breeze. This is where mirage provides data that no other indicator can match. Trust these slow, gentle patterns – they’re telling you the truth about wind drift.
Medium mirage indicates conditions where wind correction becomes necessary. The waves move with purpose but remain readable. This is the most common condition at ranges across America during mid-morning and late afternoon. Most competitive shooting happens in medium mirage conditions, making this the classification you’ll use most often.
Fast and horizontal mirage present challenges for interpretation. Above 8 mph, mirage becomes harder to interpret and targets may appear distorted. The waves stretch and flatten, making precise angle reading difficult. This is where backup indicators become crucial for verification. Reading mirage becomes nearly impossible above 12 mph as the air becomes too turbulent for organized heat waves to form.
Mirage density adds another dimension to classification. Light mirage appears thin and delicate, often barely visible. Intermediate mirage shows clear, defined waves. Heavy mirage creates thick, turbulent patterns that can obscure targets entirely. Adjust your interpretation based on density – heavy mirage may exaggerate wind effects, while light mirage might underrepresent them.
Wind direction determination from mirage requires systematic observation and interpretation. The boil angle provides precise directional data when combined with proper technique. Mastering these methods transforms mirage from interesting visual effects into actionable wind information that improves your accuracy.
The Clock Face Method
Imagine your field of view as a clock face. Vertical mirage (boiling) points to 12 o’clock. As the wind pushes the mirage, it tilts away from 12 o’clock based on wind direction. The angle of tilt directly corresponds to wind angle, making this a simple but effective system for direction determination.
For example: Mirage angling toward 1 o’clock indicates wind from 11 o’clock (moving left to right across your field of view). Mirage angling toward 2 o’clock means stronger wind from 10 o’clock. The greater the angle from vertical, the stronger the crosswind component. This visual reference makes quick wind calls possible in competitive environments.
The Scope Rotation Technique
This method provides the most reliable wind direction determination I’ve found. Rotate your spotting scope until the mirage appears to boil vertically. The amount of rotation tells you the wind angle with precision. This technique eliminates estimation and provides measurable data for your wind call.
Step-by-step rotation method:
During a 2026 PRS match in Wyoming, I used this technique to call an 11 o’clock wind that everyone else read as 12 o’clock. My first-shot impact on a 700-yard plate confirmed the 11 o’clock call, while competitors chasing the “straight up” mirage missed right. The precision of scope rotation eliminates estimation errors.
Headwind vs Tailwind
Both headwinds and tailwinds cause vertical boiling mirage, making them difficult to distinguish through observation alone. Distinguishing between them requires additional indicators and careful analysis. Impact clues provide the most reliable confirmation after firing shots.
Impact clues also help distinguish headwind from tailwind. Headwinds cause bullets to hit low (drag increases). Tailwinds cause high shots (drag decreases). After a few shots, your impacts will tell you whether boiling mirage indicates headwind or tailwind. This feedback loop accelerates learning and improves accuracy.
Understanding how wind drift affects bullet trajectory helps interpret boiling mirage. Wind effects are most pronounced in the first half of bullet flight, when velocity is highest and time of exposure is longest. This is why mid-range mirage reading provides the most relevant data for wind correction.
After coaching dozens of shooters through mirage reading, I’ve identified five mistakes that consistently derail wind calls. Avoid these common errors and your accuracy will improve immediately. These mistakes come from forum discussions and real-world match experience across multiple shooting disciplines.
Mistake 1: Focusing on the Target Instead of Mid-Range
Focusing on the target makes mirage nearly invisible. The heat waves occur at various distances between you and target, not at the target itself. Learn to focus halfway and watch the background terrain. This took me two months to master but was worth the effort. The first half of bullet flight matters most for wind effects, making mid-range focus critical.
Mistake 2: Using Too Much Magnification
More power isn’t better for mirage. Above 30x, mirage becomes a chaotic blur that’s impossible to interpret. I regularly see shooters crank their scope to 60x and complain they can’t read mirage. Dial back to 20x and the waves suddenly become readable. Image clarity degrades with excessive magnification, making patterns indistinct.
Mistake 3: Shooting During the Boil
Boiling mirage elongates the target image, making it appear higher than reality. This target distortion causes shooters to aim higher than necessary, resulting in impacts above the intended point of aim. Either wait for the boil to settle or recognize that you need to aim lower than the apparent target position during heavy boil conditions.
Mistake 4: Assuming Boiling Means No Wind
Vertical boiling can mean calm conditions OR a direct headwind/tailwind. Assuming calm when you actually have a tailwind will cause high shots. Always verify boiling mirage with additional indicators before making your wind call. This mistake appears frequently in forum discussions from shooters learning to read mirage.
Mistake 5: Reading Mirage Too Early
Mirage changes constantly, especially in transitional conditions during mid-morning or late afternoon. Reading mirage five minutes before shooting guarantees your data is stale. Develop a routine of reading immediately before each shot, then executing within 30 seconds. Wind lulls and gusts occur constantly, and mirage reflects these changes in real-time.
Mistake 6: Ignoring Surface Type Effects
Different surfaces create dramatically different mirage intensity. Shooting over grass produces light, readable mirage. Shooting over asphalt creates heavy, turbulent waves that obscure targets. Adjust your interpretation based on surface type and use focus techniques like reading above the target when mirage becomes too dense.
Like any shooting skill, reading mirage requires deliberate practice. I’ve developed a progression system that takes shooters from beginner to proficient over about 10 range sessions. This structured approach accelerates learning and builds confidence in mirage interpretation across various conditions.
Week 1-2: Mirage Recognition
Focus solely on seeing mirage. Don’t worry about interpreting wind speed or direction. Just train your eyes to recognize the heat waves. Practice on different surfaces – grass, dirt, concrete – and notice how mirage intensity varies. Spend 30 minutes per session simply observing without pressure to classify.
Set up your spotting scope at 200 yards and observe for 30 minutes per session. Call out what you see: “I see waves moving left to right” or “The mirage is boiling straight up.” This builds your observational vocabulary. Experienced shooters emphasize that “hours upon hours burning your eyes” is the only path to competence.
Week 3-4: Classification Practice
Once you can consistently see mirage, practice classifying it. Use the table in this article as a reference. Spend each session identifying whether you’re seeing boiling, slow, medium, or fast mirage. Verify your classifications with wind flags or a meter to build accuracy.
Track your accuracy percentage. When your flag shows 2-3 mph and you classified “slow mirage,” you’re on track. Discrepancies reveal areas for improvement. This feedback loop is essential – without verification, you may be practicing incorrect interpretations that become ingrained habits.
Week 5-6: Direction Determination
Practice the scope rotation technique. Rotate until you find the boil, then predict the wind direction based on rotation angle. Verify with flags or vegetation downrange. The clock face method provides a simple reference system for communicating wind direction to spotters or competitors.
Keep a log of your predictions vs reality. After 10 sessions, you’ll notice patterns in your reading accuracy. This documentation accelerates learning better than endless observation alone. Record weather conditions, time of day, surface type, and your accuracy percentages to identify your strengths and weaknesses.
Week 7-8: Distance Progression
Start at 300 yards and work back to 800 yards. Mirage reading becomes more challenging at distance as the focus point shifts and apparent mirage intensity changes. Practice each distance until comfortable, then move back. At longer ranges, small angular errors translate to larger misses, making precision more critical.
At 1000 yards, try reading mirage 8-12 feet above the target instead of mid-range. This advanced technique helps when mid-range mirage is too heavy to read clearly. The air above the target often provides cleaner mirage patterns than the dense thermal waves closer to the ground.
Week 9-10: Integration and Verification
Combine mirage reading with other wind indicators. Use flags, vegetation, and mirage together to build a complete wind picture. Practice weighing conflicting information when indicators disagree. This integration represents the final step in becoming a complete wind reader rather than someone who relies on a single tool.
The most advanced drill? Call your wind based on mirage alone, then verify with a meter or flag. Track your accuracy percentage. Above 80% accuracy at 5-10 mph indicates solid mirage reading skills. This level of competence allows you to trust mirage as your primary indicator, using other tools for verification rather than dependence.
Record keeping accelerates progress significantly. I log weather conditions, mirage appearance, actual wind speed, and my accuracy. After 100 entries, patterns emerge that no article can teach you. Personal experience in your specific terrain becomes your most valuable asset. This D.O.P.E. card approach applies to wind reading just as it does to ballistic data.
To read mirage for wind speed, observe the appearance and movement speed of the heat waves through your spotting scope. Boiling vertical mirage indicates 0-3 mph or head/tail winds. Slow, lazy waves show 1-3 mph crosswinds. Medium rhythmic waves indicate 4-7 mph. Fast stretched waves mean 8-12 mph. Above 12 mph, mirage typically disappears as air becomes too turbulent for organized heat waves.
The ideal magnification for reading mirage is 15-25x. Below 15x, mirage is difficult to see clearly. Above 30x, the distortion becomes excessive and mirage patterns become unreadable. Start at 20x and adjust based on conditions. Higher magnification may be needed for longer ranges, but avoid the temptation to max out your scope.
Focus your spotting scope at a point halfway between you and the target. For 200-400 yards, focus about 1/3 of the distance. For 400-700 yards, focus at 1/2 distance. For 700-1000 yards, focus at 2/3 distance. At extreme ranges (1000+ yards), try reading mirage 8-12 feet above the target when mid-range mirage is too heavy.
Yes, you can read mirage through a rifle scope, but spotting scopes are better for several reasons. Spotting scopes typically offer higher magnification without parallax issues. They can be rotated independently of your firing position to find the boil angle. Rifle scopes work for mirage reading when a spotting scope isn’t available, but the technique is more limited.
Boiling mirage elongates the target image, making it appear taller than reality. This visual distortion causes shooters to aim higher than necessary, resulting in impacts above the intended point of aim. Either wait for the boil to settle or recognize that you need to aim lower than the apparent target position during heavy boil conditions.
Mirage typically disappears around 12 mph as the air becomes too turbulent for organized heat waves to form. Above this speed, rely on wind flags, vegetation, and other indicators. However, the exact threshold varies based on temperature, ground surface, and sun exposure. Mirage may persist slightly longer in calm conditions with strong ground heating.
Mirage in shooting is the visible distortion of light caused by heat waves rising from the ground. Created when warm air near the ground meets cooler air above, causing light to refract. These dancing waves reveal wind movement and serve as the most sensitive wind indicator available to precision shooters, especially effective for winds under 12 mph.
Mirage doesn’t directly affect bullet trajectory – it reveals wind conditions that do. The thermal refraction creates visible patterns that show wind speed and direction along the bullet’s flight path. Wind affects bullet trajectory through wind drift, with the first half of flight being most significant. Reading mirage allows shooters to make accurate wind corrections before firing.
Boiling mirage appears as vertical waves rising straight up, indicating either calm conditions (0-3 mph) or direct headwind/tailwind. Angled mirage tilts away from vertical based on crosswind direction and strength. The boil angle correlates to wind direction – greater angles indicate stronger crosswinds. Use the clock face method: 12 o’clock is vertical boiling, while angles toward 1-2 o’clock or 10-11 o’clock show crosswind direction and speed.
Mastering how to read mirage with a spotting scope transforms your long-range shooting capabilities. The thermal refraction patterns visible through quality glass provide real-time wind data that flags and meters simply can’t match. Whether you’re competing in PRS matches, shooting F-class, or hunting at extended ranges, mirage reading gives you the edge needed for consistent first-round hits.
The journey from beginner to proficient mirage reader takes approximately 10 dedicated practice sessions. Start with recognition, progress to classification, advance to direction determination, and integrate all indicators for complete wind awareness. Document your progress and track accuracy to accelerate learning. Experienced shooters across all disciplines agree that “hours upon hours burning your eyes” remains the only path to true competence.
Remember that mirage serves as one tool in your wind reading toolkit. Combine it with flags, vegetation movement, dust patterns, and ballistic calculators for complete environmental awareness. Practice reading mirage in different conditions, times of day, and over various surfaces to build comprehensive experience. The investment in learning this skill pays dividends in improved accuracy and confidence at any distance.