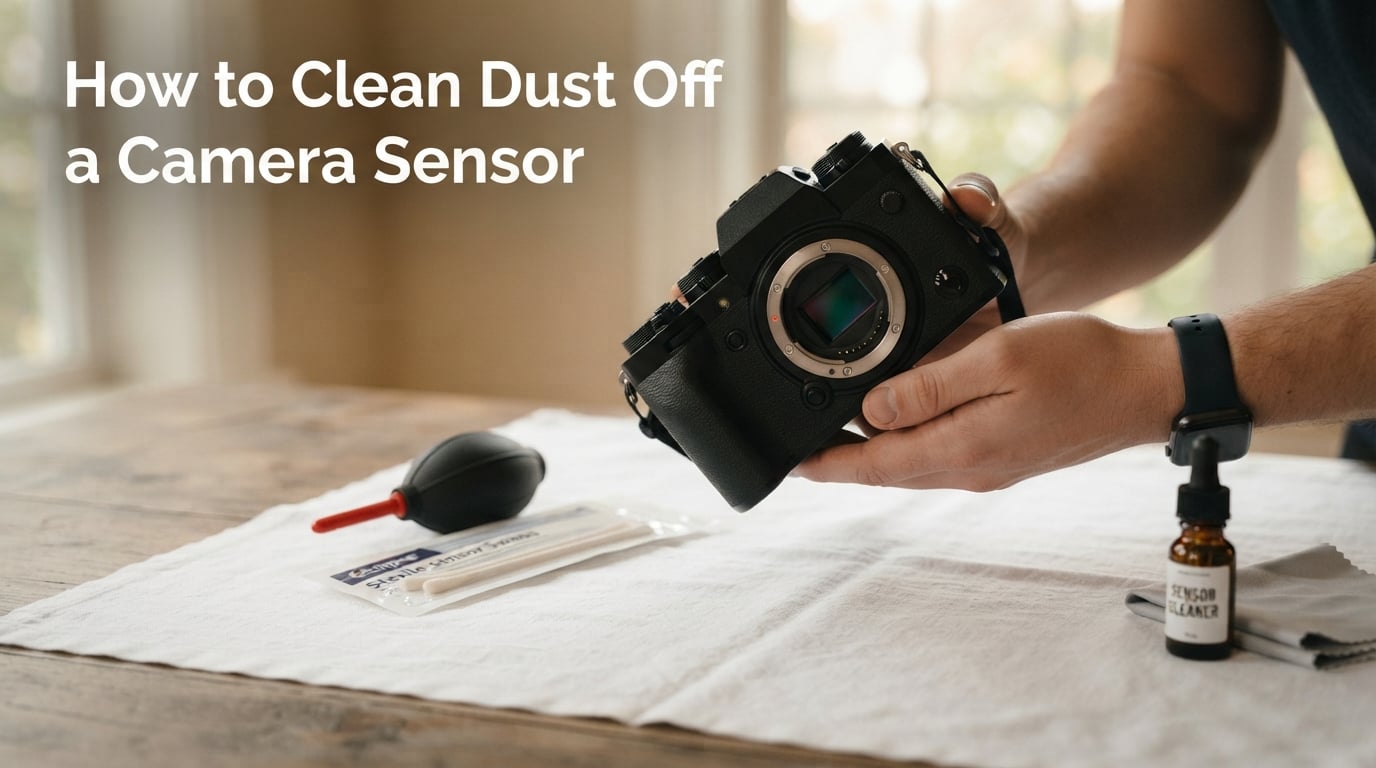
How to Clean Dust Off a Camera Sensor (September 2026)
I noticed the problem the day I shot a wedding at f/11. Every blue-sky frame had three stubborn dark dots…

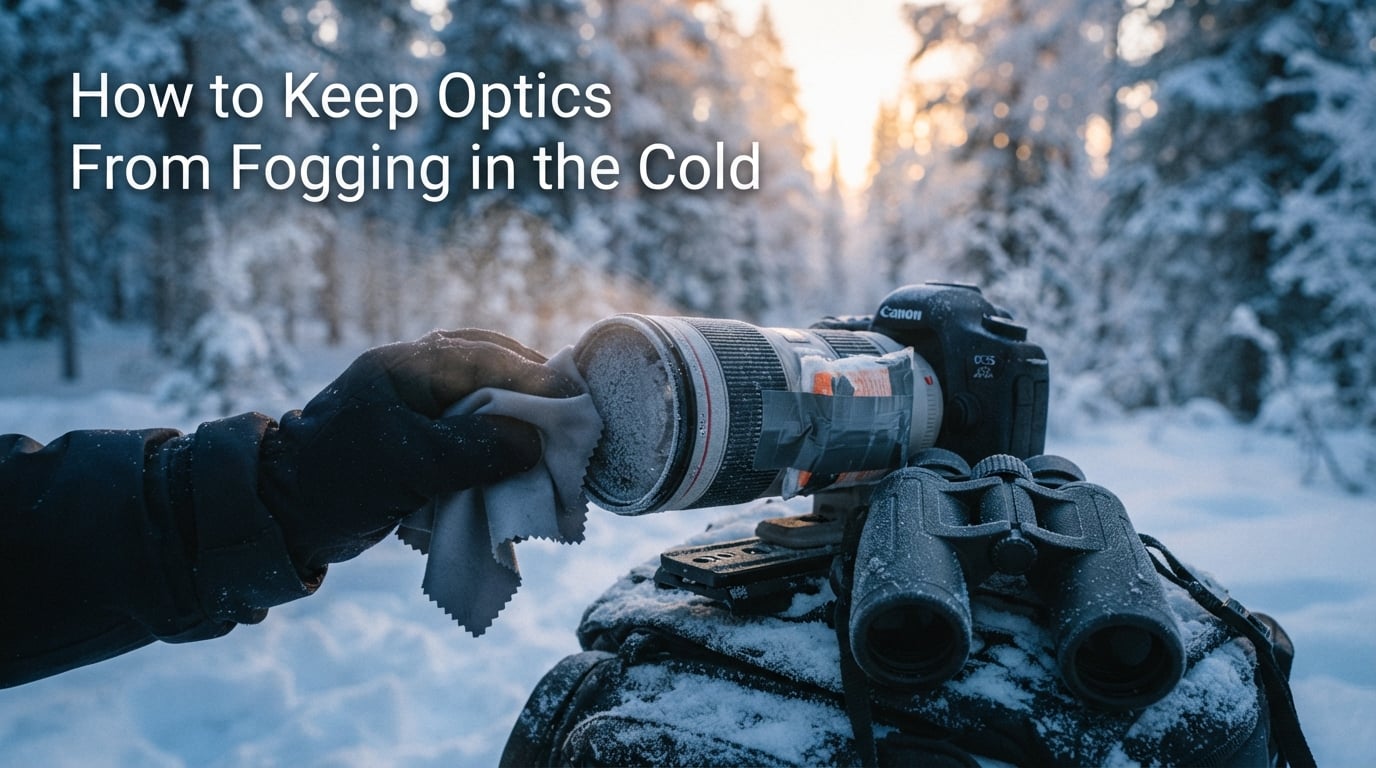
If you’ve ever stepped out of a warm car into a single-digit morning with a camera, a binocular, or a rifle scope, you’ve watched your viewfinder turn into a white cloud within seconds. That frustrating haze is condensation, and it has very little to do with the gear itself and almost everything to do with the physics of warm, humid air meeting a cold glass surface. The good news is that fogging is one of the most predictable problems in cold weather photography and observation, which means it is also one of the most preventable.
Our team has spent the last several winters shooting wildlife, hiking alpine ridges, glassing whitetail from treestands, and pulling eyepieces off telescopes in sub-freezing conditions to put together this guide. The goal here is simple: teach you how to keep optics from fogging in the cold using a layered defense — acclimation, anti-fog treatment, heat management, rain protection, and humidity control. Each method on its own helps. Stack them, and you can shoot in almost any cold weather condition without losing your first 15 minutes to fog.
We will cover the dew point science behind fogging, a step-by-step acclimation sequence, the real difference between anti-fog wipes, sprays, and gels, the hand-warmer trick that hunters have used for decades, and what to do when your optics still fog mid-shoot. Whether you’re a wildlife photographer chasing foxes in a January dawn, a birder scanning a frozen marsh, an astronomer setting up a refractor at 10°F, or a hunter climbing into a stand before sunrise, the same principles apply.
Optics fog when warm, humid air contacts a glass surface colder than the dew point. To stop that from happening, use a layered defense:
Skip any one of these and the others have to work harder; skip two or three and you will spend the first hour of every shoot wiping your viewfinder. The rest of this guide explains each step in detail, plus what to do when fogging still happens.
Fog is not a defect. It is the same thing that happens when you step out of a hot shower into a cold bathroom and the mirror turns white. Condensation forms when a gas (water vapor in the air) cools below its dew point — the temperature at which it can no longer hold its moisture as vapor — and turns back into liquid. The droplets scatter light, and the glass appears fogged.
Optics are uniquely prone to this because glass is an excellent conductor of temperature and an excellent radiator of heat. When you carry a camera, binocular, or scope from a warm interior (a heated car, a cozy cabin, your jacket against your body) into the cold, the glass inside and on the surface of the optic is significantly colder than the air around it. Warm, humid indoor air rushes against the cold front element, and water vapor condenses on the glass. The greater the temperature differential between the optic and the surrounding air, the faster and heavier the fog forms.
This is a distinction that most guides skip, and it is the one most likely to send you chasing the wrong fix. External fogging is condensation on the outer glass surfaces — front element, rear element, eyepiece, viewfinder. It is normal, predictable, and 100 percent preventable using the methods in this article. Internal fogging is condensation on the inside surfaces of the lens or prism system, between the optical elements. It looks like a faint haze that does not wipe off from the outside.
Internal fogging usually means one of two things: either the optic is not nitrogen-purged or weather-sealed, and humid air got trapped inside at the factory, or the seal has failed and outside air has leaked in. Nitrogen-purged optics are filled with dry nitrogen during assembly to prevent internal condensation, and they will not fog internally unless that seal is compromised. If your premium binocular or rifle scope suddenly fogs from the inside and you cannot wipe it off, it is a service issue, not a user issue.
A common forum complaint we hear on r/Binoculars and r/Hunting is: “My binoculars say fog-proof and waterproof, but they still fog.” That frustration is fair, but it conflates two different problems. Nitrogen purging prevents internal fogging for the life of the seal. It does nothing to prevent external fogging, which is a physics problem, not a construction problem. Even the most expensive Swarovski or Vortex optic will fog on the outside when warm, humid breath or air meets cold glass. Manufacturers know this, and their warranties cover internal fog, not external condensation.
For a deeper look at how manufacturers seal optics against moisture intrusion, see our guide on how to waterproof your optics.
Acclimation is the single most effective anti-fog technique, and it is free. The goal is to bring the glass temperature close to the outdoor temperature before you expose the optic to humid outdoor air, so that no condensation forms when you finally do step outside.
Here is the field-tested sequence our team uses when leaving a heated vehicle for a cold shoot:
The plastic bag trick is critical because it traps the warm, humid air next to the optic and prevents that humid air from contacting cold glass. As the optic slowly cools inside the bag, the humidity in the trapped air condenses on the inside of the bag, not on the lens. By the time you open the bag, the glass is roughly the same temperature as the air, and there is no longer a dew point differential. BirdForum users report this same method and credit it with eliminating the first five minutes of fog they used to fight every morning.
Aim for 20 minutes as a baseline. At temperatures between 0°F and 32°F, 30 minutes is safer. Below 0°F, give it 45 minutes to an hour, especially for large lenses or telescopes where the internal glass has more thermal mass. Astronomers on Cloudy Nights consistently report 30 to 60 minutes of telescope acclimation as the single most effective anti-fog measure they use.
Anti-fog products create a thin, hydrophilic (water-attracting) film on the glass that spreads condensation into a transparent layer instead of letting it form as droplets. Used correctly, they extend fog-free shooting time from minutes to hours. Used incorrectly, they can streak coatings, attract dust, or wear off mid-shoot.
| Format | Duration per Application | Coating-Safe? | Best Use |
|---|---|---|---|
| Pre-moistened wipes | 4 to 8 hours | Yes, when labeled for optics | Quick field application, eyepieces, viewfinders |
| Pump or aerosol spray | 2 to 5 days | Yes, when coating-safe labeled | Long shooting days, lenses that won’t be cleaned mid-shoot |
| Gel or paste | 1 to 3 days | Yes, with buffing | Heavy-duty use, eyepieces, rifle scopes |
| DIY (dish soap, baby shampoo, saliva) | Minutes to an hour | Mixed — can strip hydrophobic coatings | Emergency only, on non-coated glass |
Start with a clean, dry lens. Any oil, dust, or residual moisture will create uneven coverage and visible streaks. Apply the wipe or spray to a fresh microfiber cloth, then wipe the lens in slow, concentric passes from center to edge. Let the film haze over for 30 to 60 seconds, then buff lightly with a clean section of the cloth until the glass looks clear. If you can see a rainbow tint on the glass, you have applied too much.
Reapply every 4 to 8 hours during long shoots, or sooner if you notice fog returning. For rifle scopes and binoculars that you carry close to your face, pay extra attention to the rear eyepiece, where breath fogging is the most common failure point.
Forum threads on r/photography frequently recommend dish soap, baby shampoo, or even saliva as cheap anti-fog alternatives. They can work in a pinch on plain glass, but they have real downsides on modern coated lenses. Many lenses ship with hydrophobic or oleophobic coatings that repel water and oil, and dish soap will degrade that coating over time. Spitting on a lens is worse: saliva contains salts and enzymes that can etch coatings with repeated use.
If you are mid-shoot and forgot your anti-fog wipes, a tiny drop of diluted dish soap on a microfiber cloth is better than nothing. Treat it as a one-time emergency, not a regular practice, and clean the lens with an optical cleaning solution as soon as you get back inside.
Heating the optic is the most reliable way to keep glass above the dew point, and the cheapest way to do it is the chemical hand warmer. Hunters have been taping hand warmers to rifle scopes and binocular bodies for decades, and it works because a steady, low-level heat source keeps the glass just warm enough to prevent condensation from forming on it.
Use a 12-hour or 8-hour chemical hand warmer (the kind you crack to activate). Tape it to the lens barrel, the binocular bridge, or the scope’s objective bell using a single wrap of painter’s tape or a rubber band. The goal is gentle warmth, not heat: you want the glass a few degrees above ambient, not hot to the touch.
Position the hand warmer on the body of the optic, not directly on the glass. Direct contact with a hot hand warmer can stress lens adhesives and seals over time. For rifle scopes, hunters on r/Hunting report taping the warmer to the scope’s main tube, just behind the objective bell, which radiates heat forward into the lens housing.
For prolonged cold weather shooting, USB-powered heated lens wraps and eyepiece heaters are worth considering. These typically use a low-wattage heating pad and a USB battery bank. They run for hours on a 10,000 mAh power bank and provide more consistent warmth than chemical hand warmers. They are especially popular with astrophotographers shooting in sub-zero temperatures, where a 6-hour imaging session would otherwise require two or three hand warmer swaps.
Your body produces roughly 100 watts of heat at rest, and you can borrow some of it to keep your optics warm. Carry binoculars and small cameras under your jacket against your chest, or in an interior chest pocket. Hunters carry rangefinders inside their coat. Birders drape a binocular harness under a shell jacket.
Body heat has a downside: it can also fog your optics from the inside out if you bring a warm optic straight into cold air. The acclimation step earlier in this guide solves that problem. Combine the two — acclimate in a sealed bag, then carry under your jacket once acclimated — and you get the benefit of body heat without the fog.
How you carry your gear in the field matters as much as how you treat it before going out. Cold, moist air moving across a glass surface causes more fogging than still cold air, which is why wind and precipitation are the worst conditions for fog.
A rain cover does two jobs in cold weather: it keeps precipitation off the front element, and it traps a thin layer of still air around the glass. That still air warms slightly from the optic and stays warm enough to prevent condensation. Even a simple plastic shower-cap style cover over the lens hood helps.
Lens hoods serve a similar function. By extending the optical path and shielding the front element from stray side air, a hood reduces the volume of cold, moist air that reaches the glass. Use your hood. Many shooters remove it in winter to save space, but it is one of the cheapest fog-prevention tools you own.
Where your gear sits between shots is just as important as how you carry it on the way out. A camera left on a tripod in a 10 mph wind will fog faster than the same camera cradled in your lap under a jacket. Binoculars hanging from a neck strap in the open air will fog faster than binoculars tucked into a chest harness.
For long cold sessions, consider keeping optics inside a soft case or padded bag when not actively shooting. The case acts as insulation and slows the temperature drop, which means the optic stays closer to its acclimated temperature and is less likely to fog when you pull it out for the next shot.
If you shoot with multiple lenses, rotate them inside your jacket rather than letting them sit in an open backpack. For a closer look at how premium optics are built to handle field conditions, our review of the best Trijicon binoculars covers weather sealing in detail.
Anti-fog treatments handle the outside of the glass. Desiccants handle the inside of your bag. Silica gel packs absorb excess humidity in the air trapped inside a closed camera bag or case, lowering the dew point and making it harder for condensation to form on cold glass surfaces when you open the bag.
Standard silica gel packets — the small white sachets you find in shoe boxes — are the most common choice. They are cheap, reusable, and effective for typical camera bags. For larger cases (telescope cases, hard rifle cases), rechargeable desiccant canisters hold more moisture and can be dried out in an oven at 250°F for two to three hours when they saturate.
Avoid calcium chloride-based desiccants inside camera bags; they can leak and corrode metal contacts on lens mounts and electronics. Stick to silica gel.
Toss three to five silica gel packets into your camera bag, lens case, or binocular case. For larger bags, use a desiccant canister with a humidity indicator card so you can see when it needs recharging. Replace or recharge the silica gel whenever the indicator turns from blue to pink (or from orange to green, depending on the type).
Silica gel does not prevent fogging on its own — it lowers the humidity in the bag, which makes acclimation faster and reduces the severity of fog when you do open the bag in cold air. Think of it as one layer of a multi-layer defense, not a standalone solution.
Even with perfect preparation, fogging sometimes happens. The right response depends on where the fog is, how severe it is, and what kind of optic you are using.
Resist the urge to wipe. Wiping a fogged lens with a glove, shirt, or tissue can scratch coatings and grind dust into the glass. Instead, give the optic a few minutes to warm up slightly on its own — body heat against the housing or a chemical hand warmer pressed against the barrel for 30 to 60 seconds will often clear external fog without any wiping at all.
If you must wipe, use a clean microfiber cloth in a single light pass from center to edge. Replace the cloth when it gets damp. Do not use clothing, paper tissue, or any rough fabric, and never use your breath to “pre-warm” the glass before wiping. Breath contains a lot of moisture, and you will make the fog worse.
Eyepiece fogging is the most common failure in cold weather observation because your eye and breath are inches from the glass. Anti-fog wipes on the eyepiece help, as does a rubber eyecup that creates a seal between your eye and the lens. If your binocular or scope has a twist-up eyecup, keep it extended. For telescopes, anti-fog treatment on the eyepiece plus a dew shield (an extension tube between the scope and the eyepiece) is the standard fix.
Some astronomers use a small 12V dew heater strap wrapped around the eyepiece or the corrector plate. These draw very little current and run for hours on a small battery.
If you see fog that does not wipe off and that moves when you change the angle of the optic, the fog is on the inside of the lens system. This is rare in modern weather-sealed and nitrogen-purged glass, but it does happen. Unfortunately, there is no field fix. Set the optic aside in a warm, dry place for 24 hours and check again. If the internal fog persists, contact the manufacturer — internal fogging is typically covered under warranty as a defect.
The trip home is where a lot of cold weather damage happens, and it is the step most beginners skip. Walking into a warm, humid house or car with cold optics is a one-way ticket to heavy condensation on every surface, including inside the bag and on every other piece of gear in the bag.
Before you go back inside, seal your optic in the same plastic bag you used for the trip out. The bag traps cold, dry outdoor air around the optic and prevents warm indoor air from condensing on the cold glass. Leave the optic sealed inside the bag for 30 to 60 minutes while your house or car warms up. This is the single most useful habit you can build for cold weather gear care, and it is one that comes up constantly on r/photography trip reports.
Once the optic has warmed through, remove it from the bag and inspect every surface for moisture. Wipe down the body with a dry microfiber cloth and let the lens air-dry for 15 to 20 minutes before putting caps back on. Caps trap residual moisture against the glass and can cause fungal growth on coatings if the optic is stored warm and slightly damp.
Recharge or replace your silica gel packs after every cold shoot so they are ready for the next outing. If you are shopping for fresh gear before the season starts, our roundup of Cyber Monday optics deals and CR123A batteries for optics can save you money on the supplies you need to stay out longer this winter.
Optics fog when warm, humid air contacts a glass surface colder than the dew point. Water vapor in the air cools, condenses into tiny droplets, and scatters light, producing the white haze you see. The greater the temperature difference between the warm air and the cold glass, the faster and heavier the fogging.
Acclimate the scope slowly inside a sealed plastic bag for 30 minutes before stepping outside. Apply a coating-safe anti-fog wipe to the lenses, tape a chemical hand warmer to the scope tube just behind the objective bell, and keep the scope close to your body when not actively shooting. These three steps prevent both external condensation and breath-fog on the eyepiece.
Yes, when you use a coating-safe anti-fog spray or wipe labeled for camera lenses, binoculars, or scopes. The treatment creates a thin hydrophilic film that spreads condensation into a transparent layer instead of droplets. Avoid generic anti-fog products not labeled for optics, and never use dish soap or saliva as a regular substitute on coated glass.
Resist wiping and instead warm the lens housing gently with body heat or a hand warmer pressed against the barrel for 30 to 60 seconds. If you must wipe, use a clean microfiber cloth in a single light pass from center to edge. Avoid breathing on the lens, which adds moisture and makes fog worse.
Yes. Tape a chemical hand warmer to the lens barrel or scope tube so the gentle radiant heat keeps the glass a few degrees above the dew point. Position the warmer on the housing, not directly on the glass, and use painter’s tape so you do not damage the finish. A single 8-hour hand warmer typically lasts a full shoot.
Apply a coating-safe anti-fog wipe to the eyepiece before each session and let it haze then buff clear. Add a dew shield between the telescope and the eyepiece to trap a layer of warm air, and consider a 12V dew heater strap for sub-freezing sessions. Let the telescope acclimate outside for 30 to 60 minutes before observing so the optics reach ambient temperature.
Knowing how to keep optics from fogging in the cold comes down to one core idea: control the temperature and humidity around the glass. Every method in this guide is a different way of doing that. Acclimation slows the temperature change. Anti-fog treatments spread condensation into a clear film. Hand warmers keep the glass above the dew point. Body heat and rain covers insulate the optic. Silica gel pulls humidity out of the surrounding air. Used together, they form a layered defense that handles everything from a chilly autumn dawn to a -20°F winter night.
Start with acclimation and a coating-safe anti-fog wipe, then add a hand warmer and a rain cover for serious cold. Re-bag your gear before going back inside, and recharge your silica gel between shoots. Do those four things consistently, and you will stop losing the first 15 minutes of every cold weather session to a fogged viewfinder.
Have a cold weather shooting tip we missed, or a fogging story to share? Drop it in the comments — we read every one and update this guide when our community points us to a better method.