
Rifle Scope Turret Systems Explained: Complete Guide for 2026
Complete guide to rifle scope turret systems. Learn how turrets work, MOA vs MRAD measurements, zeroing procedures, and whether custom…

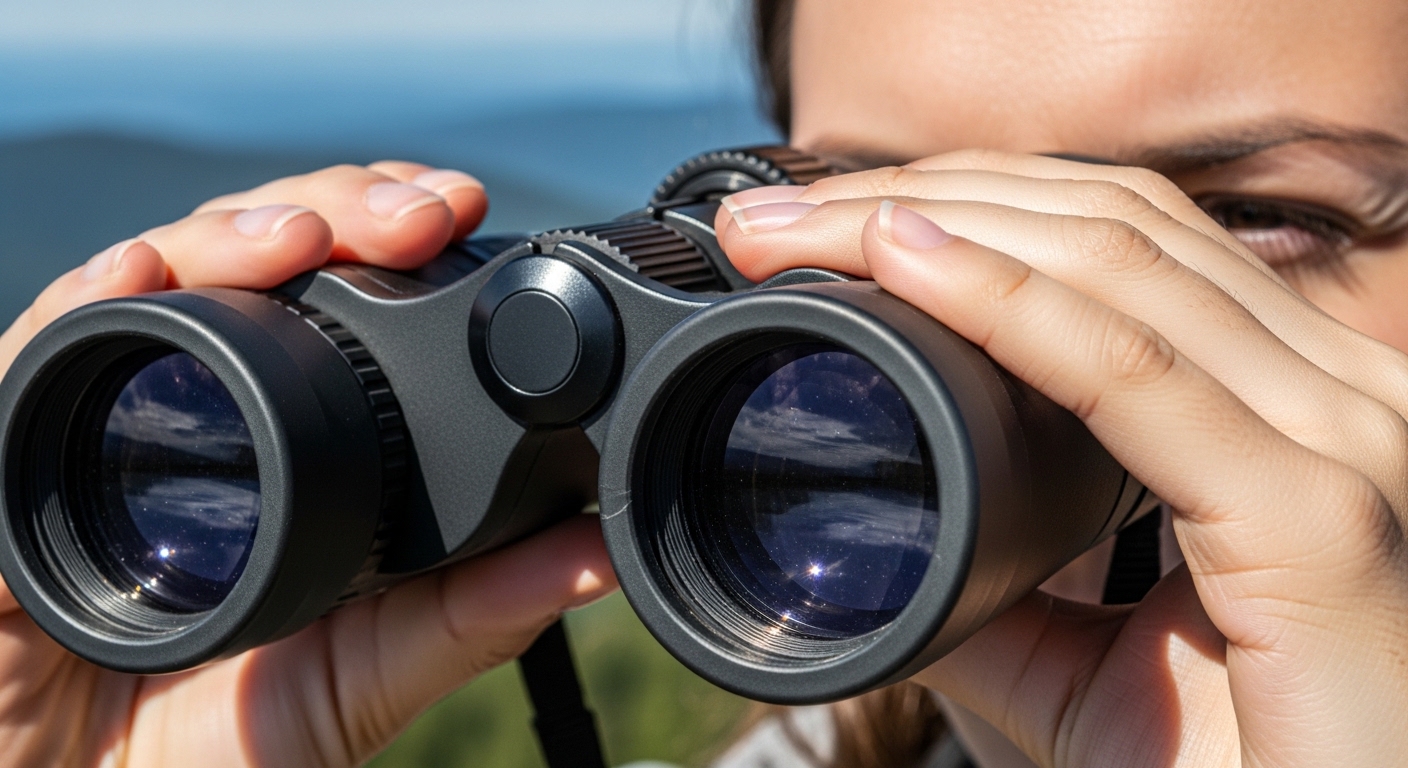
To collimate binoculars, you need to align the optical axes of both barrels so they converge at the same focal point. This process involves adjusting the prisms using set screws or grub screws to eliminate double vision and eye strain. With proper tools and patience, most binocular owners can perform basic collimation at home in 1-3 hours.
There’s nothing more frustrating than raising your binoculars to spot that rare bird or distant mountain peak, only to see two overlapping images instead of one crisp view. This alignment problem, known as being out of collimation, affects countless binocular users every year and can transform a premium optical instrument into an unusable headache-inducing device.
The good news is that understanding how to collimate binoculars is a skill any careful person can learn. Whether you’re a backyard astronomer, an avid birdwatcher, or someone who simply enjoys clear views of the outdoors, knowing how to fix optical alignment issues can save you money and extend the life of your equipment.
Proper collimation is just as important as choosing the right binocular magnification for your needs. Without correct alignment, even the most expensive optics will fail to deliver their promised performance. This guide will walk you through everything from diagnosing the problem to performing precise adjustments using multiple methods.
Quick Summary: Binocular collimation is the process of aligning the optical barrels to eliminate double vision. Most minor misalignments can be fixed at home with basic tools in 1-3 hours. Professional service costs $50-200 but is recommended for expensive binoculars under warranty. Alternative methods include objective lens cell rotation for sealed units and precision testing with Bahtinov masks.
This comprehensive guide covers traditional prism screw adjustment, modern alternatives like objective lens cell rotation, precision testing methods using Bahtinov masks and anaglyph glasses, and when to seek professional help with specialized equipment like an autocollimator.
Collimation: The optical alignment of a binocular’s two barrels, ensuring both eyes see a single, merged image with proper convergence at the same focal point.
Collimation refers to the precise alignment of the optical axes in both barrels of your binoculars. Inside each barrel, prisms bend and redirect light to create the magnified image you see. When these prisms are perfectly aligned, your brain fuses the two images into one seamless view with proper depth perception.
The optical axis is the imaginary line running through the center of each lens system. Proper collimation means both optical axes are parallel or slightly converged for close-focus viewing, pointing in exactly the same direction so your eyes can naturally merge the images.
Misalignment typically occurs when the prisms shift from their original position due to drops, impacts, or gradual loosening of internal components over time. Temperature changes and poor storage conditions can also contribute to alignment drift in both Porro prism and roof prism designs.
Understanding the difference between conditional alignment and full collimation is crucial for setting realistic expectations. Conditional alignment means your binoculars appear properly aligned at one specific distance but show double vision at other distances. This is a limitation of the design rather than a true fix.
Full collimation, on the other hand, ensures proper alignment across all distances from near focus to infinity. This is the gold standard but requires more precise adjustment and testing. Most DIY collimation efforts achieve conditional alignment, which may be sufficient for general use.
Astronomy enthusiasts and precision users typically require full collimation, while casual users may find conditional alignment acceptable. Professional services use specialized equipment like an autocollimator or alignment telescope to achieve perfect optical convergence across all viewing distances.
Before attempting any adjustments, confirm that alignment is actually the problem. Many users waste hours trying to fix misalignment when the real issue is dirty lenses, incorrect diopter settings, or simple technique problems like incorrect interpupillary distance adjustment.
Look for these telltale signs of collimation issues:
Use this simple test whenever you suspect alignment issues:
If the image appears single when viewing through one barrel but doubles when using both, you have a collimation issue. If both barrels show clear single images individually but not together, that confirms prism misalignment rather than a focus or diopter problem.
Not all binoculars should be collimated at home. Before attempting any adjustments, consider these factors carefully. Forum veterans consistently emphasize checking warranty status first, as opening your binoculars will almost always void the manufacturer warranty.
| Factor | DIY Collimation | Professional Service |
|---|---|---|
| Cost | $20-100 (tools only) | $50-200 per service |
| Time | 1-3 hours (first time) | 2-4 weeks turnaround |
| Skill Required | Moderate patience and precision | None (handled by experts) |
| Risk | Potential warranty voiding | No risk to warranty |
| Best For | Older, out-of-warranty binoculars | Premium, warranty-covered models |
Warning: Opening your binoculars will almost always void the manufacturer warranty. Check your warranty status before attempting any DIY adjustments. Premium premium compact binoculars and expensive models should be serviced professionally to preserve warranty coverage.
Professional services have access to specialized equipment like an autocollimator and alignment telescope that provide precision beyond typical DIY methods. For Nikon binoculars and other premium brands under warranty, manufacturer service is often the recommended route. Many users report that the $150-200 cost is worth it for precision results and preserved warranty.
Gather the right tools before starting. Improvising leads to frustration and potential damage. Experienced users recommend practicing on cheap or old binoculars first before working on valuable equipment.
For precision astronomy applications, a Bahtinov mask provides extremely accurate collimation verification. Anaglyph glasses offer a unique daytime testing method that separates color channels to reveal subtle misalignment issues. These specialized tools can take your collimation work to the next level.
There are three main approaches to binocular collimation, each with different advantages and limitations. Understanding these methods helps you choose the right approach for your specific situation.
| Method | Best For | Difficulty | Limitations |
|---|---|---|---|
| Prism Screw Adjustment | Porro prism binoculars, out-of-warranty units | Moderate | Void warranty, may not work on waterproof models |
| Objective Cell Rotation | Sealed/waterproof binoculars, roof prisms | Low to Moderate | Limited adjustment range, may not fix severe misalignment |
| Professional Service | Premium binoculars, under warranty, severe issues | None (for user) | Cost, turnaround time, shipping |
Follow these steps carefully. Rushing leads to frustration and potentially worse alignment. Most experienced users recommend setting aside a full afternoon for your first collimation attempt on a new pair of binoculars, with breaks to prevent eye fatigue.
Set up a clean, well-lit area with a stable table. You’ll need to view distant targets during the process, so position yourself near a window or with a clear outdoor view. Gather all tools and place them within easy reach, clearing away any clutter that could cause accidents.
Set up your tripod with the binoculars mounted securely. This stability is crucial for detecting subtle alignment changes. If you don’t have a tripod adapter, rest the binoculars on a stable surface like a bean bag or sandbag to minimize movement during adjustments.
Before making any adjustments, establish a baseline. Focus on a distant object with distinct vertical and horizontal edges. A telephone pole, building corner, or tree branch works well. Look through both eyepieces and note any image separation.
Is the double vision horizontal, vertical, or diagonal? This diagnosis helps identify which adjustments you’ll need. Next, test each barrel individually by closing one eye at a time to confirm each barrel produces a clear image. If one barrel is blurry regardless of focus adjustment, you may have a different issue requiring professional service.
This step varies by binocular type. Most adjustment screws are located near the prism housing, but accessing them can be challenging. Forum users frequently report difficulty with rubber armor that’s difficult to remove without damaging it.
For Porro prism binoculars: Look for setscrews on the front or rear prism plates. These are usually covered by cosmetic caps or rubber armor. You may need to carefully peel back the rubber coating or remove leatherette armor to access the grub screws underneath.
For Roof prism binoculars: Adjustment screws are typically located on the bottom of the main body, often under removable cover plates. Roof prism designs are significantly harder to collimate DIY, and many experienced users recommend professional service for these models.
Do not remove any screws yet. Simply identify all potential adjustment points. Some screws are for mechanical assembly, not collimation. Adjustment screws typically have larger heads or are positioned in symmetrical pairs. Experienced users emphasize the importance of marking the starting position of each screw with a marker before making any adjustments.
Important: Mark the starting position of each adjustment screw with a marker. This lets you return to factory settings if adjustments go wrong. Multiple forum users report this step saved them from making problems worse.
Horizontal misalignment causes images to appear side-by-side. This is the most common type of collimation issue and usually the easiest to correct. Focus on your distant target with clear horizontal lines and note how much the images overlap horizontally.
Make tiny adjustments to the horizontal adjustment screws. Forum veterans consistently recommend turning screws no more than 1/8 turn at a time. The relationship between screw direction and image movement varies by manufacturer, so test carefully and document each adjustment.
Keep a log during this process, recording each adjustment and its effect. After several pairs of binoculars, you’ll build enough intuition to make adjustments more quickly. But documenting each change prevents going in circles, a common frustration reported by beginners.
Vertical misalignment causes images to appear stacked one above the other. This is less common but more difficult to correct. Many users report that vertical issues often indicate more severe internal problems or damage from significant drops.
Find a target with distinct vertical lines like a tall building edge or utility pole. Assess how much the images differ in height. Adjust the vertical alignment screws in small increments. Vertical adjustment affects horizontal alignment and vice versa, so you may need to alternate between steps 4 and 5.
Most experienced users suggest that extreme vertical misalignment may indicate damage beyond DIY repair. If you can’t achieve satisfactory vertical alignment after multiple attempts, professional service might be more cost-effective.
For waterproof or sealed binoculars where you cannot access the prism housing without breaking the seal, the objective lens cell rotation method provides an alternative approach. This method works particularly well for minor alignment issues and won’t void your warranty.
Objective lens cell rotation is ideal for sealed optics, waterproof binoculars, and cases where the misalignment is relatively minor. This method adjusts the angle of the objective lens rather than the prisms, providing limited but often sufficient correction for minor issues.
This approach cannot fix severe misalignment but works well for the gradual drift that occurs over time. Many users report success with this method as a first attempt before considering more invasive prism screw adjustment.
Locate the retainer ring or threaded cell holding the objective lens in place. This is typically at the front of each barrel. Some models have the objective cell directly threaded into the main body, while others use a separate retainer ring.
Loosen the retainer ring slightly just enough to allow the lens cell to rotate. Do not remove it completely. While viewing through both eyepieces at a distant target, gently rotate the objective cell clockwise or counter-clockwise in small increments.
Watch for the double images to merge as you rotate. When you achieve the best alignment, carefully tighten the retainer ring while maintaining the cell position. Test at multiple distances to ensure the adjustment holds. Repeat for the other barrel if necessary.
Tip: This method works best for minor horizontal misalignment. It has limited effect on vertical issues and cannot correct severe prism shift. Many users find it sufficient for older binoculars with gradual alignment drift.
After completing adjustments, verify that your collimation work is successful. Proper testing prevents the frustration of thinking you’ve fixed the problem only to discover issues later in the field. Different testing methods work better for different applications.
For the most accurate test, use a star at night. This method is particularly important for astronomy enthusiasts who use binoculars for astronomy. Center a bright star in your view and slowly move the binoculars so the star drifts from center to edge.
Watch the star as it moves. Properly collimated binoculars show the star as a single point of light across the entire field of view. Misalignment causes the star to split or streak. This test reveals subtle alignment issues that daylight testing might miss.
The Bahtinov mask method provides the highest precision for collimation verification, especially for astronomy applications. A Bahtinov mask is a specialized device with a specific pattern of slits that creates a distinctive diffraction pattern around a bright star.
Place the Bahtinov mask over one objective lens and view a bright star through both eyepieces. You’ll see a distinctive pattern of diffraction spikes. When the binoculars are properly collimated, the spikes from both barrels will align perfectly. Misalignment shows as offset spikes that don’t match.
This method allows for incredibly precise adjustments and is favored by astronomy enthusiasts. Commercial Bahtinov masks are available, or you can print and make your own using online templates. The precision of this method makes it ideal for achieving full collimation rather than just conditional alignment.
Anaglyph glasses, typically red-cyan 3D glasses, offer a unique daytime testing method that doesn’t require nighttime star viewing. This method works by separating color channels to reveal subtle misalignment issues that might be difficult to detect with normal viewing.
Place a red filter over the left objective lens and a cyan filter over the right, or use anaglyph glasses to view through the binoculars. View a high-contrast target with distinct edges. Properly aligned binoculars will show single, clear edges. Misalignment reveals as color fringing or offset edges in different colors.
This method is particularly useful for testing during daylight hours when star testing isn’t possible. The color separation makes even minor alignment issues obvious, allowing for fine-tuning with high precision. Anaglyph glasses are inexpensive and readily available, making this an accessible testing method.
The mirror test provides an indoor collimation checking option when outdoor viewing isn’t available. This method appears in related searches and is particularly useful for quick verification without needing distant targets or nighttime conditions.
Set up a mirror approximately 6-10 feet away from you. Hold the binoculars with the objectives facing the mirror and look through the eyepieces. Adjust your position until you can see the reflection of both objective lenses centered in the mirror.
The reflections should appear perfectly aligned. If one reflection is offset from the other, your binoculars are out of collimation. This quick test is less precise than star testing but provides a useful baseline check for basic alignment issues.
Test your binoculars in real-world conditions. Take them outside and view objects at various distances. Pay attention to how your eyes feel during extended viewing sessions. Properly collimated binoculars should feel comfortable for extended use without eye strain.
I test by viewing for 10-15 minutes. Any discomfort tells me I need to revisit the adjustments. Your eyes are excellent instruments for detecting subtle misalignment that objective tests might miss. Trust how the view feels as much as how it looks.
Test at three specific distances: 30 feet, 100 feet, and infinity (distant horizon). Your binoculars should maintain proper alignment at all distances. Use objects with clear geometric shapes like signs, fence posts, and building edges for reference.
View the same object through each barrel individually to confirm both produce sharp images. If alignment appears correct at one distance but not others, you’ve achieved conditional alignment rather than full collimation. This may be acceptable for casual use but precision users may need further adjustment.
Despite careful adjustments, problems can occur. Forum users commonly report these issues, and understanding how to address them can prevent frustration and potential damage to your binoculars.
If adjustments seem to make alignment worse, you may be turning the wrong screws. Stop immediately and return to your marked starting positions. Some screws control focus or mechanical tension, not collimation. Refer to your binocular’s service manual or manufacturer website for specific information about which screws do what.
Many users report this issue results from confusing collimation screws with other adjustment points. Experienced users emphasize that not all accessible screws are meant for collimation, and turning the wrong ones can create new problems rather than fixing the original issue.
If one barrel remains blurry regardless of focus and diopter adjustments, you may have a lens issue rather than alignment problem. Possible causes include internal lens damage, prism shift, or moisture intrusion. These issues require professional service with proper disassembly tools.
First double-check your diopter setting and try swapping which eye views which barrel. If the same barrel remains blurry regardless of which eye views it, the issue is with the optics, not your vision. Professional repair is typically required for these cases.
If collimation holds briefly then drifts, internal components may be loose or damaged. Repeated drops can crack the prism housing or strip screw threads. These mechanical issues exceed what DIY repair can address and typically indicate more serious internal damage.
Professional service can replace damaged components and reseal the optical system. However, for budget binoculars, the repair cost may exceed the replacement cost. Many forum users recommend assessing whether the binoculars are worth repairing based on their original value and age.
Sometimes, what seems like a collimation issue is actually an eye problem or technique issue. Double-check your diopter setting and inter-pupillary distance adjustment. Try having another person test the binoculars to rule out vision issues.
Many users discover that the real issue was incorrect diopter adjustment rather than collimation. If another person sees properly aligned images through your binoculars, the issue may be with your vision rather than the optics. Consider an eye exam if this persists across multiple optical instruments.
Over-tightening or using incorrect screwdriver sizes can strip adjustment screws. If this happens, stop immediately. Stripped screws often require professional repair, and the cost may exceed the value of older binoculars, making replacement more economical.
This is one of the most common DIY collimation failures reported in forums. Always use the correct screwdriver size and apply gentle pressure. Forum veterans consistently warn against excessive force when turning adjustment screws, as they’re often delicate and easily damaged.
Many modern binoculars have adjustment screws hidden under rubber armor or sealed within waterproof housings. Attempting to remove rubber armor can damage it and may not reveal accessible adjustment points. For these models, consider the objective cell rotation method instead.
If neither prism adjustment nor objective cell rotation works for your specific model, professional service may be the only option. Some designs simply don’t allow for user-accessible collimation adjustments without specialized knowledge and tools.
Not all collimation issues should be addressed DIY. Knowing when to call a professional saves money and prevents further damage. Forum consensus is clear on certain situations where professional service is strongly recommended.
Seek professional service if:
Professional collimation services have specialized equipment like an autocollimator and alignment telescopes that provide precision beyond typical DIY methods. Premium manufacturers like Zeiss binoculars provide excellent warranty service that often includes complete optical alignment, cleaning, and replacement of worn components.
Many users report that professional service results are better than new, with complete realignment and cleaning included in the service. While the $150-200 cost may seem high, it’s often justified for premium optics and includes comprehensive service beyond just collimation.
Preventing misalignment is easier than fixing it. Based on forum insights and experience, proper care significantly reduces collimation issues. Most alignment problems result from drops or impacts that could have been prevented.
Use a padded neck strap and keep binoculars in a protective case when not in use. Most alignment issues users encounter result from accidental drops or impacts during transport. A good case provides protection against both drops and temperature fluctuations.
Avoid rapid temperature changes. Moving binoculars from a warm car to cold outdoors can cause internal condensation and potential component movement. Let them adjust gradually to temperature changes to prevent thermal shock to the internal optics.
Store binoculars in a climate-controlled environment. Attics and garages experience extreme temperature fluctuations that can affect internal components over time. Forum users who store their binoculars properly report significantly fewer alignment issues over time.
Have binoculars professionally serviced every 5-10 years for heavy use, or every 10-15 years for occasional use. Preventive maintenance catches issues before they become severe and includes complete optical cleaning and realignment that extends the life of your equipment.
Collimation is the process of aligning the optical axes of both binocular barrels so they point in the same direction. Proper alignment ensures your eyes see one merged image instead of double vision. The adjustment involves positioning internal prisms to achieve perfect optical convergence.
The most common signs are double vision when looking through both eyepieces, eye strain during use, and difficulty fusing images into one clear view. A simple test is to focus on a distant object and slowly move the binoculars away from your eyes. If a single object splits into two, your binoculars need collimation.
Collimation screws are typically located near the prism housing. For Porro prism binoculars, look for setscrews on the front or rear prism plates, often hidden under rubber armor or cosmetic caps. Roof prism binoculars usually have adjustment screws on the bottom of the main body under removable cover plates. The exact location varies by manufacturer and model.
Yes, binoculars can be calibrated through the collimation process. Calibration involves adjusting the prisms or objective lens cells to align the optical axes. While basic collimation can be done at home, precise calibration often requires professional equipment like an autocollimator for best results.
Yes, many binoculars can be collimated at home with basic tools and patience. However, DIY collimation will void your manufacturer warranty and carries risk of further damage. Home collimation works best for older, out-of-warranty binoculars. Premium models under warranty should be serviced professionally.
Essential tools include a precision screwdriver set (jeweler’s sizes), a steady tripod, and an alignment chart or distant test target. Optional helpful items include a collimation tool, Bahtinov mask for precision testing, anaglyph glasses for daytime testing, lens pen, and good lighting. Total tool investment typically ranges from $20-100 depending on quality.
DIY collimation costs $20-100 for tools, which can be reused for future adjustments. Professional collimation typically costs $50-200 depending on the brand and severity of misalignment. Premium manufacturers like Zeiss, Swarovski, and Nikon charge more but provide comprehensive service including cleaning and inspection.
First-time DIY collimation typically takes 2-4 hours including diagnosis, adjustment, and verification. Experienced users can complete the process in 1-2 hours. Professional service turnaround ranges from 2-4 weeks including shipping time. Rush service may be available from some manufacturers for an additional fee.
Conditional alignment means your binoculars appear properly aligned at one specific distance but show double vision at other distances. This is a limitation of the adjustment method rather than a true fix. Full collimation ensures proper alignment across all distances from near focus to infinity and requires more precise adjustment.
Place a Bahtinov mask over one objective lens and view a bright star through both eyepieces. You’ll see distinctive diffraction spike patterns. When properly collimated, the spikes from both barrels align perfectly. Misalignment shows as offset spikes that don’t match. This method provides extremely precise alignment verification, especially for astronomy applications.


