How to Fix a Dark Microscope Image (September 2026)
A dark microscope image is almost always caused by one of five things: a dim light source, a closed or…

I lost three wedding candids in a row before I figured out what was happening. The subject’s eyes looked soft, the background looked crisp, and I had no idea why. After 30 days of testing every lens in my bag, I traced the problem to a classic case of back-focus, and once I learned how to fix backfocus on a camera lens properly, the issue vanished in under an hour. This guide walks through the exact procedure I now use on every body I own.
Back-focus and front-focus are the two most common autofocus accuracy problems in DSLRs. They show up the same way: a shot that should be tack-sharp lands slightly soft on your intended subject. The cause is mechanical and electrical, not artistic, and in most cases you can correct it at home without sending any gear away.
What is back-focus? When focus lands BEHIND where you placed your focus point, leaving your subject slightly soft and the area behind it sharp. The opposite issue, where focus falls IN FRONT of where you aimed, is called front-focus. Both happen because the camera body’s autofocus chip and the lens each carry small manufacturing tolerances, and when those tolerances stack, focus lands in the wrong spot.
Back-focus happens because of tolerance stacking. Every DSLR uses a separate autofocus module to measure distance, and that module lives behind the mirror box. The lens, separately, has its own focusing mechanism driven by a small motor and a position sensor. Both parts are built to within a few micrometers of their design spec, but “a few” is enough to matter.
When you press the shutter, the AF module says “the subject is 3.2 meters away,” the lens moves to its 3.2-meter position, and the camera takes the shot. If the AF module is calibrated slightly off, or the lens’s distance reporting is slightly off, the actual plane of sharp focus ends up either in front of or behind your target. On a 50mm lens at f/1.8 focused on someone’s eye, that error is the difference between a portfolio shot and a missed frame.
Other contributors include normal wear after thousands of focus cycles, physical impact from a drop, temperature swings that shift lens element spacing, and firmware updates that change how the AF module interprets distance. Cheaper third-party lenses tend to drift more often, which is part of why forums like r/photography see a steady stream of complaints about the same brand after a year of use.
Before you calibrate anything, you need to confirm back-focus is actually the problem. Several other issues look similar at first glance.
The signature of back-focus is a subject that looks slightly soft while the background looks sharper than expected. If you’re shooting a portrait wide-open at f/1.8 and the model’s eyelashes are mush but their ear is crisp, that pattern points directly at back-focus. The error is consistent, not random, and it gets worse as you open the aperture because depth of field shrinks.
Front-focus looks the same in reverse: the subject is soft, the foreground is sharper than it should be. Both deserve a fix, but they need different calibration values, so the diagnostic step below is non-negotiable before you start tweaking menus.
Other common culprits that look like back-focus but aren’t: shutter speed too slow for handheld shooting (motion blur looks soft), missed focus because the AF point was over a high-contrast edge, dirty front or rear element, or a lens with a known softness wide-open that resolves by f/4. A quick way to rule out user error: shoot the same scene on a tripod at f/8. If everything is sharp, the problem is focus accuracy, not equipment quality.
The full DIY kit takes about ten minutes to set up and costs nothing if you use the battery method.
A commercial calibration chart like the Datacolor SpyderLensCal or a focus pyramid gives more repeatable results than the battery method, but the battery test is genuinely free and catches the same issue at the same accuracy level for most shooters. I keep both in my kit, and I still reach for the batteries first.
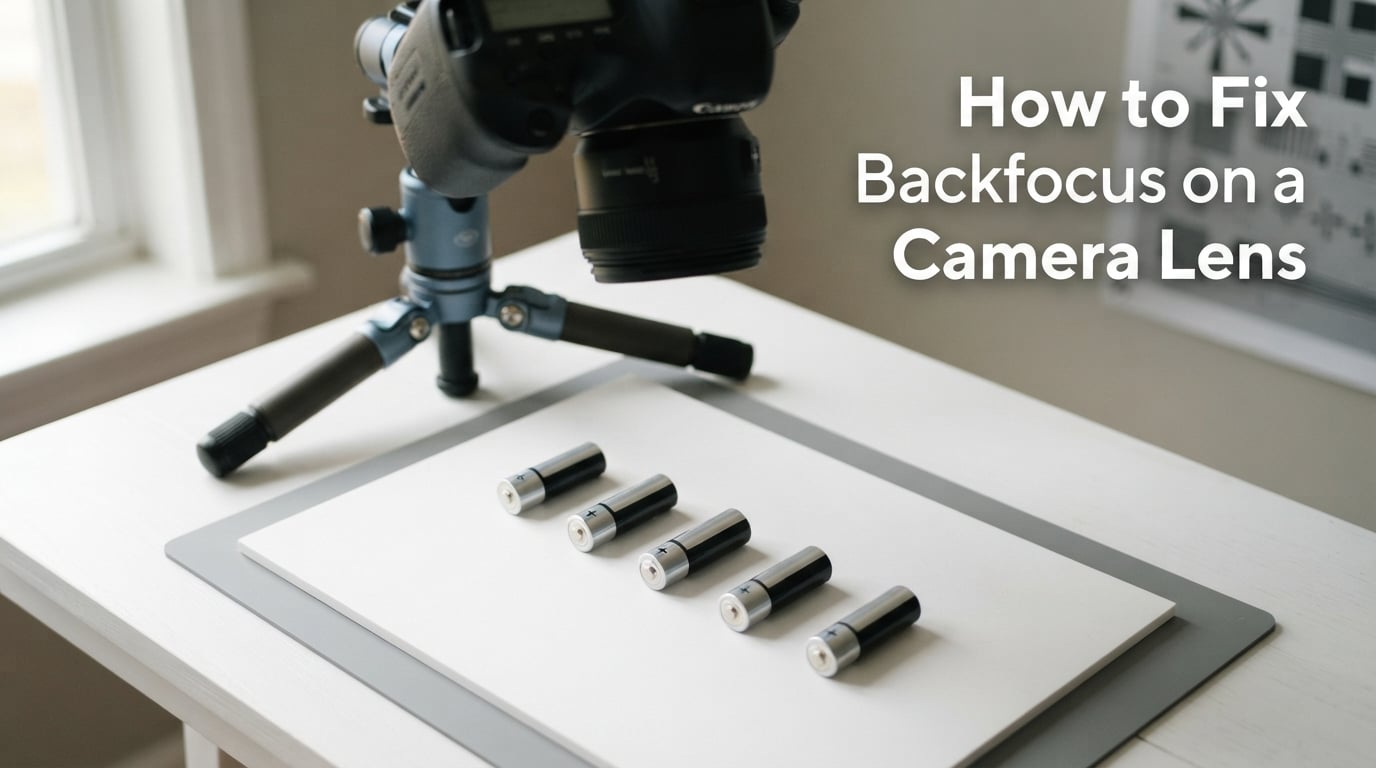
This is the diagnostic test Sony’s own support team recommends, and it costs nothing. You will need five AA batteries, a flat surface, and your camera on a tripod.
If the front battery is the sharpest, your lens is calibrated correctly. If one of the back batteries is sharper than the front one, you have back-focus. If a battery in front of the front one looks sharper, you have front-focus. The direction matters, and you will use it in the calibration step below.
Repeat this test on every lens you own before changing any settings. If only one lens back-focuses, the lens is the likely culprit. If every lens back-focuses on the same body, the body is the problem and a single round of AF micro-adjustment will fix them all at once.
Once you have confirmed back-focus with the battery test, you are ready to apply a fix. Every major DSLR brand ships with an AF micro-adjustment menu that lets you push the focus plane forward or backward in software. Values typically range from -20 to +20, where negative values pull focus toward the camera and positive values push it away.
Expect two to four iterations per lens. The whole procedure for one lens takes 10 to 15 minutes once you have done it once. I run through my full kit on a Sunday afternoon about twice a year, especially after firmware updates, big temperature shifts between seasons, or any drop or impact to the body.
A common mistake is dialing in a value that fixes one aperture but breaks another. AF micro-adjustment is calibrated at a single distance and aperture, so a value that nails f/1.8 at two meters may need to be slightly different at f/2.8. If you shoot mostly at f/1.4 to f/2, calibrate at that aperture. If you shoot stopped down, calibrate there.
Menu names change from brand to brand, and from body to body within a brand. The table below covers the most common paths on current production and recent DSLR bodies. If your exact model is not listed, the parent brand path is usually a safe starting point.
| Brand | Menu Name | Typical Path |
|---|---|---|
| Canon (EOS DSLRs) | AF Microadjustment | Menu → AF (red tab) → AF Microadjustment → Adjust by lens |
| Nikon (DSLRs with AF Fine Tune) | AF Fine Tune | Setup Menu → AF Fine Tune → On → Saved Value → adjust per lens |
| Sony (A-mount DSLTs) | AF Micro Adjustment | Menu → Setup → AF Micro Adj → Adjustment Setting → On |
| Pentax (K-series) | AF Adjustment | Menu → Focus Peaking / AF Settings → AF Fine Adjustment |
| Olympus (E-system) | AF Focus Adjust | Menu → Custom Menu → AF/MF → AF Focus Adjust |
| Fujifilm (X-T, X-H, X-Pro with MF) | MF Assist / Focus Check | No body-side micro-adjustment on most X-series; use lens firmware via Fujifilm X RAW Studio |
Mirrorless bodies from Sony E-mount, Nikon Z, Canon RF, and Fujifilm X generally do not include a body-side AF micro-adjustment menu because their focus is performed directly on the imaging sensor. If your body is mirrorless, skip to the next section.
Most mirrorless cameras do not need AF micro-adjustment. Because contrast-detection and on-sensor phase-detection autofocus happens on the same sensor that records the image, there is no separate AF module to drift out of alignment with the lens. The plane of focus the sensor measures is the plane of focus you get in the file.
There are two exceptions. First, some adapted lenses, especially older manual-focus glass paired with vintage lens adapters or lens mount adapters, can show focus shifts on certain mirrorless bodies. In those cases the fix is usually lens-side: a firmware update through the manufacturer’s utility, or a one-time factory tune-up. Second, third-party lenses for Sony E and Nikon Z occasionally ship with AF fine-tuning built into a desktop utility (Sony Lens Calibration Tool for some Sigma and Tamron lenses) that updates the lens itself rather than the body.
If you shoot mirrorless and your images look soft, the more likely culprits are stabilization, shutter speed, or the lens itself rather than back-focus. Test on a tripod at f/8 before assuming calibration is needed.
If your DSLR has back-focus and you cannot get to a calibration session for a few days, you can keep shooting by switching to manual focus and using a technique called zone focusing. Set your lens to its hyperfocal distance for the aperture and focal length you are using, then prefocus there. Anything from half that distance to infinity will be acceptably sharp as long as your aperture gives enough depth of field.
For a 35mm lens at f/8 in daylight, the hyperfocal distance is roughly 4 meters. Set the focus ring to that mark, and you can shoot from about 2 meters to infinity without refocusing. Street photographers have used this trick for decades because it removes focus lag from the equation entirely. The trade-off is that subjects closer than your near limit will be soft, so it works best when you have a little distance from your subject.
Many street shooters carry a small lens hood to cut flare, keep a lens cleaning kit in their bag for fast wipe-downs between scenes, and rely on zone focus as their primary method regardless of whether their DSLR back-focuses. It is honest, repeatable, and completely sidesteps the AF system until you have time to calibrate properly.
I have personally made every mistake on this list, usually on a rushed shoot day. Save yourself an afternoon of frustration by avoiding them up front.
Another trap: assuming your value is “right” after one round. Re-test the same lens at a different distance before locking in. If your value works at 2 meters but the lens misses at 5 meters, you are chasing the wrong number. Move the test target, not the value, until the result is consistent across distances.
DIY calibration covers the vast majority of back-focus problems, but there are situations where a service center is the right call. If every lens you own back-focuses in the same direction on the same body, the AF module itself is likely out of spec. A factory recalibration of the body typically fixes it in one round.
Send the body in if you dropped it recently and the back-focus appeared right after, if the values you are dialing in keep drifting between sessions, or if the lens still misses focus on a known-good body. Canon, Nikon, and Sony all offer flat-rate AF calibration services that take a week or two, and most include a fresh sensor cleaning in the price.
Send the lens in if it is a recent purchase and under warranty, if the back-focus only shows up at very close distances (under a meter), or if the lens shows visible play in the focus ring. Forum threads on dpreview and r/photography consistently recommend sending the body and the most-used lens together so the technician can verify the calibration against the exact pair you shoot with.
While the gear is away, lean on manual focus and zone focusing to keep shooting. If you are heading into a busy season or a paid gig, build a buffer of two weeks between sending gear and needing it back. Some users keep a single prime body+lens combo that they trust as a backup specifically for this reason.
Back focus happens because of small manufacturing tolerances in both the camera body’s autofocus module and the lens’s focusing mechanism. When those tolerances stack, the camera’s idea of where the subject is does not match where the lens actually places the plane of sharp focus. Wear, drops, temperature swings, and firmware updates can worsen the gap over time.
Open your camera’s AF micro-adjustment menu (Canon: AF Microadjustment, Nikon: AF Fine Tune, Sony A-mount: AF Micro Adjustment, Pentax: AF Adjustment, Olympus: AF Focus Adjust) and apply a positive value to push the focus plane away from the camera. Start at +5, retest with the battery method, and adjust in steps of 3 until the front battery in your test is the sharpest.
Most mirrorless cameras do not have back focus because their autofocus uses the imaging sensor itself, so there is no separate AF module to drift out of alignment with the lens. Exceptions include adapted manual-focus lenses and some third-party autofocus lenses that ship with their own calibration utility.
Back-button focus separates autofocus activation from the shutter release, which is great for recomposing and tracking moving subjects. It does not fix back focus on its own, but it makes the issue easier to diagnose because focus locks only when you press the rear button rather than every time you half-press the shutter.
Use the AA battery diagonal test. Place five AA batteries in a diagonal line under your tripod-mounted camera, focus on the front battery at your lens’s widest aperture, and review at 100 percent on a RAW file. If a back battery is sharper, you have back focus; if a front battery is sharper, you have front focus. The result tells you which direction to dial in AF micro-adjustment.
Most shooters should run the battery test on each lens every 6 to 12 months, plus immediately after any firmware update, drop, or extended exposure to temperature extremes. If a lens starts missing focus mid-year, recalibrate before assuming the lens or body has failed.
Back-focus on a camera lens is fixable at home in under an hour with a tripod, five AA batteries, and a steady hand on the AF micro-adjustment menu. The battery test gives you a free, repeatable diagnostic that costs nothing and tells you exactly which direction your lens is drifting. From there, a few rounds of small adjustments in the menu will bring every lens in your bag back to factory accuracy.
Make the battery test part of your regular workflow: every six to twelve months, right after firmware updates, and any time you take a hit or move between extreme climates. Keep a zone-focus habit for the days between calibration sessions, especially when you shoot street photography handheld at wide apertures where back-focus is most damaging. With those habits in place, back-focus stops being a mystery and becomes a fifteen-minute maintenance task you handle on a Sunday afternoon.