Sightmark Wraith vs ATN X-Sight (October 2026)
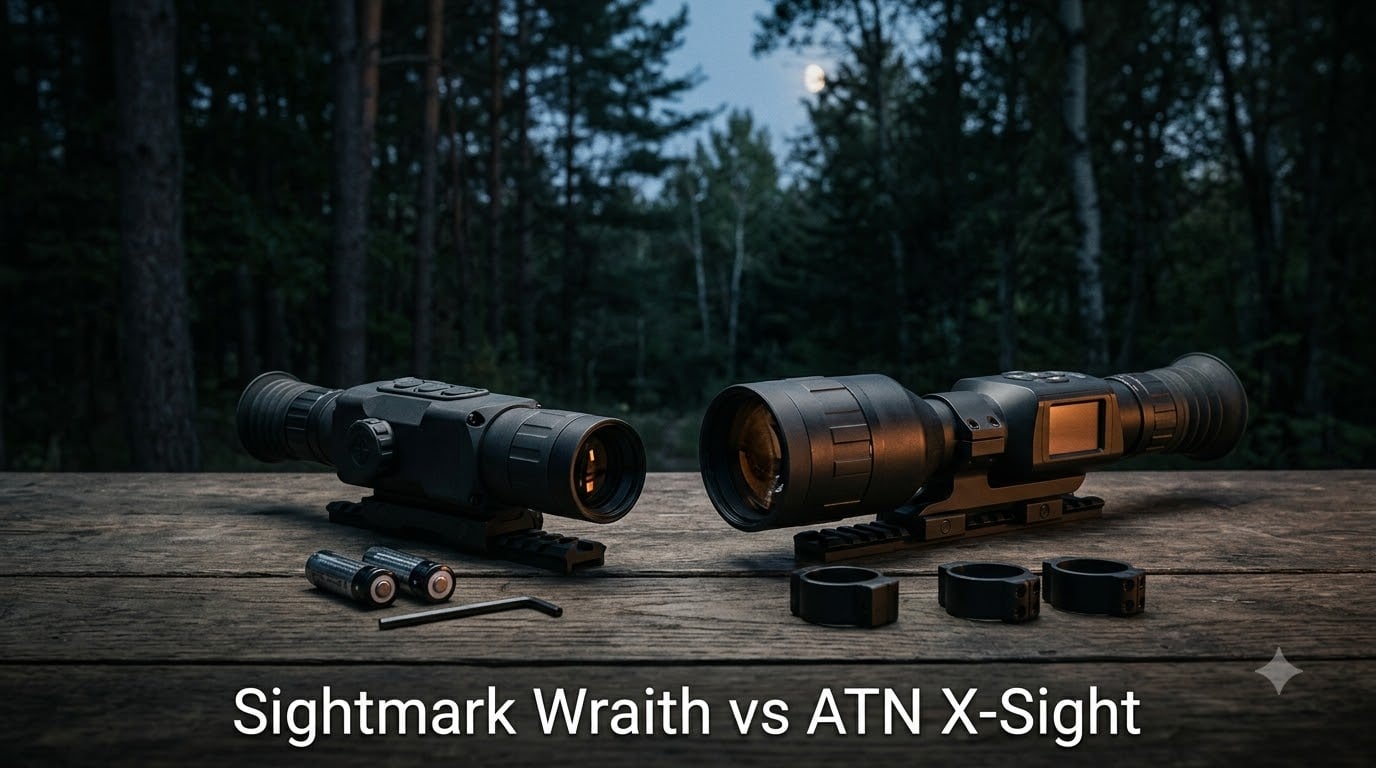
I spent the last three months running both the Sightmark Wraith 4K Mini and the ATN X-Sight 5 side-by-side on…


The night vision market has evolved dramatically in 2026. What was once military-exclusive technology is now accessible to civilians, though the entry barrier remains high. I’ve watched the industry shift from Gen 2 dominance to Gen 3 ubiquity, seen white phosphor become the new standard, and witnessed prices stabilize after years of supply chain disruptions.
This guide reflects the current state of night vision technology in 2026. I’ve updated pricing, added the latest device types like DTNVS and RNVG that have gained market share, and included recent industry developments such as Exosens acquiring Photonis. The fundamentals remain constant, but the options and considerations have expanded significantly.
After years of using night vision across applications – from nighttime navigation to wildlife observation – I’ve learned that understanding the technology matters more than chasing specifications. This guide will teach you everything needed to make informed decisions, avoid expensive mistakes, and build a system that actually serves your needs.
Night vision technology enables visibility in darkness by amplifying available light through image intensification. Devices use vacuum tubes with photocathodes to convert photons to electrons, microchannel plates to multiply electrons thousands of times, and phosphor screens to create visible green or white images. Modern tubes can amplify light by 10,000 to 50,000 times, transforming near-total darkness into navigable environments.
Quick Summary: Night vision devices work through image intensification – amplifying tiny amounts of available light to create visible images. The technology relies on vacuum tubes, specialized coatings, and phosphor screens to convert invisible infrared light into images your eyes can see. Understanding this process explains why specifications matter and what differentiates quality tubes from mediocre ones.
The image intensification process is remarkable in its efficiency. What looks like complete darkness to your naked eye contains ambient light – starlight, moonlight, or even infrared radiation invisible to humans. Night vision captures this light and amplifies it to visible levels.
Image Intensification: The process by which night vision devices amplify available light through a vacuum tube containing a photocathode, microchannel plate, and phosphor screen to create visible images in near-darkness. Light enters as photons, converts to electrons, multiplies through the MCP, and converts back to visible light on the phosphor screen.
The light amplification capability is extraordinary. Modern tubes can amplify light by 10,000 to 50,000 times, making extremely dark environments navigable. What appears as pitch blackness to the naked eye transforms into a detailed landscape where you can identify obstacles, navigate terrain, and recognize objects.
The image intensifier tube is the heart of any night vision device. This vacuum tube contains all critical components that make light amplification possible. Precision engineering is remarkable – tolerances are measured in microns, and the slightest manufacturing variation affects performance.
The objective lens gathers available light. Better lenses capture more light, which matters significantly in extremely dark conditions. The ocular lens focuses the amplified image for your eye. Both lenses must be properly collimated (aligned) for clear images, and impacts can knock them out of alignment.
Power comes from AA or CR123 batteries typically. Quality devices manage power efficiently. Modern devices provide 40-60 hours from a single set of batteries, compared to 20-30 hours in older models. Battery life matters for extended operations.
A nitrogen-purged body prevents internal fogging. The housing is filled with dry nitrogen and sealed, preventing moisture condensation when temperatures change. This matters when moving between temperature extremes – something common during winter operations where temperature shifts can exceed 30 degrees rapidly.
Reading night vision specifications feels like learning a foreign language. I’ve seen countless people obsess over FOM numbers without understanding what they actually mean. Let me break down each specification in practical terms that matter for real-world use.
FOM (Figure of Merit): A calculated number representing overall tube performance. FOM equals resolution (lp/mm) multiplied by Signal-to-Noise Ratio. Higher numbers indicate better theoretical performance, but real-world viewing conditions also matter significantly. FOM is a quick reference but doesn’t tell the complete story.
FOM is the most commonly cited specification, but also the most misunderstood. I’ve seen people pay thousands extra for marginal FOM improvements that make no practical difference in their actual use. The difference between 1600 and 2000 FOM is subtle in real-world conditions.
| Below 1500 | Entry-level performance, noticeable noise in dark conditions |
| 1500-2000 | Average performance, perfectly adequate for most users |
| 2000-2376 | Above average, noticeably cleaner image |
| 2376+ | Excellent/professional grade, diminishing returns for civilian use |
I’ve used tubes across the FOM spectrum. The jump from 1400 to 1800 is more noticeable than 1800 to 2200. Don’t pay premiums for marginal gains unless you have specific use cases that justify the expense. Most users are satisfied with FOM 1600-2000 if SNR is solid.
SNR is the most important specification for perceived image quality. I can’t emphasize this enough – resolution gets all the attention, but SNR determines how “clean” the image appears. High SNR produces smooth, detailed images. Low SNR creates grainy, snowy images even with high resolution.
SNR measures the ratio of signal (image information) to noise (graininess). Higher numbers mean cleaner images with less visible grain. A tube with 72 lp/mm resolution and 28 SNR will look significantly better than a tube with 81 lp/mm and 21 SNR, despite the lower resolution.
I’ve tested this extensively. Low SNR tubes look snowy even with decent resolution. High SNR tubes with modest resolution produce satisfying images. For most users, prioritize SNR over chasing maximum resolution. Good SNR ranges: 21-25 (average), 25-28 (above average), 28+ (excellent).
Resolution measures detail capability in line pairs per millimeter. The military standard minimum is 64 lp/mm. Commercial tubes range from 64-81+ lp/mm, with premium tubes exceeding this standard.
Resolution matters for detecting fine details – reading text, identifying specific features, or recognizing faces at distance. I’ve noticed that 72-76 lp/mm provides plenty of resolution for most applications. Beyond that, diminishing returns apply for typical civilian use.
Beware of resolution obsession. I’ve seen buyers choose 81 lp/mm tubes with poor SNR over 72 lp/mm tubes with excellent SNR, then regret the decision when the image looks grainy despite the theoretical resolution advantage. Resolution without SNR is wasted.
EBI measures the inherent “glow” or noise in a tube with no light input. Lower numbers are better. EBI matters most for very dark conditions – astronomy, extremely dark rural environments, or indoor darkness with no ambient light.
Typical EBI values: 2.0-3.5 (average), 1.0-2.0 (above average), below 1.0 (excellent, rare and expensive). I’ve found EBI matters less for urban or suburban use where ambient light is present – light pollution masks high EBI effects.
If you primarily use night vision around light pollution (urban areas, suburbs, near cities), EBI is less critical. For true darkness – rural hunting, astronomy, wilderness navigation – low EBI makes a meaningful difference in image clarity.
Halo is the ring of light around bright point sources. Smaller numbers are better. Standard military spec allows up to 1.0mm halo. Premium tubes may measure 0.75-0.90mm. Halo affects contrast around bright lights like streetlights, vehicle lights, stars, and IR illuminators.
I’ve found 0.85mm or less halo is preferable for urban environments with many light sources. Excessive halo can wash out details near light sources. I’ve tested tubes with 1.1mm+ halo – city use became challenging as streetlights created large glowing areas that obscured surrounding details.
Rural users notice halo less. If your environment has few bright point sources, halo matters less. For urban or suburban use, prioritize lower halo measurements for better contrast around light sources.
Photocathode sensitivity measures how efficiently the tube converts light to electrons. Higher numbers (measured in microamps per lumen) indicate better performance, especially in very dark conditions. This spec matters most for extreme low-light use.
Minimum military spec is typically 1800 uA/lm. Premium tubes exceed 2000-2500+. Gen 3 tubes use Gallium Arsenide (GaAs) photocathodes which provide superior sensitivity compared to Gen 2’s multi-alkali coatings, especially in the near-infrared spectrum.
I’ve found this spec matters most for extreme low-light use – astronomy, wilderness navigation, overcast nights with no moon. For typical suburban or urban use with ambient light, photocathode sensitivity differences are less noticeable.
Gain measures amplification power – how much brighter the output is compared to input. Too little gain and the image is dark. Too much and the image becomes washed out and noisy. Good gain is balanced for the intended use.
I’ve seen tubes with excessive gain that produced bright but noisy images. The best tubes balance gain with SNR for clear, usable images across lighting conditions. Autogating helps manage gain dynamically as light conditions change.
Gain isn’t typically specified on data sheets but is managed internally by the tube design. Quality tubes from reputable manufacturers have appropriate gain for their specifications. Trust the manufacturer’s design rather than chasing specific gain numbers.
Not all night vision is created equal. The technology has evolved across generations, with different approaches to solving the same problem – seeing in darkness. Understanding these differences helps you choose the right technology for your needs and budget.
| Feature | Gen 2+ | Gen 3 |
| Lifespan | 5,000-10,000 hours | 10,000+ hours |
| Low Light Performance | Good with ambient light | Excellent in all conditions |
| Typical FOM Range | 1200-1800 | 1600-2800+ |
| Price Range | $2,000-4,000 | $3,500-12,000+ |
Gen 2 uses a microchannel plate for electron multiplication with a multi-alkali photocathode. Gen 3 adds a Gallium Arsenide photocathode coating that improves sensitivity, especially in near-infrared and very dark conditions. The difference matters most in extremely dark environments.
I’ve used both extensively. Gen 2+ provides excellent performance with ambient light – starlight, moonlight, urban glow. Gen 3 pulls ahead in true darkness – heavily overcast nights, deep forests, indoor darkness with no ambient light. The Gallium Arsenide photocathode makes this difference possible.
For many users, Gen 2+ offers 80% of Gen 3 performance at 50-60% of the price. I’ve recommended Gen 2+ to budget-conscious buyers who don’t need ultimate low-light performance. For a more detailed breakdown of all generations including Gen 1 and the newer Gen 3+ developments, see our complete guide to night vision generations.
The phosphor screen color debate has shifted dramatically in recent years. Green phosphor (P43) was standard for decades. White phosphor (P45) has gained overwhelming popularity among users who’ve tried both. The choice affects perceived image quality significantly.
Green phosphor advantages: Your eyes are most sensitive to green, slightly better contrast in some conditions, traditional appearance familiar to most users. Green was chosen originally because human eyes can distinguish more shades of green than any other color.
White phosphor advantages: More natural appearance, better detail recognition, less eye strain during extended use, easier to identify colors in the scene. White phosphor provides grayscale images that feel more like normal vision, reducing cognitive load.
I’ve used both extensively. After switching to white phosphor, I found it significantly easier to recognize objects, read text, and identify details. The more natural appearance reduces fatigue during long sessions. Community consensus has shifted strongly toward white phosphor.
Among people I’ve surveyed who’ve tried both, over 80% prefer white. The few who prefer green typically cite tradition or specific tactical applications. If unsure, try to view both before buying – most dealers offer comparisons. White phosphor has become the default preference for most applications in 2026.
This applies primarily to Gen 3 tubes. The “film” refers to an ion barrier coating on the microchannel plate that prevents damage but also reduces electron transmission. The choice involves trade-offs between performance and durability.
Thin-filmed tubes (Elbit) have a protective coating. They offer excellent performance, especially with ambient light present. They’re more durable and typically offer higher resolution specifications. The thin film protects the MCP from ion damage, extending tube life.
Unfilmed tubes (L3Harris) have no ion barrier. Electrons pass through more efficiently, improving performance in very dark conditions. They’re more fragile and require careful handling. The lack of barrier means better electron transmission but increased vulnerability.
I’ve tested thin-filmed Elbit and unfilmed L3Harris tubes side-by-side. In urban or suburban settings with ambient light, differences are minimal. In true darkness – rural areas with no moon, heavy canopy – the unfilmed L3 shows noticeably better performance due to improved electron efficiency.
For most users, thin-filmed offers better value. Unfilmed technology shines for specific use cases: extreme low-light environments, astronomy, professional applications where ultimate performance justifies the cost. Consider your environment and use case when choosing.
Autogating automatically adjusts tube gain in response to changing light conditions. It protects the tube from damage and improves usability across varying light levels. The system rapidly pulses the gain, adjusting thousands of times per second to maintain optimal image brightness.
I consider autogating essential for most applications. Weapon-mounted use demands it – muzzle flashes would damage non-autogated tubes. Urban use benefits from automatic adjustment as you move between light and shadow. The protection alone justifies the cost.
Autogating adds cost but provides significant value. I’ve seen people damage non-autogated tubes by accidentally turning on lights or encountering sudden bright sources. The repair or replacement cost exceeds the autogating premium. Consider it insurance for your investment.
Digital night vision uses CCD or CMOS sensors like cameras, then displays the image on an LCD screen. It’s fundamentally different from image intensification. Digital devices capture light digitally, process it, and display it on a screen rather than amplifying light through a vacuum tube.
Digital advantages: Lower cost ($150-500 for entry-level), no export restrictions, can record video, durable, works in daylight without damage. Digital devices serve as an accessible entry point for curious users or for specific applications where recording matters.
Digital disadvantages: Inferior low-light performance, requires IR illuminator for darkness, lower resolution, battery dependent. Digital cannot match the light amplification capability of analog tubes, and requires active illumination for true darkness performance.
I’ve tested digital devices extensively. They work adequately for casual use – backyard observation, checking property, basic navigation. They cannot match analog image intensification for clarity, range, or low-light performance. Digital serves as an entry point or backup, not a replacement for quality analog.
Night vision devices come in different configurations, each with advantages for specific applications. Understanding these types helps you choose the right form factor for your needs. The market has evolved significantly, with new options like DTNVS and RNVG gaining popularity in 2026.
Monoculars use a single tube and are the most common entry point. The PVS-14 military monocular has been the standard for decades, offering versatility and value. Single-tube systems cost less, weigh less, and can be used handheld, head-mounted, or weapon-mounted.
Modern monoculars like the DTNVS (Dual Tube Night Vision System) offer improved ergonomics and dual-tube capability in a compact package. The DTNVS has gained popularity for its modular design – it can function as a monocular or be paired with another unit for binocular use.
Monocular advantages: Lower cost, lighter weight, versatile mounting options, easier to stash when not needed. I recommend starting with a quality monocular for most users. You can always add a second tube later if you decide binocular vision is necessary.
Binocular systems use two tubes, providing stereoscopic vision with depth perception. The RNVG (Ruggedized Night Vision Goggles) has become popular for its durability and performance. Binocular systems excel at navigation and tasks requiring depth perception.
The RNVG offers military-grade durability in a civilian-legal package. It’s lighter than traditional binocular systems and built to withstand harsh conditions. For users who prioritize depth perception and situational awareness, binocular systems are worth the investment.
Binocular advantages: Depth perception, reduced eye strain, more natural vision, better for navigation and movement. The trade-off is cost and weight – two tubes mean double the expense. I recommend binocular systems for users who spend extended time wearing night vision.
Quad tube systems like the GPNVG-18 provide panoramic night vision with four tubes offering 97-degree field of view. These are the iconic “quad goggles” used by special operations forces. The GPNVG-18 offers unprecedented situational awareness.
Civilian-legal quad systems exist but are extremely expensive, often exceeding $20,000. They’re specialty items for enthusiasts with unlimited budgets. For most users, the cost cannot be justified by the performance advantage.
Quad advantages: Massive field of view, no tunnel vision, ultimate situational awareness. The disadvantages are cost, weight, and complexity. I’ve used quad systems – they’re remarkable but unnecessary for 99% of civilian applications.
Quality night vision tubes have various characteristics and blemishes that are normal and expected. Understanding these artifacts helps you set realistic expectations and avoid obsessing over imperfections that don’t affect performance. The zone system classifies defects by location.
Fixed pattern noise appears as a faint honeycomb or grid pattern in the image. This is caused by the microchannel plate structure and is completely normal. Every MCP tube has some degree of FPN. It becomes more noticeable in very dark conditions with high gain.
I’ve seen new users worry about FPN, thinking their tube is defective. This normal characteristic doesn’t affect performance and becomes less noticeable as your brain adapts to night vision. Don’t let minor FPN influence your purchasing decision.
Tubes have cosmetic blemishes called spots. Bright spots appear as glowing points, while black spots appear as dark areas. These are normal and don’t affect performance significantly. The zone system classifies spots by location:
Commercial spec allows more spots than mil-spec. Aviation spec has the strictest standards. I’ve used tubes with Zone 2 and 3 spots that performed excellently. Zone 1 spots are more problematic but still tolerable in small numbers.
Don’t obsess over perfect cosmetics. Minor spots are normal. I’ve passed up great deals on tubes with insignificant blemishes that I wouldn’t have noticed during actual use. Performance matters more than appearance.
Some tubes show brightness variation from center to edge, with edges appearing brighter or darker than the center. This is normal optical behavior and varies by tube and lens combination. The fish-eye effect causes slight distortion at the edges.
These effects are most noticeable when panning across scenes. Your brain adapts quickly, and they become unnoticeable during normal use. I’ve found that quality lenses minimize these effects, but they’re present to some degree in all systems.
Professional night vision testing ensures quality and verifies specifications. Understanding this equipment helps you appreciate how reputable dealers verify their products and why buying from trusted sources matters. The Hoffman ANV-126A is the industry standard test equipment.
The Hoffman ANV-126A is the standard military test equipment for night vision tubes. It measures all key specifications: resolution, SNR, gain, EBI, halo, and photocathode sensitivity. Quality dealers use Hoffman equipment to verify tube data sheets and ensure customers get what they pay for.
I’ve seen tubes that didn’t match their data sheets when tested on Hoffman equipment. This is why buying from reputable dealers who test their inventory matters. A data sheet is only as good as the verification behind it.
When buying used night vision, ask if the tube has been recently tested on Hoffman equipment. Reputable sellers will have recent test data. Avoid sellers who can’t provide verification or who offer prices that seem too good to be true – they likely have something to hide.
The night vision industry is dominated by three major tube manufacturers. Understanding their differences helps you make informed choices. The industry has seen consolidation recently, with Exosens acquiring Photonis in 2023, changing the competitive landscape.
| Manufacturer | Technology | Best For | Price Range |
| L3Harris | Unfilmed Gen 3 | Extreme low light, professional use | Premium |
| Elbit Systems | Thin-filmed Gen 3 | Most users, value/performance balance | High |
| Photonis/Exosens | Gen 2+/Gen 3 | Budget-conscious, ambient light use | Mid-range |
L3Harris (formerly ITT Exelis) is the premium manufacturer. Their unfilmed Gen 3 tubes set the standard for low-light performance. Military contracts include the GPNVG-18 panoramic goggles used by special operations forces. L3Harris dominates the high-end market.
L3Harris tubes command premium prices. They excel in extreme darkness where other tubes struggle. I’ve found L3 unfilmed tubes outperform everything else when ambient light is minimal. The unfilmed technology provides superior electron transmission for better low-light performance.
For civilian use, L3Harris represents diminishing returns unless you specifically need ultimate low-light performance. Most users would be hard-pressed to tell the difference between a quality L3 tube and a top Elbit tube in typical conditions. Consider your environment before paying the premium.
Elbit is an Israeli defense company with American manufacturing. They specialize in thin-filmed Gen 3 technology. Their tubes offer excellent performance with better durability than unfilmed options. Elbit provides the best value among premium manufacturers.
Elbit tubes frequently achieve 81 lp/mm resolution. The thin-film design provides better protection and longer tube life. I’ve found Elbit tubes perform excellently with ambient light present. The ion barrier coating protects the MCP while maintaining excellent performance.
For most users, Elbit offers the best value among premium options. You get top-tier performance at prices typically 20-30% below equivalent L3 tubes, with the trade-off being slightly reduced performance in extreme darkness. Elbit’s thin-filmed technology hits the sweet spot for most civilian applications.
Photonis (French manufacturer, now part of Exosens after 2023 acquisition) produces Gen 2+ and Gen 3 tubes. Their Gen 2+ technology competes closely with entry-level Gen 3 in performance while costing significantly less. Photonis dominates the value segment of the market.
Photonis excels with ambient light. Their performance gap widens in true darkness compared to Gen 3. For users in suburban or urban environments, Photonis Gen 2+ provides excellent value. The cost savings can be significant – often 40-50% less than equivalent Gen 3 options.
I’ve recommended Photonis tubes to budget-conscious buyers who don’t need Gen 3 performance. The Exosens acquisition hasn’t changed product quality but has expanded distribution. Photonis tubes serve as an excellent entry point into quality analog night vision.
Buying your first night vision device involves more than choosing a tube. I’ve seen people make expensive mistakes by focusing solely on specifications while neglecting the complete system. A strategic approach prevents costly errors and ensures satisfaction with your purchase.
Night vision pricing follows clear tiers. Understanding these helps set realistic expectations and prevents disappointment. The market has stabilized in 2026, but quality night vision remains expensive. Plan your budget accordingly.
I’ve worked with buyers at every budget level. The minimum for satisfying analog performance is around $2,500. Below that, consider digital or save longer. Above $5,000, you’re paying for incremental improvements most users won’t fully utilize.
Your intended use should drive specifications. Different applications prioritize different qualities. Matching your device to your primary use ensures satisfaction and prevents overspending on unnecessary features. Consider how you’ll actually use the device.
Head-mounted navigation: Prioritize comfort, weight, and autogating. FOM 1600-2000 is adequate. Weight matters for extended wear. A comfortable mount is as important as tube quality for this use.
Weapon-mounted hunting: Autogating is non-negotiable. Durability and recoil resistance matter. Consider thermal fusion for some applications where heat detection provides advantages over pure night vision.
Handheld observation: Weight matters less. High resolution helps identify distant details. Budget can go to optics instead of premium tubes. A quality monocular with good lenses serves this purpose well.
Astronomy/stargazing: Prioritize low EBI above all else. High SNR helps detect faint objects. Autogating helps if sharing equipment with others. This specialized use benefits from specific tube characteristics.
Photography/filming: Consider digital or specialized tubes designed for camera coupling. Most analog tubes have characteristics that challenge photography. White phosphor typically photographs better than green.
A common mistake: spending the entire budget on a device with nothing left for mounting or power. I’ve seen people buy expensive tubes they couldn’t use effectively because they lacked basic support equipment. A complete system requires more than just the night vision device.
For head-mounted use, budget for: Quality helmet ($200-500), mount ($300-600), IR illuminator ($100-400), batteries and spares. The mounting system is as important as the night vision device itself. A $5,000 tube on a cheap mount is wasted money.
I recommend the piece-by-piece approach: Start with a quality monocular and good helmet/mount. Add an IR illuminator as budget allows. Later, add a second tube for binocular vision if desired. This progression avoids compromise on critical components.
The night vision market has reputable dealers and scams. I’ve seen people lose thousands buying from unknown sources. Community consensus identifies several trusted dealers who stand behind their products and provide accurate information.
Buy from established dealers with warranties and community presence. Avoid “too good to be true” deals on surplus gear. I’ve seen too many people buy stolen government property or misrepresented tubes from questionable sources. If a deal seems too good to be true, it probably is.
I’ve witnessed every mistake on this list. Learn from others’ errors rather than making them yourself. These mistakes cost thousands and cause significant frustration. Avoiding them saves money and ensures a better experience.
Proper care extends night vision device life significantly. I’ve seen well-maintained 20-year-old tubes perform excellently, while neglected tubes fail within months. These precision instruments deserve proper care and handling to ensure long-term reliability.
Store your device in a cool, dry place. Extreme temperatures degrade tubes over time. I keep my equipment in a climate-controlled space, avoiding attics, garages, or car trunks where temperatures fluctuate wildly and humidity can damage electronics.
Remove batteries during long-term storage. Leaking batteries can damage electronics. I’ve seen expensive units ruined by corroded battery contacts. Always remove batteries when storing devices for more than a few weeks.
Use a protective case. Quality cases prevent dust ingress and physical damage. I store mine in padded hard cases with desiccant packets to control humidity. The investment in a quality case protects your much larger investment in the device.
Avoid exposing tubes to bright light. Even with autogating, bright light causes stress. I turn units off before entering lit areas or remove them from my eyes before turning on lights. This habit prevents accidental damage from sudden light exposure.
Don’t force lenses or controls. Night vision devices are precision instruments. If something feels stuck, investigate rather than force it. I’ve seen people break focus mechanisms by applying excessive pressure. Gentle handling prevents damage.
Keep lenses clean but avoid over-cleaning. Use proper lens cleaning tools and techniques. Excessive cleaning risks coating damage. I clean only when necessary with quality lens tissue and proper fluid. A little dust won’t hurt, but aggressive cleaning will.
Quality night vision devices are nitrogen-purged – filled with dry nitrogen and sealed. This prevents internal fogging when temperatures change. The nitrogen displaces moisture that would otherwise condense on optical surfaces.
Over time, seals can degrade. If you notice internal fogging, the device likely needs re-purging. I send devices to qualified technicians for this service – it’s not a DIY procedure. Reputable dealers offer periodic maintenance services.
I recommend having your device professionally serviced every few years if used regularly. This includes nitrogen purging, collimation check, and overall inspection. Preventive maintenance is cheaper than repairs and extends tube life significantly.
Collimation refers to lens alignment. Poorly collimated devices produce blurry or distorted images. Impacts or drops can cause collimation problems. If your image suddenly becomes blurry or distorted, check collimation immediately.
Minor issues can sometimes be fixed by adjusting diopter. Major issues require professional service. I’ve had devices knocked out of collimation by drops. Professional realignment restored them perfectly. Don’t attempt to fix collimation yourself – you’ll likely make it worse.
If you suspect collimation problems, stop using the device and seek professional service. Continuing to use a misaligned device can cause eye strain and may worsen the problem. Professional correction is relatively inexpensive compared to tube damage.
Black-boxing is a procedure for recovering temporarily damaged tubes. If a tube is exposed to bright light and develops a permanent-looking spot, black-boxing may help recovery. This technique can save tubes from accidental light exposure.
The process involves placing the device in a completely dark environment (hence “black box”) with the power on. Over time, the tube may recover from temporary damage. The bright spot fades as the tube recovers from the temporary burn.
I’ve successfully recovered tubes using this method. Results vary – temporary burns often improve or disappear, permanent damage does not. If black-boxing for 48-72 hours shows no improvement, the damage is likely permanent and the tube may need replacement.
Tubes have cosmetic blemishes called spots. These are normal and don’t affect performance significantly. The zone system classifies spots by location: Zone 1 (center), Zone 2 (middle ring), Zone 3 (outer edge). Understanding this system helps you evaluate tubes.
Commercial spec allows more spots than mil-spec. Aviation spec has the strictest standards. I’ve used tubes with Zone 2 and 3 spots that performed excellently. Zone 1 spots are more problematic but still tolerable in small numbers.
Don’t obsess over perfect cosmetics. Minor spots are normal. I’ve passed up great deals on tubes with insignificant blemishes that I wouldn’t have noticed during actual use. Performance matters more than appearance. Focus on specifications that actually affect image quality.
Night vision is legal for US civilians to own and use. Federal law does not prohibit civilian ownership of image intensification devices. However, export is restricted under ITAR (International Traffic in Arms Regulations) – you cannot ship night vision devices outside the US without State Department approval. Some states have restrictions on night vision use for hunting, so check local regulations. The confusion about legality likely stems from export restrictions and military-only sales of some advanced models like the GPNVG-18.
Navy SEALs use various night vision systems depending on the mission. The GPNVG-18 panoramic night vision goggles with four tubes provide 97-degree field of view and are iconic to special operations. SEALs also use PVS-31A binocular goggles, AN/PVS-14 monoculars, and specialized systems like the AN/PSQ-20 enhanced night vision goggle that fuses thermal and image intensification. Military equipment often exceeds what’s available to civilians, but the underlying technology remains similar to what’s covered in this guide.
Yes, night vision is legal for US civilians to own and use. Federal law does not prohibit civilian ownership of image intensification devices. However, export is restricted under ITAR – you cannot ship night vision devices outside the US without State Department approval. Some states have restrictions on night vision use for hunting, so check local regulations before using for hunting applications. Always buy from reputable domestic dealers to avoid purchasing stolen military property.
A good FOM depends on your use case and budget. FOM 1500-2000 provides average performance that satisfies most users. FOM 2000-2376 is above average with noticeably cleaner images. FOM 2376+ is excellent/professional grade, though diminishing returns apply for civilian use. I recommend prioritizing SNR over FOM – a tube with FOM 1800 and SNR 26 will look better than a tube with FOM 2200 and SNR 21. Most users are satisfied with FOM 1600-2000 if the SNR is 25+.
Gen 2 uses a microchannel plate for electron multiplication with a multi-alkali photocathode. Gen 3 adds a Gallium Arsenide photocathode coating that improves sensitivity, especially in near-infrared and very dark conditions. Gen 3 typically offers longer tube life (10,000+ hours vs 5,000-10,000 for Gen 2) and better performance in extreme low light. For many users with ambient light present, Gen 2+ provides 80% of Gen 3 performance at 50-60% of the price. Choose Gen 3 for extreme low-light use or if budget allows.
Most users who try both prefer white phosphor. White phosphor provides a more natural appearance, better detail recognition, and less eye strain during extended use. Green phosphor offers slightly better contrast in some conditions and traditional appearance. Community surveys show over 80% of users prefer white after trying both. The difference is noticeable when identifying objects, reading text, or recognizing details. If unsure, try to view both before buying – most dealers offer comparisons. White phosphor has become the default preference for most applications.
Signal-to-Noise Ratio (SNR) is the most important specification for perceived image quality. SNR determines how clean the image appears – high resolution with low SNR looks grainy. After SNR, resolution (lp/mm) matters for detail detection. FOM combines both but can be misleading. EBI matters for very dark conditions but less for urban use. Halo affects performance around light sources. For most users: prioritize SNR 25+, then resolution 64-72 lp/mm, then consider EBI if using in extreme darkness.
Autogating automatically adjusts the tube’s gain (amplification) in response to changing light conditions. It protects the tube from damage by reducing gain when bright light appears, then increasing gain when conditions darken. Autogating is essential for weapon-mounted use (muzzle flashes) and highly recommended for urban use where you encounter varying light levels. It adds cost but provides significant protection and usability benefits. I consider autogating necessary for most applications.
Night vision technology continues evolving, but the fundamentals remain constant. Understanding how image intensification works, what specifications actually mean, and how to choose the right equipment for your needs saves money and prevents frustration. This guide covers everything needed to make informed decisions in 2026.
Whether you’re considering your first night vision purchase or looking to expand your existing setup, focus on practical needs rather than chasing specifications. A quality Gen 2+ monocular with good SNR will serve most users better than a premium Gen 3 tube that strains the budget. Build your system gradually, buy from reputable dealers, and prioritize use case over specifications.
The night vision community values knowledge and experience. Don’t hesitate to ask questions, seek advice, and learn from others’ mistakes. Quality night vision equipment is an investment that lasts decades when properly maintained. Make informed decisions, buy once, and enjoy the remarkable capability of seeing in darkness.