
8 Best Binoculars for Elk Bugling (September 2026)
I’ve spent more than 30 days chasing bugling bulls across Colorado, Wyoming, and New Mexico over the past six seasons,…

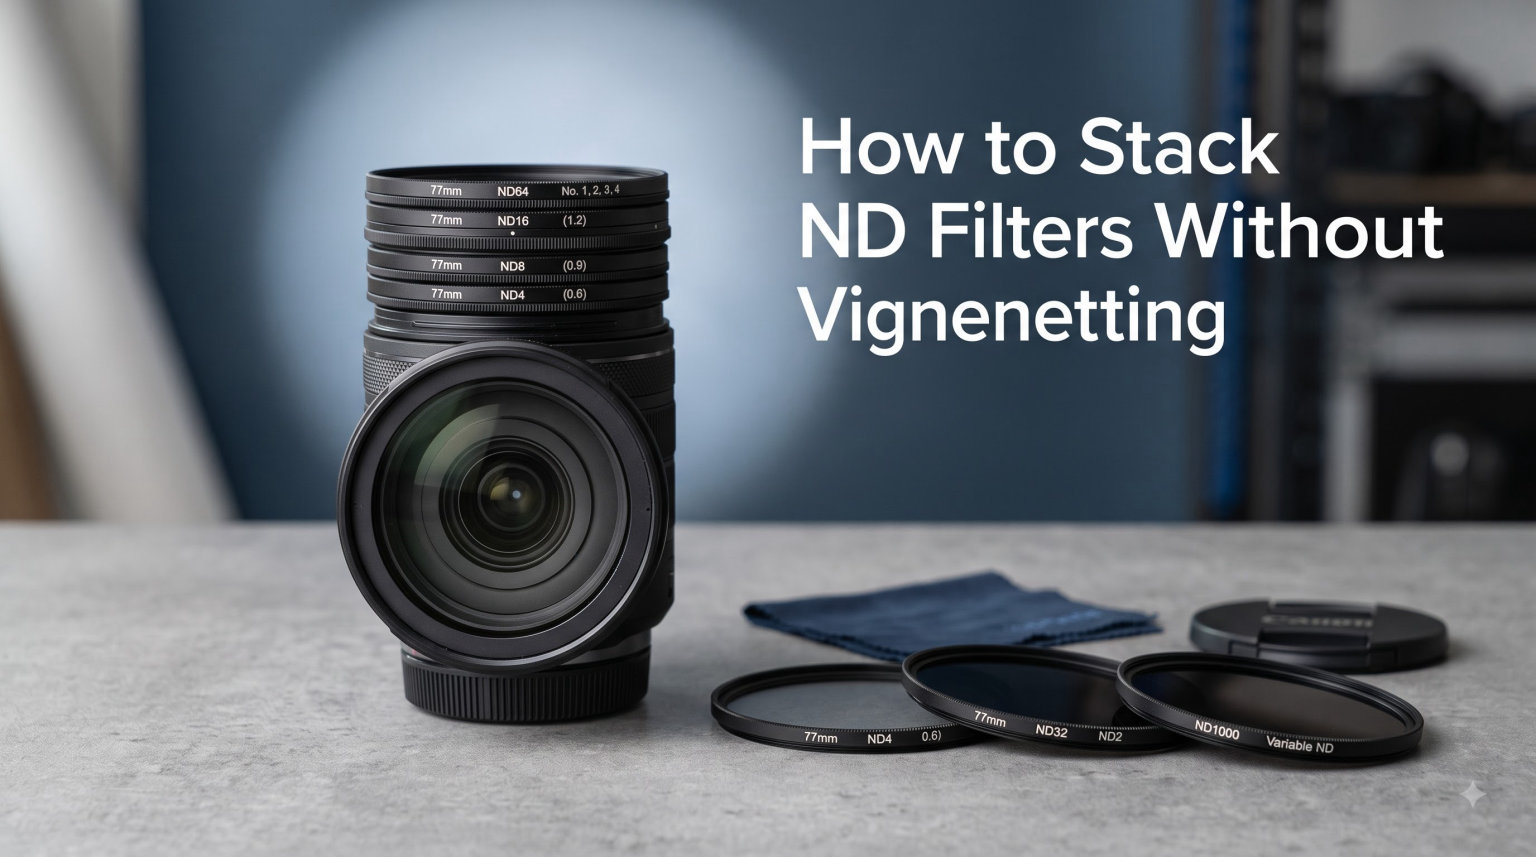
I have lost count of how many landscapes I have shot with dark corners eating the frame. If you have ever mounted a second ND filter and watched the corners of your preview go black, you already know the frustration. Learning how to stack ND filters without vignetting is one of those skills that separates clean long exposures from files you end up cropping in post.
I run long exposures in foggy harbors, mountain valleys, and tight urban alleys, so I have stacked everything from a 10-stop Big Stopper to a 6-stop ND with a polarizer on the front. Some of those setups caused heavy vignetting at 16mm and barely showed any at 35mm. That difference is not random, and once you understand what is going on optically, you can prevent almost every case of dark corners before you press the shutter.
This guide is the workflow I actually use in 2026. I will show you what causes stacked-filter vignetting, how to diagnose it in 60 seconds, and the exact prevention steps that keep your wide-angle long exposures clean.
Vignetting from stacked ND filters is almost always mechanical, not optical. Mechanical vignetting happens when something physical blocks the wide-angle light cone before it reaches the sensor, and a stack of filters is a perfect offender.
Optical vignetting is built into the lens design. Light rays hitting the edge of the frame travel at a steeper angle and pass through more glass, so they fall off naturally. You will see it on every lens at the widest aperture, and lens profiles in Lightroom usually clean it up.
Mechanical vignetting is different. The filter frame, the step-up ring, or the holder itself physically intrudes into the light cone. You will see hard, sharp-edged corners that look almost like a second frame inside your image. No lens profile can fix this because the pixels were never recorded in the first place.
Every filter you add moves the front mounting edge farther from the lens. Two filters in a single ring create a deeper tunnel. Three filters make the tunnel deeper still. At 24mm on a full-frame body, even one filter with a thick frame can intrude. Add a second filter on top and the corner shadowing becomes obvious.
This is why the same lens that handles a single 10-stop ND cleanly will show heavy dark corners the moment you stack a polarizer on top of it. The combined filter height extends the front edge, and the wider your focal length, the more obvious the problem.
Variable ND filters introduce a separate issue. Inside the filter are two polarizing layers that rotate relative to each other. When you stack them or push them to their strongest settings, the polarization axes can create a dark X-shaped band across the center of your frame at wide focal lengths. It looks nothing like corner vignetting and is a totally different problem.
I will explain how to identify and avoid the X-pattern later, because most people mistake it for a stacking issue when it is really a variable ND design limitation.
Treat the diagnosis like a 60-second field test. The shape, sharpness, and color of the dark area tells you what is actually going on, and that determines the fix.
If the dark corners have a sharp, defined edge where the dark area meets the bright image, you are looking at mechanical vignetting. The frame is blocking light. The fix is in your filter setup, not your aperture.
If the dark corners fade gradually into the image with no sharp edge, you are looking at optical vignetting from the lens itself. Stopping down by one or two stops usually clears it up. Lens correction profiles in post handle most of what remains.
When in doubt, stop the lens down to f/8 or f/11 and shoot a test frame. If the dark corners disappear, the lens was the cause. If they stay exactly the same, the filter stack is the cause.
Here is the exact sequence I run when I suspect vignetting from a stacked ND setup. It takes about a minute.
The focal length where the corners clear up tells you your safe range. If you need to shoot at 16mm, that setup will not work. If 24mm is your limit and you shoot mostly at 35mm and up, you are fine.
Prevention is faster than fixing in post. These are the techniques I apply before I leave the hotel room with the camera bag.
If your lens has a 77mm filter thread, use 77mm filters whenever you can. That sounds obvious, but a lot of photographers buy a single filter set in one size and use step-up rings to fit them on every lens. That works on telephotos and fails badly on wide-angles.
If you own a 16-35mm f/2.8 and a 24-70mm f/2.8, both with 82mm threads, buy your filters in 82mm. The depth of the front element on a 16-35mm is what makes mechanical vignetting show up first.
Filter manufacturers sell the same ND density in two frame styles: standard and slim. The slim version shaves a few millimeters off the front edge height and that single change can be the difference between vignetting and clean corners at 24mm.
If you shoot at 16mm or wider, look specifically for filters labeled wide-angle or ultra-slim. Brands like B+W, NiSi, and Breakthrough Photography all make wide-angle-specific versions. They cost slightly more but they eliminate the most common stacking problem.
There is no universal rule, but I have a hard limit: one circular filter on any lens at 24mm or wider, two circular filters at 35mm or longer. That is the rule I have used for ten years and it has held up across landscapes, urban work, and seascapes.
If I need more density at a wide focal length, I switch to a single fixed 10-stop or 15-stop filter instead of stacking. The single filter keeps the front edge as close to the lens as possible.
The direction of your adapter ring matters more than most photographers realize. Pick the wrong direction and you create vignetting that was not there before.
A step-up ring increases the filter thread size. A 67mm-to-77mm step-up ring lets you use 77mm filters on a 67mm lens. Because the larger filter sits in a wider mount, its front edge is physically farther from the optical axis, which sounds bad but actually moves the filter frame out of the wide-angle light cone.
This is the single biggest reason a step-up ring setup often produces cleaner corners than a same-size filter on the lens native thread.
A step-down ring shrinks the filter size, fitting a smaller filter on a larger lens. The smaller filter sits deeper inside the lens mount, so its frame intrudes into the light cone earlier. You will see heavy mechanical vignetting at any focal length below 35mm.
I only use step-down rings for telephoto and macro work where wide-angle issues do not apply. For landscapes and street scenes, step-up rings are the only safe choice.
Match the larger end of the ring to your widest lens. If your widest lens is 82mm and your smaller lenses are 67mm and 72mm, use 67mm-to-82mm and 72mm-to-82mm step-up rings. One filter set in 82mm covers everything.
Avoid chaining rings. A 67mm-to-77mm ring with a 77mm-to-82mm adapter stacked together adds unnecessary depth and almost guarantees vignetting at 16mm or 20mm.
Which filter type you choose for stacking has a bigger effect on vignetting than the filter brand or price.
Fixed ND filters contain a single piece of darkened glass. There is no polarization layer, no rotating ring, and no internal mechanism. Stacking two fixed ND filters is the cleanest setup you can get, and you will only see mechanical vignetting if the frames are too thick for your focal length.
This is why serious landscape photographers almost always shoot with fixed 6-stop, 10-stop, and 15-stop filters in a 100mm or 150mm square holder system. The holder itself is wide and flat, and there is no tunnel to worry about.
Variable ND filters let you dial in any density from 1 to 8 or 10 stops by rotating the front ring. That convenience comes with trade-offs at wide focal lengths. The internal polarization layers and the thicker rotating barrel create more opportunities for mechanical vignetting.
Most variable ND filters start showing corner darkening between 17mm and 24mm on full-frame bodies. The moment you stack another filter on the variable ND, that threshold climbs toward 28mm or 35mm.
The X-pattern is a separate issue from corner vignetting. Two dark bands form an X across the middle of the frame, usually only visible at the strongest densities (around 6 stops and above) and at wide focal lengths.
If you see an X-pattern, you are not seeing a stacking problem. You are seeing the two polarization layers fighting each other inside a single variable ND filter. The fix is to switch to a fixed ND, stop down the variable ND, or zoom in past the focal length where the X appears. Stacking a second filter will not fix it and will probably make it worse.
Sometimes you can solve mechanical vignetting with camera settings instead of changing your filter setup. Sometimes those settings make it worse.
Stopping down reduces optical vignetting but does almost nothing for mechanical vignetting. The filter frame is still in the same physical position, and the light cone still hits it at the same angles.
If your test shot at f/4 shows dark corners that look exactly the same at f/11, you have mechanical vignetting. Aperture is not the fix.
As you zoom toward the long end of a wide-angle zoom, the field of view narrows. The light cone hitting the front of the lens becomes less extreme, and the filter frame that was intruding at 16mm no longer touches the cone at 35mm.
This is the same reason the same lens and filter stack will show heavy vignetting at 16mm and a perfectly clean frame at 50mm. The image circle gets smaller, the filter frame stays the same size, and the intruding corners disappear.
From years of testing, here are the rough thresholds I have found for full-frame bodies with a typical slim filter on a step-up ring:
For APS-C bodies, multiply each focal length by 1.5 to get the equivalent full-frame threshold.
Stacking filters creates gaps. Gaps let light leak in through the viewfinder, between the filter threads, and through the seams where the rings meet. During a 30-second or 5-minute exposure, that stray light registers as fog, haze, or color casts across your image.
Each filter ring has a slight tolerance. Stack two filters with a step-up ring and you have three metal-to-metal contact points, each with micro-gaps. Light from the back of the camera, from streetlights, or even from your hand behind the lens can sneak through.
The longer the exposure, the more time light has to register on the sensor through those gaps. A 1/15 second exposure rarely shows leakage. A 4-minute exposure almost always does if the stack is unsealed.
The simplest fix is matte black tape wrapped around the seams of the stacked rings. It blocks light and adds a little grip. Better still, foam filter gaskets sit between filter rings and compress to seal the gap. Breakthrough Photography sells them, and a few third-party makers do too.
Also cover the viewfinder during long exposures. Every modern mirrorless and DSLR camera has a small eyepiece shutter or a viewfinder cover in the box. Use it. A naked eyepiece on a 90-second exposure will fog the entire frame.
Editing can fix optical vignetting and very mild mechanical vignetting. It cannot fix severe mechanical vignetting because the dark pixels were never recorded.
Enable lens corrections in Lightroom, Capture One, or Adobe Camera Raw. The built-in profile for your lens will automatically lift the corners based on the lens design and aperture. This handles most optical vignetting in one click.
For residual mechanical vignetting, the manual adjustment sliders under Manual tab let you apply a midpoint of -50 to -100 and a feather of around 50 to lift the dark corners. This works when the dark area is mild and gradual, not when it is a hard black frame.
If the dark corners are sharp-edged and almost black, you cannot recover them. No slider, no AI tool, no generative fill can reconstruct real image data that was never captured. This is why prevention is everything.
If the corners are only mildly darker than the center, you can lift them successfully. If they are pitch black with a hard edge, your only option is to crop the image or reshoot.
Print this list, save it on your phone, or run through it mentally before every long-exposure shoot. It is the same checklist I run before every landscape trip.
This list takes 30 seconds to run and saves you from discovering black corners three hours into a sunset shoot.
Black corners from an ND filter come from mechanical vignetting. The filter frame, step-up ring, or filter holder physically blocks part of the light cone at wide focal lengths. The dark area has a hard, defined edge and does not go away when you stop the lens down. Switching to a slim filter frame, using a step-up ring, or zooming past 24mm usually clears it up.
Yes, you can stack two ND filters, but the safe stacking limit depends on your focal length. On a full-frame body at 24mm or wider, one circular filter is usually the safe maximum. Two circular filters become safe around 35mm and longer. For wider angles, switch to a single higher-density fixed ND or use a square filter holder system instead.
A larger ND filter on a step-up ring reduces vignetting compared to the same filter on the lens native thread. The larger filter sits in a wider mount, moving its frame out of the wide-angle light cone. This is the most reliable fix for mechanical vignetting at 16mm to 24mm focal lengths.
Vignetting disappears when you zoom in because the field of view narrows. The light cone entering the front of the lens becomes less extreme at longer focal lengths, so the filter frame no longer intrudes into the image circle. A setup that shows heavy dark corners at 16mm will usually be clean by 35mm.
The X-pattern on a variable ND filter comes from its two internal polarizing layers interacting at strong density settings and wide focal lengths. It is not a stacking issue and stacking another filter will not fix it. Switch to a fixed ND, zoom in past the focal length where the X appears, or stop the variable ND down to a lower density range.
Stacking ND filters without vignetting comes down to three habits. First, diagnose what you are actually seeing so you fix the right problem. Second, buy filters in the size of your widest lens and use step-up rings for everything else. Third, respect your focal length thresholds and stop stacking circular filters past the safe limit.
If you shoot mostly wide-angle landscapes, invest in slim wide-angle filters or move to a 100mm square holder system. If you shoot a mix of focal lengths, build a 2 to 3 filter kit with fixed ND densities in your widest lens thread size. Either path removes the guesswork from every long exposure you set up.
I have been refining this workflow for over a decade, and it still saves me every season. Run the 60-second field test before your next long exposure, and you will stack ND filters without vignetting more often than not.