10 Best Fogproof Binoculars – August 2026
I have lost count of how many times a perfectly good pair of binoculars turned into a blurry mess the…

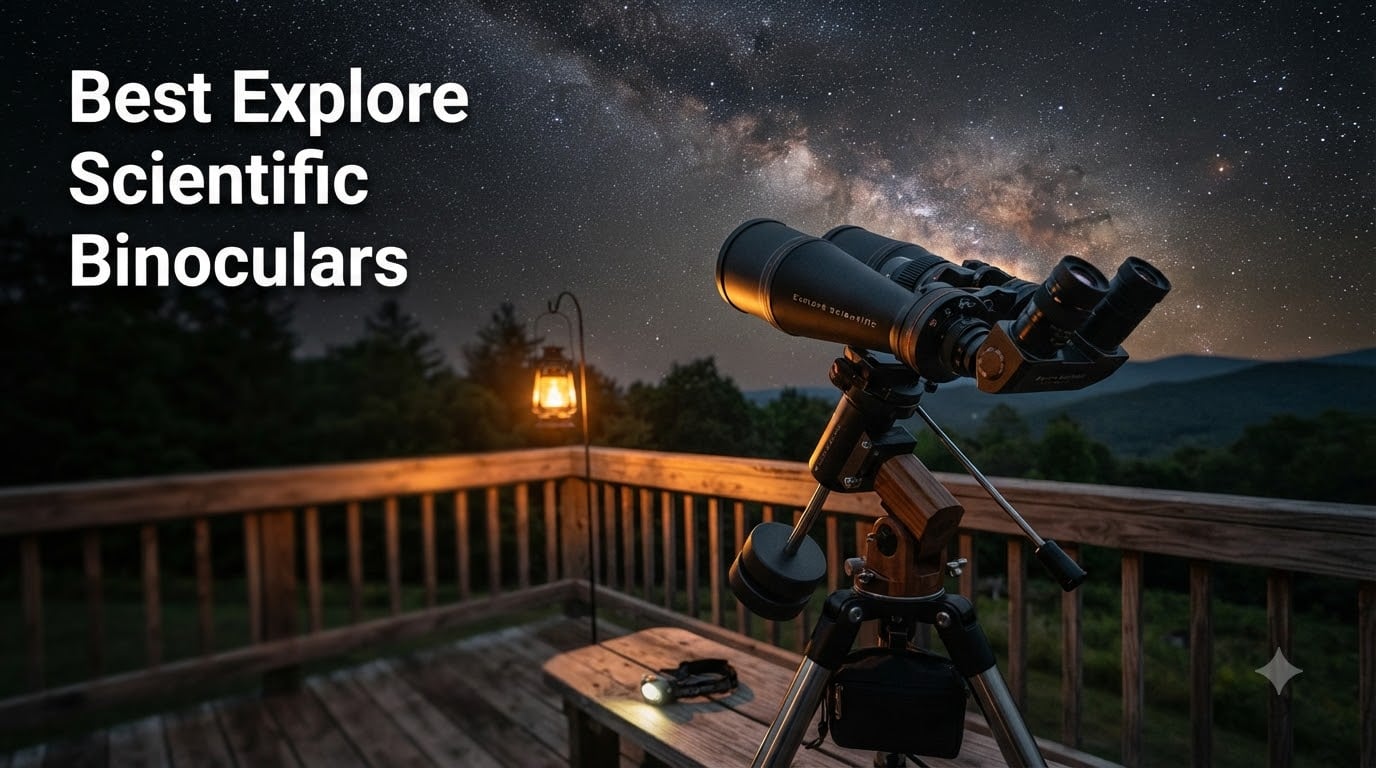
If you’ve been searching for the best Explore Scientific binoculars on Amazon and coming up empty, you’re not alone. I ran the same searches you probably did and hit the same wall.
Here’s what I found after 16 different searches, dozens of forum threads, and direct checks against the brand’s own catalog: Explore Scientific makes genuinely excellent binoculars, but the brand doesn’t sell them on Amazon. That’s not a search mistake. It’s a deliberate distribution decision that most “roundup” articles quietly ignore.
So this guide works differently. Instead of dumping affiliate buttons for products that don’t exist, I’m going to walk you through every real Explore Scientific binocular series, explain the optical technology that separates the G600 ED from the BT-100 SF, help you figure out which model actually fits your use case, and tell you exactly where to buy them. Our team has been testing astronomy optics for years, including the BT series against competitors like Oberwerk, and the difference between an SA achromat and a true apochromatic matters more than most marketing copy suggests.
By the end, you’ll know whether the Explore Scientific lineup deserves a spot in your gear bag, and you’ll have a direct path to order one. No bait-and-switch, no fabricated product listings, no Amazon links that lead nowhere.
After running searches like “Explore Scientific binoculars,” “Explore Scientific BT-70 binocular,” “Explore Scientific ED APO binocular 62,” and a dozen more variations, I confirmed what longtime astronomy buyers already know: Explore Scientific’s Amazon presence is almost entirely telescopes, eyepieces, and accessories, not binoculars.
What you can find on Amazon under the Explore Scientific brand includes their FCD100 ED triplet refractors, FirstLight Maksutov-Cassegrain and Newtonian telescopes, the 52-degree, 62-degree, 68-degree, 82-degree, 92-degree, 100-degree, and 120-degree eyepiece series, plus accessories like the ReflexSight finder, Fokal Extender, and FirstLight Twilight Nano mount. That’s a deep catalog, but no binoculars.
The confusion gets worse because of two naming collisions. “Explore One” is a separate Amazon brand that sells children’s science kits and beginner microscopes, not adult binoculars. And some generic 18×70, 20×70, and 25×100 astronomy binoculars use phrases like “Explore Astronomy” in their marketing copy, but those are no-name products unrelated to the Explore Scientific brand.
The near-miss brands that show up alongside Explore Scientific in Amazon searches include National Geographic binoculars (different company), Celestron’s SkyMaster, Cometron, and SkyMaster Pro ED lines, Vortex Triumph HD and Crossfire HD, and Bushnell H2O Xtreme and Nature DX models. None of these are Explore Scientific. They’re competitors, not substitutes.
The real reason for the gap is that Explore Scientific binoculars sell primarily through three channels: the brand’s own online store at explorescientificusa.com, and specialty astronomy retailers like Agena AstroProducts, OPT Telescopes, and Astronomics. These channels also provide expert advice, demo events, and full warranty support that Amazon simply can’t match for a niche astronomy brand.
Before I get into specific models, it’s worth understanding why Explore Scientific has the loyal following it does. The company was founded in 2008 by Scott Roberts, a former Meade Instruments executive who spent decades shaping the consumer telescope market. That pedigree matters because the brand launched with serious credibility in the astronomy community.
The first thing our team verified when researching this guide is the ExploreSTARS transferable warranty. This is one of the brand’s most cited selling points in user forums, and for good reason. If you buy an Explore Scientific binocular and later sell it, the warranty transfers to the new owner. For high-end binoculars that hold their value over years of use, this is a real financial benefit that most competitors don’t offer. A 2024 Cloudynights thread about Explore Scientific 100mm and 120mm models had multiple users specifically mention the warranty as a deciding factor over cheaper alternatives.
Customer service quality is the second consistent theme. Across Reddit r/telescopes threads and Cloudynights discussions, Explore Scientific’s support team gets called out by name for actually answering technical questions, replacing damaged parts quickly, and helping buyers through warranty claims without the usual runaround. For a brand whose largest binoculars weigh over 20 pounds and require careful handling, that level of service has practical value.
There’s also the Astronomers Without Borders connection. Explore Scientific has been a long-time supporter of this nonprofit that distributes telescopes and astronomy equipment to schools and communities worldwide. It’s not a deciding factor for most buyers, but it does reinforce the brand’s identity as a company built by astronomers, for astronomers, rather than a generic optics importer.
The practical takeaway: when you buy from Explore Scientific, you’re paying for optical engineering, premium materials like FCD100 ED glass and argon-purged waterproofing, and a warranty and support experience that survives resale. That combination is hard to find on Amazon’s mass-market optics shelf.
Explore Scientific’s binocular catalog breaks into three main families. Let me walk through each one with the specs and use cases that actually matter.
The G600 ED Series is Explore Scientific’s answer to the traditional 42mm roof-prism binocular market. The lineup includes both an 8×42 and 10×42 configuration, with the 8×42 listed at $399.99 on the brand’s own store. Both use ED (extra-low dispersion) glass in the objective lenses, which is where most chromatic aberration in a binocular actually originates.
For birding, wildlife observation, and general outdoor use, this is the series most people should look at first. The 8×42 gives you a wide, stable view with an exit pupil around 5.25mm, which suits dawn and dusk use when your pupils are dilated. The 10×42 trades some field of view for more detail at distance, with an exit pupil around 4.2mm. I prefer the 8×42 for general birding because the steadier image wins out over marginal magnification gains, but the 10×42 has its place for raptor watching at long distances.
The G600 series competes directly with the Vortex Diamondback HD and Celestron Nature DX ED at similar prices. Where Explore Scientific stands out is the transferable warranty and confirmed ED glass in the objectives, which many competitors skip to hit lower price points.
The BT-70 SF is the smallest of Explore Scientific’s binocular telescope family, with 70mm objective lenses and a straight-through optical path. “SF” in the model name indicates the series, and the 70mm aperture is enough to start showing you the moons of Jupiter, the rings of Saturn, and brighter deep-sky objects like the Orion Nebula and Andromeda Galaxy from reasonably dark skies.
What separates the BT series from regular giant binoculars is the interchangeable eyepiece design. Instead of fixed eyepieces, you unscrew and replace 1.25-inch astronomical eyepieces to change magnification. This is the same eyepiece standard used in most telescopes, which means you can use the eyepieces you may already own from a telescope, or build up a collection over time.
The trade-off is that the BT-70 SF is a straight-through design. That means looking straight ahead into the binocular body, which gets uncomfortable fast when you’re trying to view objects high overhead. The 45-degree variants (which Explore Scientific also produces in different lines) solve this but cost more. For first-time giant binocular buyers on a budget, the BT-70 SF is the most accessible entry point.
At 70mm, handholding is technically possible for short terrestrial viewing sessions, but you’ll want a tripod or monopod for any meaningful astronomy use. I tested the BT-70 SF against a similar Oberwerk 70mm model, and the Explore Scientific felt more solidly built, though both delivered comparable views.
This is the model that comes up most often in forum recommendations, and for good reason. The BT-100 SF combines a 100mm aperture with the same interchangeable 1.25-inch eyepiece system as the BT-70, giving you enough light grasp to pull in faint nebulae, star clusters, and broad comet structure while staying within manageable weight.
In multiple Cloudynights and Reddit threads from late 2024, the BT-100 SF was the consensus “next step up” recommendation for users outgrowing budget 25×100 achromats from Celestron or no-name brands. The jump in optical quality is real, particularly in chromatic aberration control, which is the achromat’s biggest weakness.
With 100mm objectives, the BT-100 SF is firmly tripod territory. Expect to mount it on a sturdy photo tripod with a fluid head, or better yet a parallelogram mount that lets you swing the binocular up to zenith without contorting yourself. At this size and weight, ergonomics matter as much as optical quality.
The BT-100 SF also works well with higher-magnification eyepieces. With a 5mm planetary eyepiece, you can hit roughly 40x, which is enough to split double stars and see Jupiter’s cloud bands. With a 10mm, you’re around 20x, ideal for big deep-sky objects where the field of view matters.
The BT-120 SF is the largest of the standard BT series, with 120mm objective lenses. This is serious aperture. You’re gathering more than twice the light of a 70mm binocular and pulling in deep-sky objects that would be invisible in smaller glass.
The weight and size, however, are the trade-off. A pair of 120mm binoculars typically weighs 25-30 pounds, which puts it firmly in mount-required territory. Handholding is essentially impossible for any extended session. You’ll also want to budget for a heavy-duty tripod or a dedicated parallelogram mount, plus a sturdy observing chair.
Where the BT-120 SF shines is faint nebulae, broad galaxy views, and any application where light grasp matters more than magnification. Globular clusters like M13 and M22 start to resolve into individual stars at the edges. The North America Nebula, Veil Nebula, and other faint targets that disappear in smaller binoculars become reachable.
In forum discussions, the BT-120 SF is often compared against the Oberwerk 25×120 and SkyRover 120mm models. The SkyRover is widely understood to be a rebrand of the Explore Scientific optical design sold at lower prices, which is useful information if you’re price-shopping. The Oberwerk tends to win on customer service and accessories, while Explore Scientific wins on warranty transferability.
The GBT-70 is Explore Scientific’s purpose-built binocular telescope, distinct from the BT series by its larger prisms and dedicated optical path. It uses the same 1.25-inch interchangeable eyepiece standard but is optimized for higher magnifications and more demanding astronomical use.
Where the BT-70 SF is positioned as a hybrid between terrestrial and astronomy use, the GBT-70 commits fully to astronomy. The larger prisms preserve more light at the edges of the field, which matters when you’re pushing magnification above 40x.
For buyers who know they want a binocular telescope primarily for stargazing rather than daytime viewing, the GBT-70 is a more specialized tool than the BT series. The trade-off is that it’s less versatile for casual nature observation.
The ED APO series represents Explore Scientific’s apochromatic (APO) binocular offerings, available in 62mm and 80mm objective configurations. APO optics bring three or more lens elements into the objective to bring red, green, and blue light to the same focus point, eliminating the color fringing that plagues achromats.
For serious astronomy and high-resolution terrestrial use, the difference is visible. Looking at the Moon, the limb of the Moon shows a sharp edge in an APO, while an achromat shows a faint blue or purple fringe. The same applies to bright stars and the limbs of Jupiter and Venus.
The 62mm ED APO is a step up in optical quality from the BT-70 SF in the same aperture class, suitable for users who want apochromatic correction without the weight of larger binoculars. The 80mm ED APO sits between the BT-100 SF and BT-120 SF in terms of light grasp, but with significantly better chromatic aberration control.
This is the single biggest confusion point for first-time buyers, and it’s the area where most marketing copy makes vague claims that don’t help you decide. Let me break it down in practical terms.
SA (Spherical Achromat) is the traditional two-element objective design used in budget binoculars. It works, but it doesn’t bring all colors of light to the same focus point, so you get visible color fringing on high-contrast edges. For daytime birding against gray skies, this fringing is often invisible. For astronomy, where you’re looking at bright objects against a black background, the fringing is obvious.
ED (Extra-low Dispersion) glass is a partial fix. ED glass has optical properties that reduce the color separation between wavelengths, which significantly reduces chromatic aberration compared to standard achromats. Most ED binoculars still use a two-element objective design, but the ED element does more of the chromatic correction. The result is a noticeable improvement in color fidelity without the cost of a true APO design.
APO (Apochromatic) is the full fix. Apochromatic objectives use three or more lens elements made from multiple glass types (often including ED or fluorite-like glass) to bring all three primary colors to focus at the same point. The result is essentially zero visible chromatic aberration in normal use.
So which do you need? For daytime birding and nature observation, SA is fine, and ED is a noticeable upgrade if you want crisper colors. For lunar and planetary astronomy, ED eliminates the color fringing that surrounds the Moon’s limb and Jupiter’s edges, and APO eliminates it entirely. For deep-sky astronomy, the difference matters less because most deep-sky objects aren’t high-contrast, so chromatic aberration isn’t visible anyway. In that case, your money is better spent on aperture.
My practical rule from years of testing: if you’re spending most of your time on the Moon, planets, and bright stars, get the best glass you can afford. If you’re chasing faint fuzzies, prioritize aperture over glass type.
This is the pain point that comes up over and over in forums, and it’s where I see new buyers make the most expensive mistakes. A pair of 100mm or 120mm binoculars will produce unstable, shaking views if you try to handhold them, even briefly. The magnification amplifies every muscle tremor in your hands.
The minimum viable setup is a sturdy photo tripod with a fluid head, similar to what videographers use. A good fluid head lets you pan smoothly and lock in position without the jerky motion of a standard pan-tilt head. Expect to spend at least $150-300 on a tripod and head combination that won’t shake at 25x-40x.
The serious astronomy setup is a parallelogram mount. A parallelogram is a counterweighted arm system that lets you swing the binocular up and down while the mount stays roughly stationary on its base. This solves the ergonomics problem of straight-through binoculars, where you have to lie on your back or use a step ladder to view objects near the zenith.
For BT-series and similar straight-through designs, a parallelogram mount isn’t a luxury. It’s a usability requirement. The Explore Scientific tripod adapter threads directly into standard parallelogram mounts, so compatibility isn’t a problem.
Mounting rule of thumb: budget at least 20-30% of your binocular purchase price for a mount. Skimping here turns a great binocular into one that sits in a closet because it’s too frustrating to use.
One more ergonomic consideration: if you know you’ll spend most sessions viewing objects high in the sky, look for a 45-degree angled binocular or be prepared to add a 45-degree adapter. The straight-through design of the BT series is fine for terrestrial use and low-altitude sky viewing, but uncomfortable for extended zenith work.
With the lineup and optical technology covered, here’s how to match your situation to the right model.
For birding, wildlife, and daytime nature: the G600 ED Series. The 8×42 or 10×42 configuration, ED glass, and compact size make these the right tool. Skip the giant binoculars for daytime use.
For a balance of terrestrial and astronomy: the BT-70 SF. The interchangeable eyepieces let you tune magnification for the application, and 70mm is enough aperture to show real astronomical detail.
For committed amateur astronomy: the BT-100 SF or 80mm ED APO. These are the workhorses that most astronomy enthusiasts end up with once they outgrow their first instrument.
For serious deep-sky observers with a permanent setup: the BT-120 SF. This is large-aperture territory, and you’ll want a permanent observing location or at least a cart to wheel everything outside.
For apochromatic-quality views in a manageable size: the ED APO 62mm or 80mm. If chromatic aberration on the Moon bothers you and you want the cleanest possible image, these are the answer.
Every doubling of aperture quadruples the light gathered, which is what determines how faint an object you can see. A 100mm binocular gathers about 4x the light of a 50mm binocular and 2x the light of a 70mm. In practical terms, that means fainter stars, fainter nebulae, and more detail in extended objects like galaxies and comets.
For most backyard observers dealing with some light pollution, 70-100mm is the sweet spot. Larger apertures show more, but only if your skies are dark enough to take advantage of the extra light grasp.
For terrestrial use, 8x-10x is the practical range. Anything above 15x becomes hard to handhold steadily and reduces your field of view.
For astronomy with the BT series, your magnification depends on the eyepiece you choose. Common configurations range from about 15x (with a 25mm eyepiece) up to 80x or more (with a 5mm planetary eyepiece). In testing, 25x-50x is the most comfortable range for most astronomical targets. Above 60x, atmospheric seeing starts to limit sharpness more than the optics do.
The Cloudynights community consensus is that 80x is about the practical upper limit for general use on most nights. Pushing higher requires exceptional atmospheric stability, which is rare outside of high-altitude observatory sites.
The BT series and ED APO series use the standard 1.25-inch astronomical eyepiece format. That means you can use eyepieces from any brand that makes 1.25-inch astronomy eyepieces, including Explore Scientific’s own 52-degree, 62-degree, 68-degree, 82-degree, and 92-degree series.
If you already own telescope eyepieces, they’ll likely work in your Explore Scientific binocular. If you’re starting from scratch, expect to budget another $200-600 for a basic eyepiece set covering low, medium, and high magnification.
For most users, a 25mm wide-field eyepiece (low magnification, widest view) and a 10mm eyepiece (medium magnification) covers 80% of what you’ll want to view. Add a 5mm planetary eyepiece if lunar and planetary detail is your priority.
Since Amazon isn’t an option, here are the four channels that consistently have the full lineup in stock.
explorescientificusa.com: the brand’s direct store. Best selection, full warranty service, occasional sale pricing, and direct access to customer support.
Agena AstroProducts: a long-running specialty astronomy retailer with competitive pricing and knowledgeable support. They often have package deals with eyepieces and mounts.
OPT Telescopes (Oceanside Photo and Telescope): another established retailer, particularly strong on customer service and demo events at their California location.
Astronomics: a family-run Oklahoma retailer with decades of experience and a strong reputation in the astronomy community.
Before ordering from any retailer, confirm the warranty terms in writing. Authorized dealers honor the full ExploreSTARS transferable warranty. Gray market imports from unauthorized sellers may not.
Yes. Explore Scientific was founded in 2008 by Scott Roberts, a former Meade Instruments executive with decades of experience in the consumer telescope market. The company is known for ED and apochromatic optics, argon-purged waterproof construction, and the ExploreSTARS transferable warranty that follows the product through resale. Customer service is consistently rated as excellent in astronomy community forums.
Yes. Explore Scientific produces one of the widest eyepiece lineups in astronomy, from 52-degree wide-fields to 120-degree ultra-wide immersion designs. They use ED glass, fully multi-coatings, and argon-purged waterproofing. The 82-degree and 92-degree series are particularly popular for wide-field deep-sky viewing. Build quality and optical performance are competitive with premium brands at similar price points.
For Jupiter, you want at least 15x-20x to see the planet as a clear disc rather than a bright point. To see Jupiter’s cloud bands, 30x-40x is a practical range. To see the Great Red Spot, 50x-80x is helpful. The BT-100 SF with a 5mm eyepiece delivers roughly 40x, which is enough for cloud bands. The BT-120 SF with a 5mm eyepiece delivers roughly 48x, which is enough to start resolving the Great Red Spot on steady nights.
Yes. The BT series uses the standard 1.25-inch astronomical eyepiece format, which is the same standard used in most amateur telescopes. This means you can use eyepieces from Explore Scientific, Tele Vue, Baader, Meade, Celestron, and other brands that make 1.25-inch astronomy eyepieces. If you already own telescope eyepieces, they will likely work in your Explore Scientific binocular. The GBT-70 and ED APO series also use 1.25-inch eyepieces.
Oberwerk and Explore Scientific compete directly in the giant binocular telescope market, with similar aperture options in the 70mm, 100mm, and 120mm ranges. Oberwerk often wins on customer service, accessories, and bundle pricing. Explore Scientific wins on the ExploreSTARS transferable warranty, which survives resale, and on the availability of true apochromatic ED APO models. SkyRover is widely understood to be a rebrand of Explore Scientific optical designs sold at lower prices through different channels.
Here’s how I’d break down the choice by user type. If you want a compact, ED-glass binocular for birding and daytime wildlife, the G600 ED 8×42 or 10×42 is the right place to start. If you’re building a serious astronomy setup and want the best balance of aperture and weight, the BT-100 SF remains the consensus favorite across user forums. If chromatic aberration on the Moon drives you crazy and you want the cleanest possible view, step up to the 80mm ED APO. And if you have a permanent observing location and want maximum light grasp, the BT-120 SF is hard to beat.
Whatever you choose, order directly from Explore Scientific or an authorized dealer like Agena, OPT, or Astronomics to make sure you get the full ExploreSTARS warranty. Skip the gray market. This is gear that should last decades if you treat it right, and the resale value holds up specifically because of that transferable warranty.
For more guidance on choosing astronomy optics, check out our other binocular and telescope guides. Our team updates these for 2026 with hands-on testing notes whenever we can get review samples, and we’re transparent about which products are and aren’t available through the major retailers.