8 Best Trail Camera SD Cards & Viewers (September 2026)
I’ve been running trail cameras across my properties for the past six years, and I can tell you from hard…

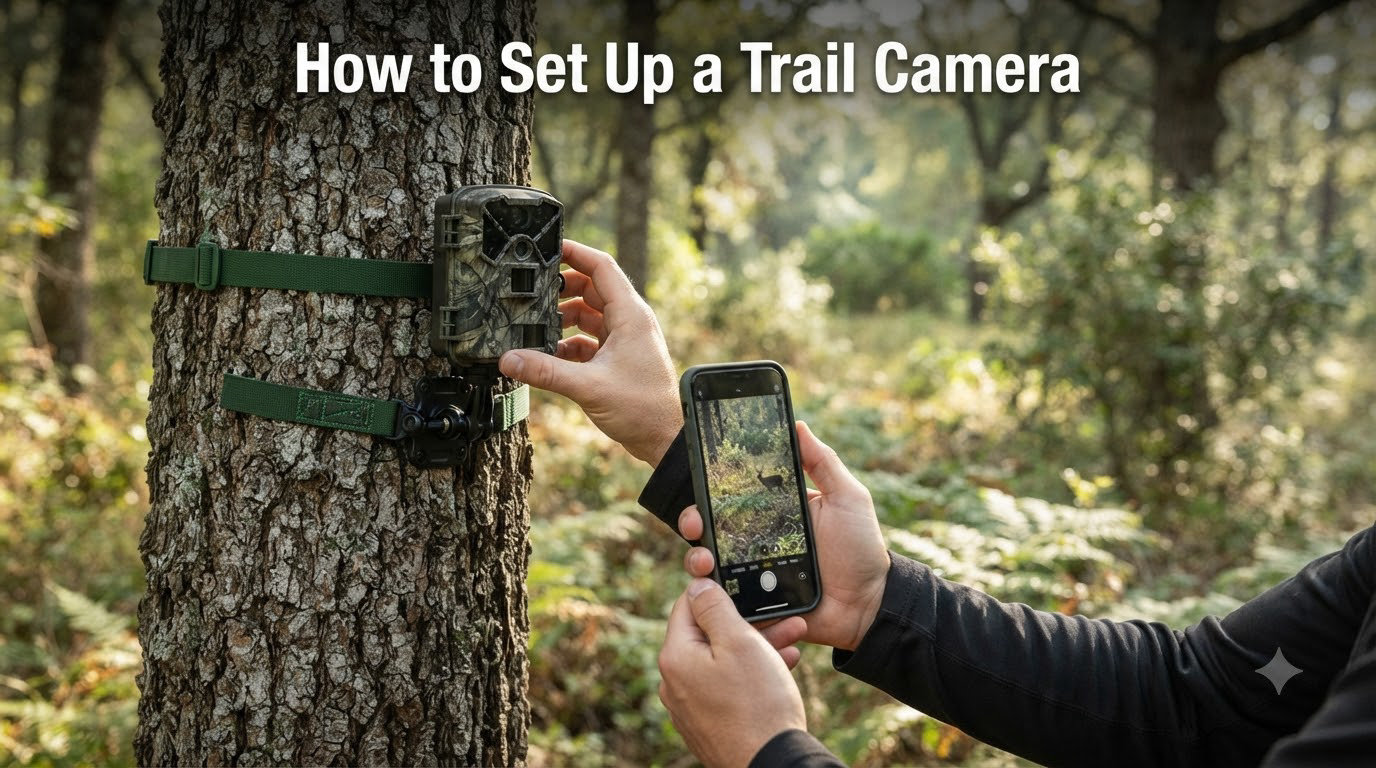
I still remember the first trail camera I ever set up. I hung it at eye level on a fence post, pointed it roughly west, slapped in some alkaline batteries I’d grabbed from the kitchen junk drawer, and walked away convinced I’d captured a masterpiece of whitetail photography.
Two weeks later I pulled the SD card and found 412 photos of empty sky, a swaying branch, and one deeply unimpressed raccoon at 3 a.m. That camera taught me a hard lesson: knowing how to set up a trail camera correctly is the difference between clear, useful wildlife images and a memory card full of nothing.
Over the past eight years I’ve deployed more than 60 trail cameras across three states for hunting, property security, and wildlife research. I’ve made every mistake in the book and learned what actually works in the field. This guide is the playbook I wish I’d had on day one.
Whether you’re a beginner wondering how to set up a trail camera for the first time or an experienced user trying to squeeze better results from your existing setup, the six steps below cover everything: location selection, mounting, settings, testing, security, and long-term maintenance. I’ll also share the advanced topics most guides skip: solar panel integration, multi-camera strategies, seasonal adjustments, and how to actually manage the thousands of photos you’ll collect.
A trail camera (also called a game camera or wildlife camera) is a rugged, weather-sealed, motion-activated camera designed to capture photos or video of wildlife and outdoor activity without a human being present. Most modern units use a passive infrared (PIR) sensor that detects body heat and movement, then triggers a photo or video capture within a fraction of a second.
Trail cameras store images locally on an SD card or, in cellular models, transmit them directly to a mobile app. They run on AA batteries, lithium battery packs, external 12V batteries, or solar panels. The cheaper end of the market starts around 50 dollars; the cellular models with AI species recognition can run 300 to 600 dollars.
Proper setup matters because a poorly mounted camera will give you a memory card full of false triggers, missed animals, and sun-glared images. A well-placed camera gives you 90% useful images and can run for months on a single set of batteries. I’ve seen the difference firsthand: a camera I placed correctly last fall captured 3,400 photos of deer, with only 89 false triggers. A buddy’s camera placed ten feet away captured mostly branches.
This guide covers what I do in the field. Every recommendation comes from real deployments, not manufacturer marketing.
Always prep your trail camera at home before driving to the field. I’ve watched too many people unpack a brand-new camera in the parking lot, fumble with batteries in the dark, and forget to format the SD card. Do everything you can at the kitchen table first.
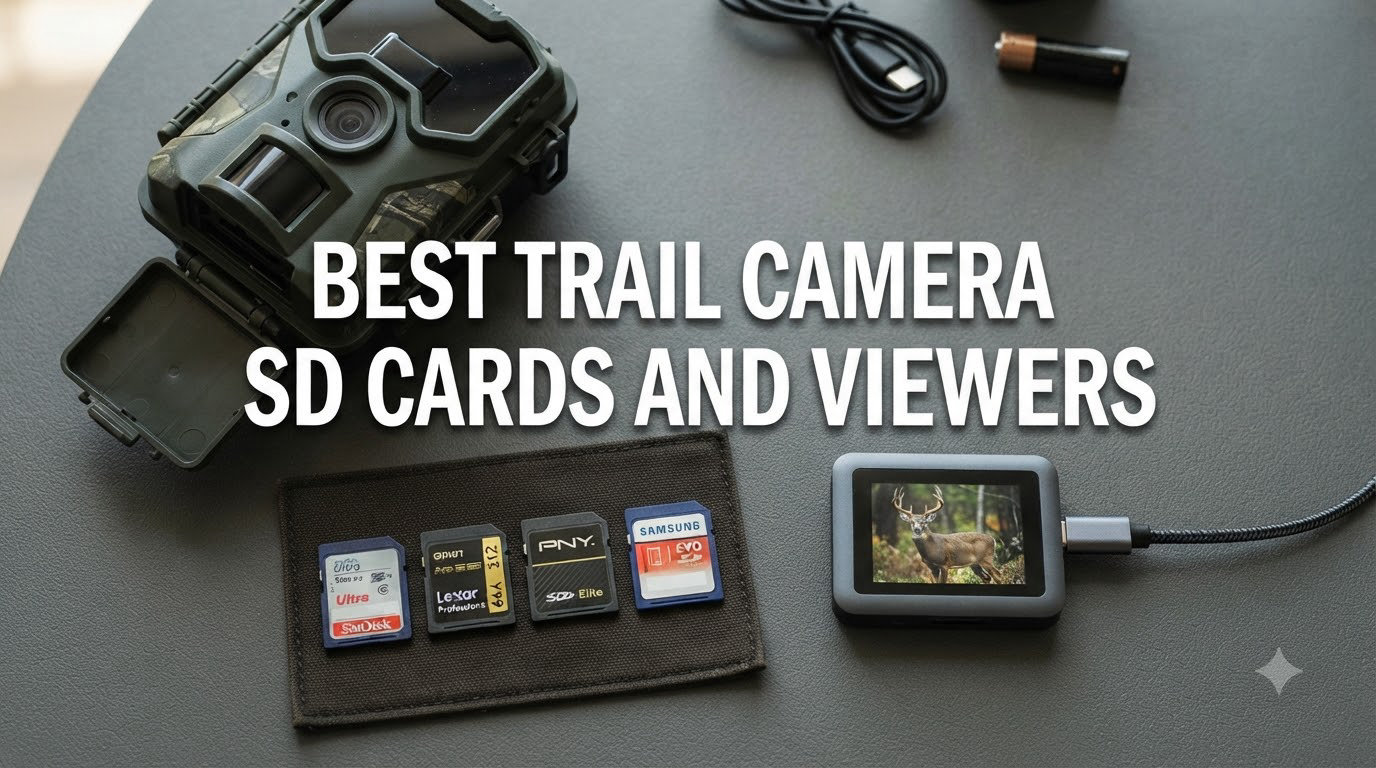
Your trail camera should use a high-quality SD card from a reputable brand (SanDisk, Samsung, or Lexar). Avoid no-name cards off Amazon; I’ve seen them corrupt card slots and lose entire photo archives. A Class 10 or UHS-I card with a capacity of 32 GB to 128 GB hits the sweet spot for most users.
Format the card inside the camera before every deployment, even if it’s brand new out of the package. Cameras use a specific file structure and a card formatted in your computer may not be recognized. While you’re at it, make sure the write-protect switch on the side of the card is unlocked.
A 16 GB card holds roughly 6,000 to 8,000 photos at 12 megapixels, depending on compression. At 20+ megapixels or HD video, you’re looking at 2,000 to 4,000 files. I’ll cover this in detail later in the FAQ.
Lithium AA batteries are non-negotiable for any serious trail camera user. They cost more upfront, but they last 3 to 5 times longer than alkaline in cold weather and won’t leak and destroy your camera. Energizer Ultimate Lithium is my go-to brand after destroying two cameras with leaking alkalics.
Alkaline batteries are fine for short, warm-weather deployments if budget is tight. Rechargeable NiMH batteries (like Panasonic Eneloop Pro) work well for users who check cameras frequently, but they self-discharge faster in storage and don’t perform well below freezing.
For longer deployments, an external 12V battery pack or a solar panel will dramatically extend runtime. I’ll cover that in the Advanced Strategies section. For now, install your lithium batteries, check the polarity twice, and close the battery compartment firmly.
Most modern trail cameras have firmware updates that fix bugs, improve battery life, and sometimes add features. Check the manufacturer’s website with your camera’s serial number before you go to the field. The update process usually involves loading a file onto your SD card.
Configure your default settings at home: photo mode (not video, at least to start), 8 to 12 MP resolution, medium PIR sensitivity, and a 1- to 3-photo burst. We’ll fine-tune these in the field once we know what we’re working with.
Location is the single biggest factor in trail camera success. A great camera in a bad location produces mediocre images. A budget camera in a great location produces gold. I’ve watched a 60-dollar camera outperform a 400-dollar unit because of where it was placed.
The first thing I look for when I step out of the truck is sign. Tracks, droppings, rubs on small trees, scrapes, and bedded-down grass all tell you what animals are using an area and how they’re moving through it. A well-used game trail between a bedding area and a feeding area is camera location number one.
Funnels are natural choke points where animals are forced to travel through a narrow corridor. Look for fence gaps, creek crossings, saddle points between two ridges, and places where thick cover pinches against an open field. A camera placed at a good funnel can capture 80% of the animals moving through the area.
Bedding edges, where thick cover meets open feeding areas, are also excellent. Deer and elk prefer to bed in dense cover and step out into the open to feed at dawn and dusk. Place your camera 15 to 20 yards inside the edge of the bedding cover, facing the open area.
Water is a magnet for wildlife, especially in late summer and dry climates. Creeks, stock tanks, seeps, and small ponds are high-traffic areas year-round. I position cameras along creek crossings where the bank narrows, giving a clear detection zone without vegetation in the way.
Mineral sites are intentional deposits of salt and minerals that draw deer and other ungulates. They’re legal to maintain on private land in most states and offer predictable camera placement for patterning bucks during summer scouting. Set the camera 10 to 15 yards from the mineral site so the entire lick is in frame.
Feeding areas include food plots, oak ridges during acorn drop, agricultural field edges, and fruit trees. Cameras on field edges during the first hour after dark often capture the best images of mature bucks, since they feel safe stepping out into open ag ground after full dark.
Always get permission before placing a trail camera on private land you don’t own. Cameras on public land are subject to state-specific rules that have tightened considerably in recent years. I’ll cover this more in the legal section below.
Avoid placing cameras near high-traffic hiking trails, fishing access points, or other spots where humans will find them. Even well-concealed cameras get bumped by hikers, ATV riders, and mushroom hunters. The more remote your location, the less likely you’ll deal with curious people or outright theft.
If you’re scouting for hunting, consider scent minimization. Wear rubber boots, use unscented gloves when handling the camera, and approach from downwind. Scent-free checklist items are easy to add to your gear bag and they pay off when you eventually hunt the area.
Once you’ve picked a spot, mounting height and angle come next. Get this wrong and you’ll spend the next month wondering why every photo is either a deer-shaped blur or the top half of a deer.
For deer and similar-sized animals, mount the camera 3 to 4 feet off the ground. This puts the lens roughly at the animal’s chest level and gives you full-body images with a clear view of antlers, body condition, and any distinguishing marks.
For predators like coyotes, bobcats, and foxes, lower the camera to 2 to 2.5 feet. Predators tend to move with their head down, scouting and reading the ground, so a lower mount catches their face and body better than a chest-high one.
For security applications on a home or barn, mount higher, 6 to 8 feet, angled down roughly 15 degrees. This puts the camera out of easy reach and gives a top-down view of anyone approaching. Just remember that PIR sensors work best at chest height; for security, you may need to trade off sensitivity for placement.
The number one reason trail camera photos are washed out is sunrise and sunset light hitting the lens directly. Even with the IR filter engaged, bright low-angle light can bleach out an entire image.
Always face your trail camera north or south, never east or west. North-facing cameras get even, indirect light all day long. South-facing cameras in the Northern Hemisphere are the second-best choice. East and west-facing cameras will produce blown-out images during the golden hour when animals are most active.
Bonus tip: face north on north-facing slopes and south on south-facing slopes. The goal is to keep direct sun off the lens as much as possible.
The detection zone is the cone-shaped area in front of the camera where the PIR sensor picks up motion. Most cameras have a detection range of 60 to 100 feet and a detection angle of 40 to 60 degrees. Anything outside that cone won’t trigger the shutter.
Tilt the camera slightly downward so the detection zone centers on the game trail rather than the sky. A general rule is to angle the camera so the bottom of the frame hits the ground 10 to 15 feet in front of the camera, then angle up a touch to capture animals at distance.
Clear vegetation in the detection zone. Grass, branches, and saplings within 3 to 4 feet of the camera will trigger constant false photos when the wind blows. I carry folding pruning shears in my pack specifically for this.
With the camera mounted, it’s time to dial in settings. The right configuration depends on what you’re trying to accomplish: deer scouting, predator patterning, security, or general wildlife observation. The settings below assume a hunting or wildlife use case; I’ll note differences for security at the end.
Trigger speed is the time between the PIR sensor detecting motion and the camera capturing an image. Anything under 0.5 seconds is considered fast; under 0.2 seconds is excellent. A slow trigger speed (over 1 second) will miss fast-moving animals and give you a parade of empty-frame photos where the animal has already left.
Burst mode captures multiple photos per trigger. I run 3-shot bursts for most applications. This gives you a sequence of images that help you identify the specific animal, judge antler size against the body, and catch moments of behavior that single shots miss.
Recovery time is the gap between captures. Modern cameras recover in 1 to 3 seconds; cheaper models may need 5 to 10 seconds. Set recovery time as low as the camera will allow. Slower recovery means you’ll miss the second animal walking past while the camera is processing the first.
12 to 20 megapixels is the sweet spot for photos. Higher resolutions consume more battery, fill cards faster, and rarely produce usable detail unless you’re printing large. I run 16 MP for most scouting and 8 MP when I want maximum images per card.
Video mode is fun to play with but batteries and card space disappear fast. A 30-second 1080p clip uses more power than 50 photos. Use video selectively, for instance on a confirmed scraper during peak rut activity when you want behavioral footage rather than still photos.
Time-lapse mode captures a photo at a set interval regardless of motion. It’s perfect for monitoring large open areas like food plots, mineral sites, or fields where deer activity is spread out rather than confined to a trail. A 5- or 10-minute time-lapse interval gives you a daily activity timeline without filling your card in an hour.
PIR sensitivity controls how much heat and motion the sensor picks up. High sensitivity catches animals at distance but triggers on small movements, blowing leaves, and shifting sunbeams. Low sensitivity ignores distant heat signatures but may miss animals passing through the edge of the detection zone.
The right setting depends on conditions. In open areas with stable vegetation, run high sensitivity. In heavy cover, on windy ridges, or during summer when vegetation grows fast, run medium or low to cut down on false triggers.
I’ve run cameras at the same location for a year and changed sensitivity as conditions evolved. Don’t be afraid to tweak this setting every time you check the camera.
The walk test is the single most valuable habit I can teach you. It’s also the one most beginners skip because they’re eager to deploy and walk back to the truck.
After mounting and configuring the camera, walk through the detection zone at different speeds and from different angles. Approach from the side, walk straight at the camera, then walk past at 10, 20, and 30 feet. Wave your hand in front of the lens. Bend down and walk through crouched.
Check the test photos on the camera’s screen (if it has one) or by removing the SD card and reviewing on your phone with a card reader. If you appear in frame at the distances you expect animals to be, the camera is properly angled and triggering correctly.
Do this in late afternoon or dusk when actual wildlife activity starts. You’ll validate that the PIR sensor triggers at the right time and that your burst and recovery settings are dialed in correctly.
Look at your test photos with a critical eye. Are subjects centered or are they cut off at the edges? Is the ground covering too much of the frame? Are there unwanted shadows? Each issue points to a specific adjustment: a slight tilt up, a side-angle shift, or moving the camera forward 3 feet.
It’s far easier to make these tweaks now than to come back two weeks later and find 1,800 badly-framed images. I’ve walked a camera to four different positions on the same tree before settling on the right angle. Worth the extra 10 minutes.
A trail camera left in the wild for months faces three threats: theft, weather, and wildlife. Address each one explicitly.
A Python cable lock threaded through the camera’s lock box slot and around the tree is the standard approach for theft deterrence. Locks won’t stop a determined thief with bolt cutters, but they stop casual theft and opportunistic vandalism on public land.
A dedicated security box (a steel cage that bolts around the camera body) adds substantial protection and also helps with camouflage. The matte finish and locked appearance discourages curious people from picking up and inspecting the unit.
Concealment matters too. Mount the camera on the back side of the tree facing away from roads and trails. Brush nearby vegetation to break up the camera’s silhouette. Avoid placing cameras in obvious spots like trail junctions or obvious game trails where any hiker would walk right past.
Most modern trail cameras carry an IP rating of IP65 or higher, meaning they handle rain and snow. But water has a way of finding seams, especially during wind-driven storms. Tuck a small desiccant packet inside the camera housing to absorb condensation, and check the rubber gaskets around the battery door and SD card slot every time you visit.
For hunting applications, scent minimization starts with how you handle the camera. Use nitrile gloves when handling the camera in the field, especially if you’ll hunt the area later. Don’t smoke or wear strong-smelling cologne while checking cameras in deer country.
I check trail cameras every 2 to 3 weeks during active scouting. That interval balances battery conservation, card space, and minimizing human pressure on the area.
At each visit, I swap SD cards (keep a labeled stack of cards in your pack), check battery levels, clear vegetation that has grown back into the detection zone, verify the camera is still level and aimed correctly, and review recent photos for trends or problems.
Common troubleshooting issues: photos are blank (batteries depleted, card full, or sensor malfunction), excessive night photos (PIR sensitivity too high, reflective surfaces nearby), overexposed day photos (sun hitting lens, time clock wrong), and blurry images (subject too close, fog or condensation on the lens, or autofocus failing).
If you want to share results with a community of users running similar setups, joining one of the best hunting forums for trail camera tips gives you a place to post sample images, ask specific questions, and learn from people who’ve already solved the exact problem you’re facing.
Once you’ve got the basics dialed in, these advanced strategies can transform your trail camera program from occasional scouting to year-round monitoring.
A solar panel with a built-in rechargeable lithium battery can extend camera runtime to 4 to 6 months in sunny locations, and indefinitely in theory. This is a massive upgrade for remote sites where driving out to swap batteries is a chore.
Most solar panels are brand-specific and connect to the camera’s external power port or replace one of the battery trays. Universal panels also work but require a 12V battery pack adapter. Match the panel voltage to the camera’s input rating (most want 6V or 12V) and orient the panel south-facing with no overhead shade.
The biggest mistake I see with solar panels is positioning them in shade “to hide them.” Even partial shade drastically reduces output. Mount the panel in full sun, even if it means the camera itself ends up slightly less concealed.
For larger properties, a single camera tells you very little. Mature bucks use the same property in different ways across different weeks of the season. A network of 4 to 6 cameras gives you a complete picture.
Spaced cameras work best when placed at strategic transition points: the gate between two pastures, the pinch point along a fence line, the trail leaving a bedding thicket and entering a feeding area. Avoid clustering cameras on a single travel corridor. Spread them across the property to catch animals moving through different zones.
For research-grade data, multi-camera setups let you estimate population, track individual animals, and identify seasonal movement patterns. Label your SD cards by camera location and date so you can build a clean database over time.
If you also use thermal optics for scouting, our thermal imaging for hunting review covers how thermal scopes complement trail camera scouting by letting you confirm a target is on the property before you go in.
Cellular trail cameras transmit photos to your phone via LTE or 5G networks, so you don’t have to visit the camera to see what’s there. They’re ideal for remote sites, security monitoring, or anyone who doesn’t want to disturb the area with frequent visits.
Yes, cellular cameras require a monthly data plan. Most manufacturers offer their own plans starting around 10 dollars a month per camera for basic photo transmission. Multi-camera plans are usually cheaper per camera. Some units work with third-party SIM cards if you want to shop for service.
Cellular cameras cost more upfront (200 to 600 dollars versus 80 to 250 for traditional) and consume more battery because the modem draws power each time it transmits. Pair a cellular camera with a solar panel and you’ll have a system that runs indefinitely and delivers images straight to your phone.
Trail cameras aren’t just for hunting season. With seasonal adjustments, the same camera can produce useful data 12 months a year.
Spring brings new vegetation and aggressive plant growth. Vegetation that didn’t exist last week can be triggering your camera today. Plan for at least one mid-season clearing visit to trim back growth in the detection zone.
Summer heat increases animal activity around water and shaded bedding areas. Move cameras from open feeding areas to creek crossings, stock tanks, and shaded trails. Trigger sensitivity can usually go higher in summer because vegetation growth is the main false-trigger source, not wind.
Summer is also when bucks are in velvet and visible antler growth happens. Higher resolution settings (16 to 20 MP) capture velvet detail well, and longer video clips can document buck behavior as they establish summer territories.
Fall brings the rut and the best deer photography of the year. Move cameras back to scrapes, rubs, and field edges. Trigger sensitivity should be at maximum because fast-moving bucks chasing does won’t wait for a slow camera.
Battery performance drops in cold weather. Lithium batteries handle cold better than alkaline or NiMH. If you’re running rechargeable batteries, expect shorter runtime once temperatures drop below freezing. Solar panels produce less energy in winter too, especially at northern latitudes with short days and frequent overcast.
Winter is also when security applications spike. Trail cameras monitoring vacation properties, rural barns, or seasonal equipment can run year-round on solar power and catch any unusual activity during the off-season when nobody is around.
After deploying dozens of cameras, I’ve made or seen every mistake below. Avoid these and you’ll be ahead of most users.
1. Mounting too high or too low. The standard 3-to-4-foot rule exists for a reason. Above 5 feet you only get ear and back-of-head shots. Below 2 feet you get ground and legs.
2. Facing east or west. Sunrise and sunset will blow out half your photos. North or south is the rule.
3. Skipping the walk test. Always test the detection zone before leaving. Empty frames mean the camera isn’t triggering where you think it is.
4. Using cheap batteries. Off-brand alkalics leak and damage cameras. Lithium batteries cost more and last longer. The math is in their favor.
5. Ignoring vegetation. Vegetation in the detection zone triggers the camera constantly. Clear it before deployment and on every check.
6. Setting sensitivity too high. More isn’t always better. Run sensitivity at the lowest setting that captures your target animals and you’ll save battery life and storage.
7. Forgetting to format the card. Cards need to be formatted in the camera, not in your computer. Format every time you swap.
8. Placing cameras too close to human trails. Cameras on access roads and visible game trails get bumped or stolen. Go deeper into the property.
9. Failing to lock the camera. A Python cable costs 15 dollars and prevents hundreds of dollars in losses. Don’t deploy without one in any theft-prone area.
10. Checking too often. Frequent checks increase human pressure on the area and shorten battery life. Let the camera do its job between visits.
Mount the camera 3 to 4 feet off the ground on a sturdy tree, face it north or south to avoid sun glare, angle the lens slightly downward, clear vegetation 3 to 4 feet in front of the lens, use lithium batteries for cold-weather performance, and always do a walk test before leaving the site.
For most wildlife and hunting scenarios, use photo mode (not video), 12 to 16 MP resolution, medium-to-high PIR sensitivity, a 3-shot burst, and the fastest trigger speed your camera supports. Time-lapse mode is useful for open food plots; video mode is best reserved for specific high-value spots like scrapes during the rut.
Three to four feet off the ground is the standard best height for deer-sized animals. This puts the lens at chest level, capturing full-body images with clear views of antlers. Mount lower (2 to 2.5 feet) for predators and higher (6 to 8 feet) for security applications where you want the camera out of easy reach.
Face your trail camera north or south. North-facing is the gold standard in the Northern Hemisphere because it avoids direct sunrise and sunset light that washes out photos. South-facing is the second-best choice. Avoid east- and west-facing cameras whenever possible.
Reduce PIR sensitivity, clear all vegetation within 3 to 4 feet in front of the camera, mount at the proper height with the lens angled downward (not at the sky), and remove any reflective objects nearby. Empty pictures on windy days almost always point to vegetation in the detection zone.
A 16GB SD card holds roughly 6,000 to 8,000 photos at 12 megapixels, around 4,000 to 5,000 at 16 to 20 megapixels, and roughly 1,500 to 2,500 HD video clips of 10 to 30 seconds. Higher resolution and longer video files fill cards much faster, so format the card before every deployment and bring spares.
Yes, cellular trail cameras require a monthly data plan to transmit photos to your phone. Most manufacturers offer plans starting around 10 dollars per camera per month for basic photo transmission, with discounts for multi-camera plans. Some units accept third-party SIM cards for users who want to shop for service. Traditional (non-cellular) trail cameras have no monthly fees.
Check standard battery-powered trail cameras every 2 to 3 weeks to swap cards, replace batteries, and clear vegetation. Cellular cameras can be checked remotely as often as you like since you don’t need to visit the site. Frequent in-person checks increase human pressure on the area and shorten battery life, so plan visits strategically rather than casually.
Trail cameras have reshaped how we scout, research, and observe wildlife. They give us a window into patterns we’d never see otherwise: which buck survived the hunting season, where does a doe group bed down in July, what predators are using a property when nobody is around.
If you’ve absorbed everything above, you know how to set up a trail camera the right way: prep your gear at home, pick a high-traffic location, mount at the correct height facing north or south, configure settings for your specific goal, test the detection zone, then secure and maintain the unit with a long-term plan in mind. The advanced strategies: solar panels, multi-camera networks, and seasonal adjustments, take a basic setup and turn it into a year-round monitoring system.
Don’t try to implement everything on day one. Pick your best location, follow the six core steps, and let that first camera teach you the rest. By your second or third deployment, the placement decisions and settings will feel instinctive.
Whether your goal is patterning bucks, monitoring property security, or just seeing what walks through your backyard after dark, a properly set up trail camera pays you back many times over for the small investment of time and gear. Get one in the field this week and start learning what your land is actually doing when you’re not there.